
Leaderboard


Popular Content
Showing content with the highest reputation on 14/02/20 in all areas
-
This post cannot be displayed because it is in a forum which requires at least 10 posts to view.
-
This post cannot be displayed because it is in a forum which requires at least 10 posts to view.
-
This post cannot be displayed because it is in a forum which requires at least 10 posts to view.
-
Gives whack with a piece of wood. Always worked on my old Triumph Dolomite2 points
-
This post cannot be displayed because it is in a forum which requires at least 10 posts to view.
-
Tell your bank you want to claim one of the payments back under the direct debit guarantee scheme. You will then have your money back and CRT and the bank can bicker with each other at lesiure.2 points
-
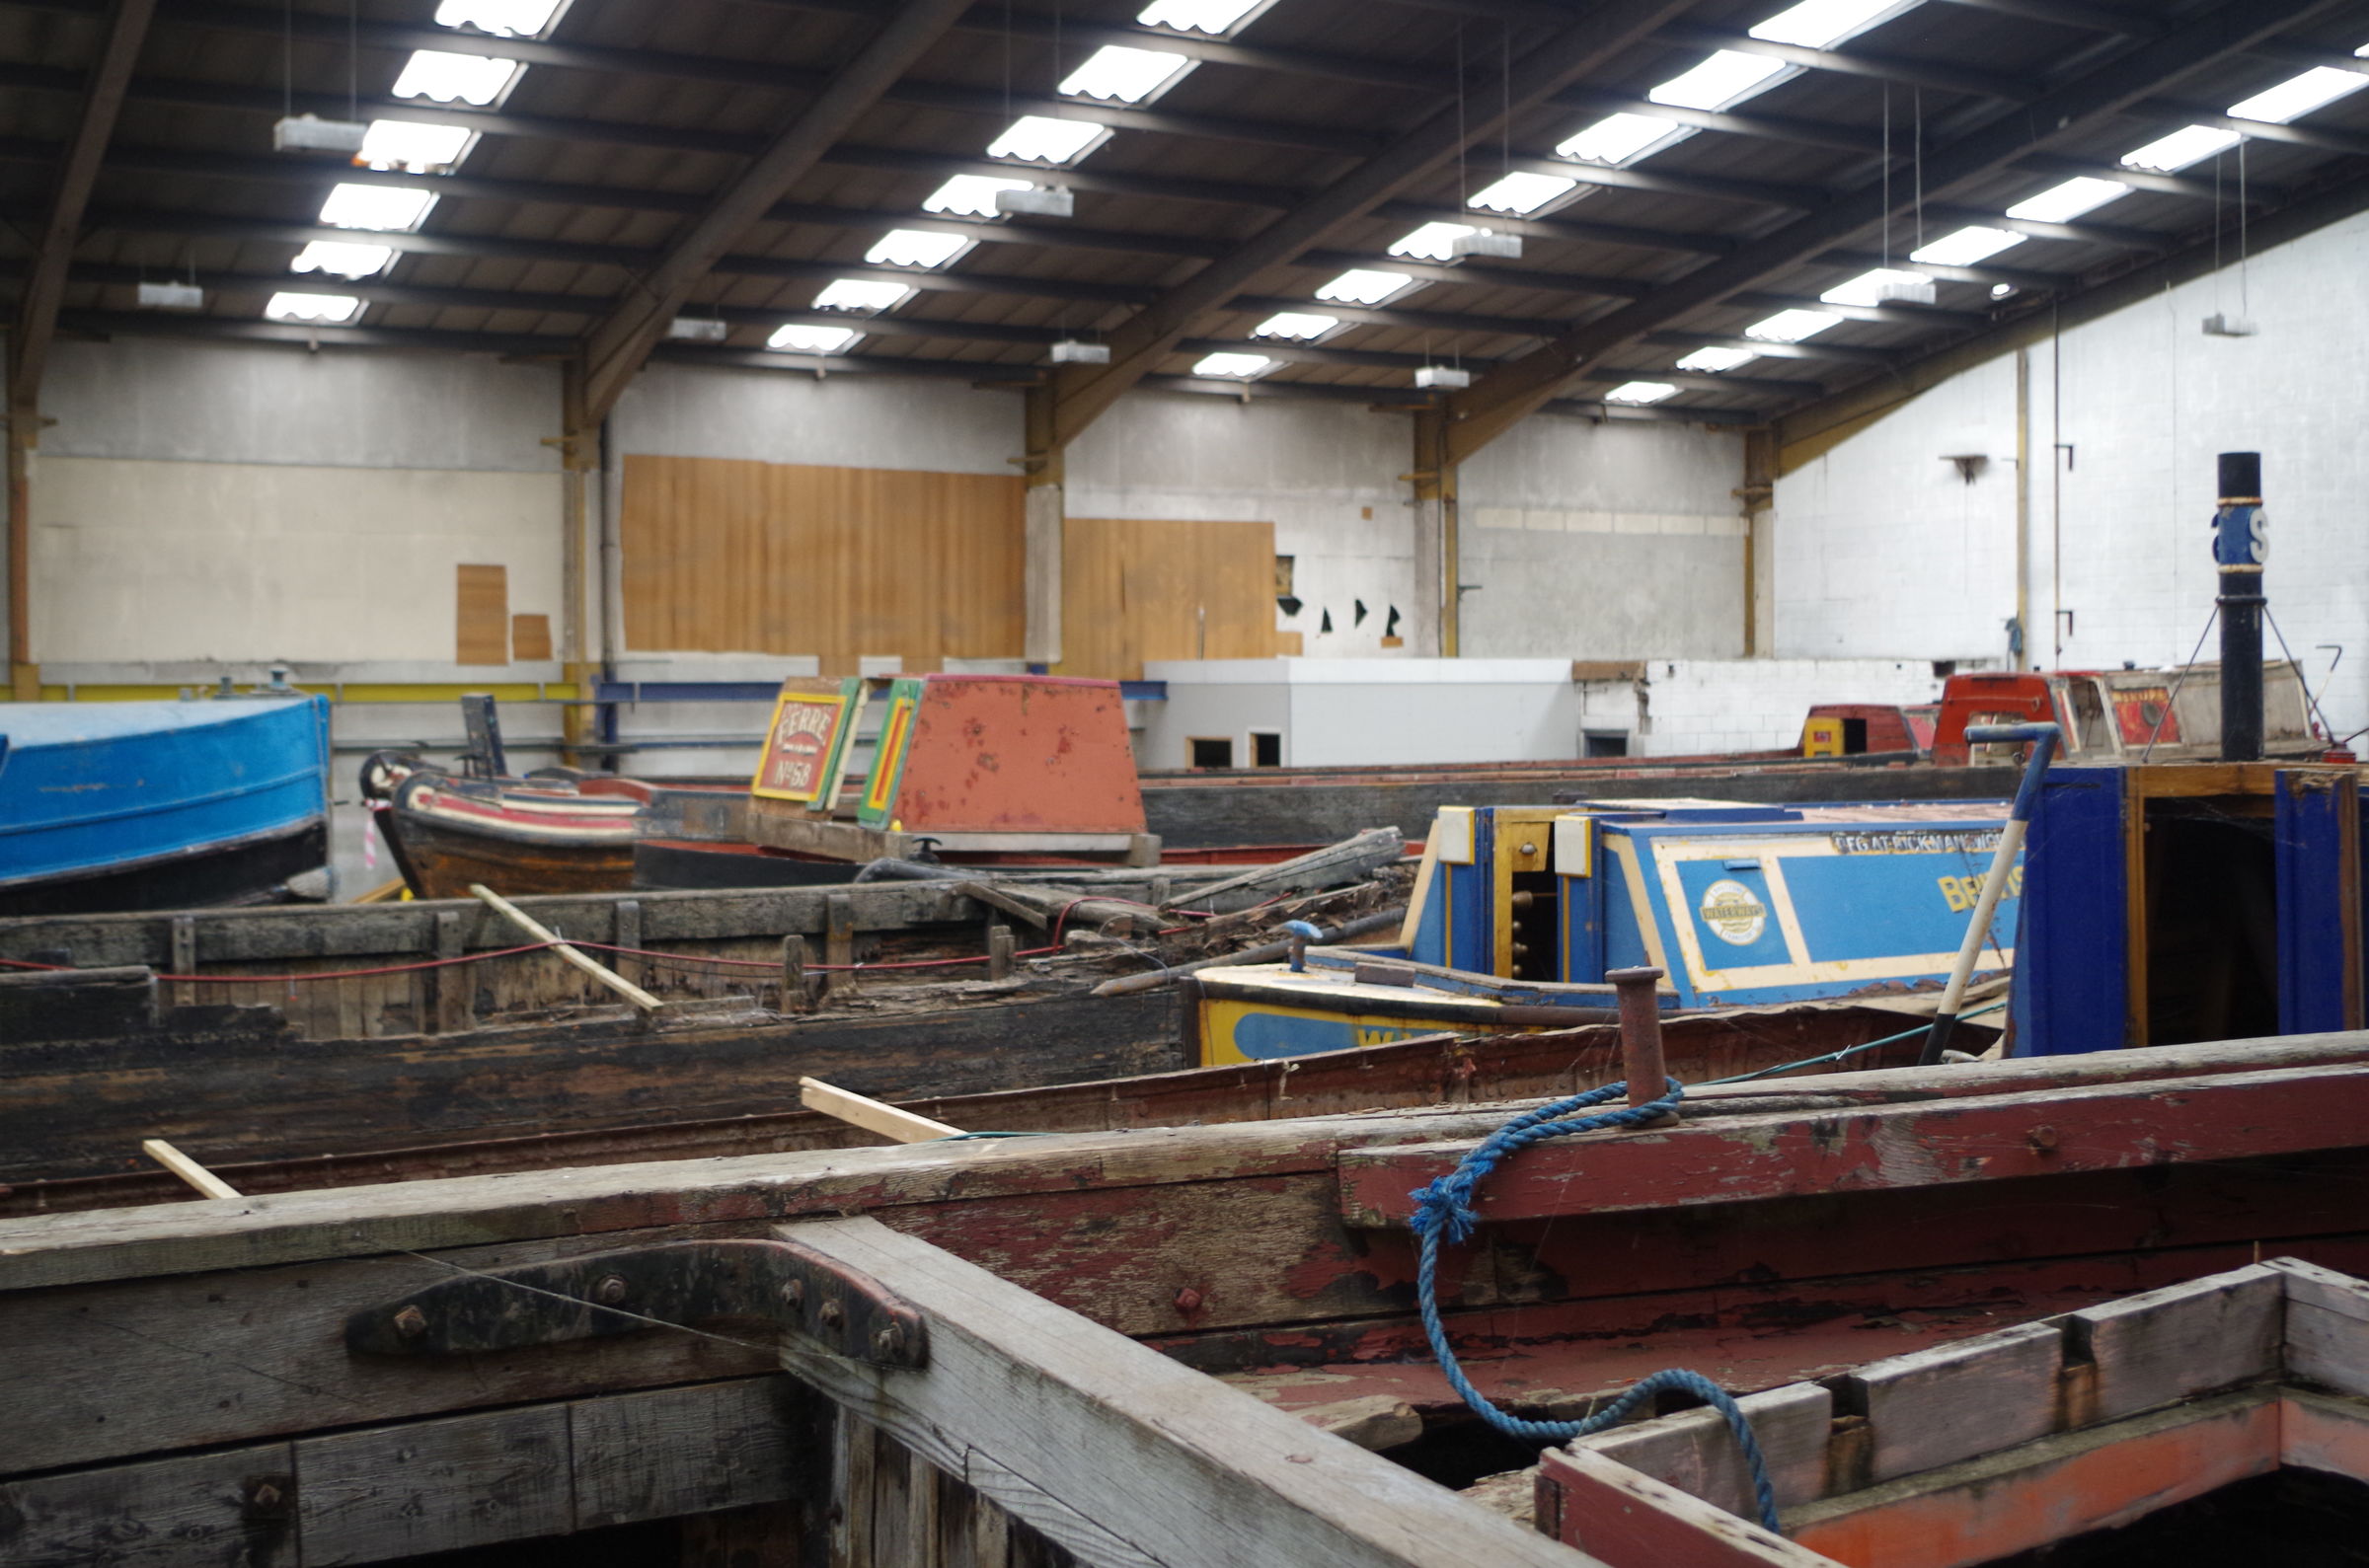
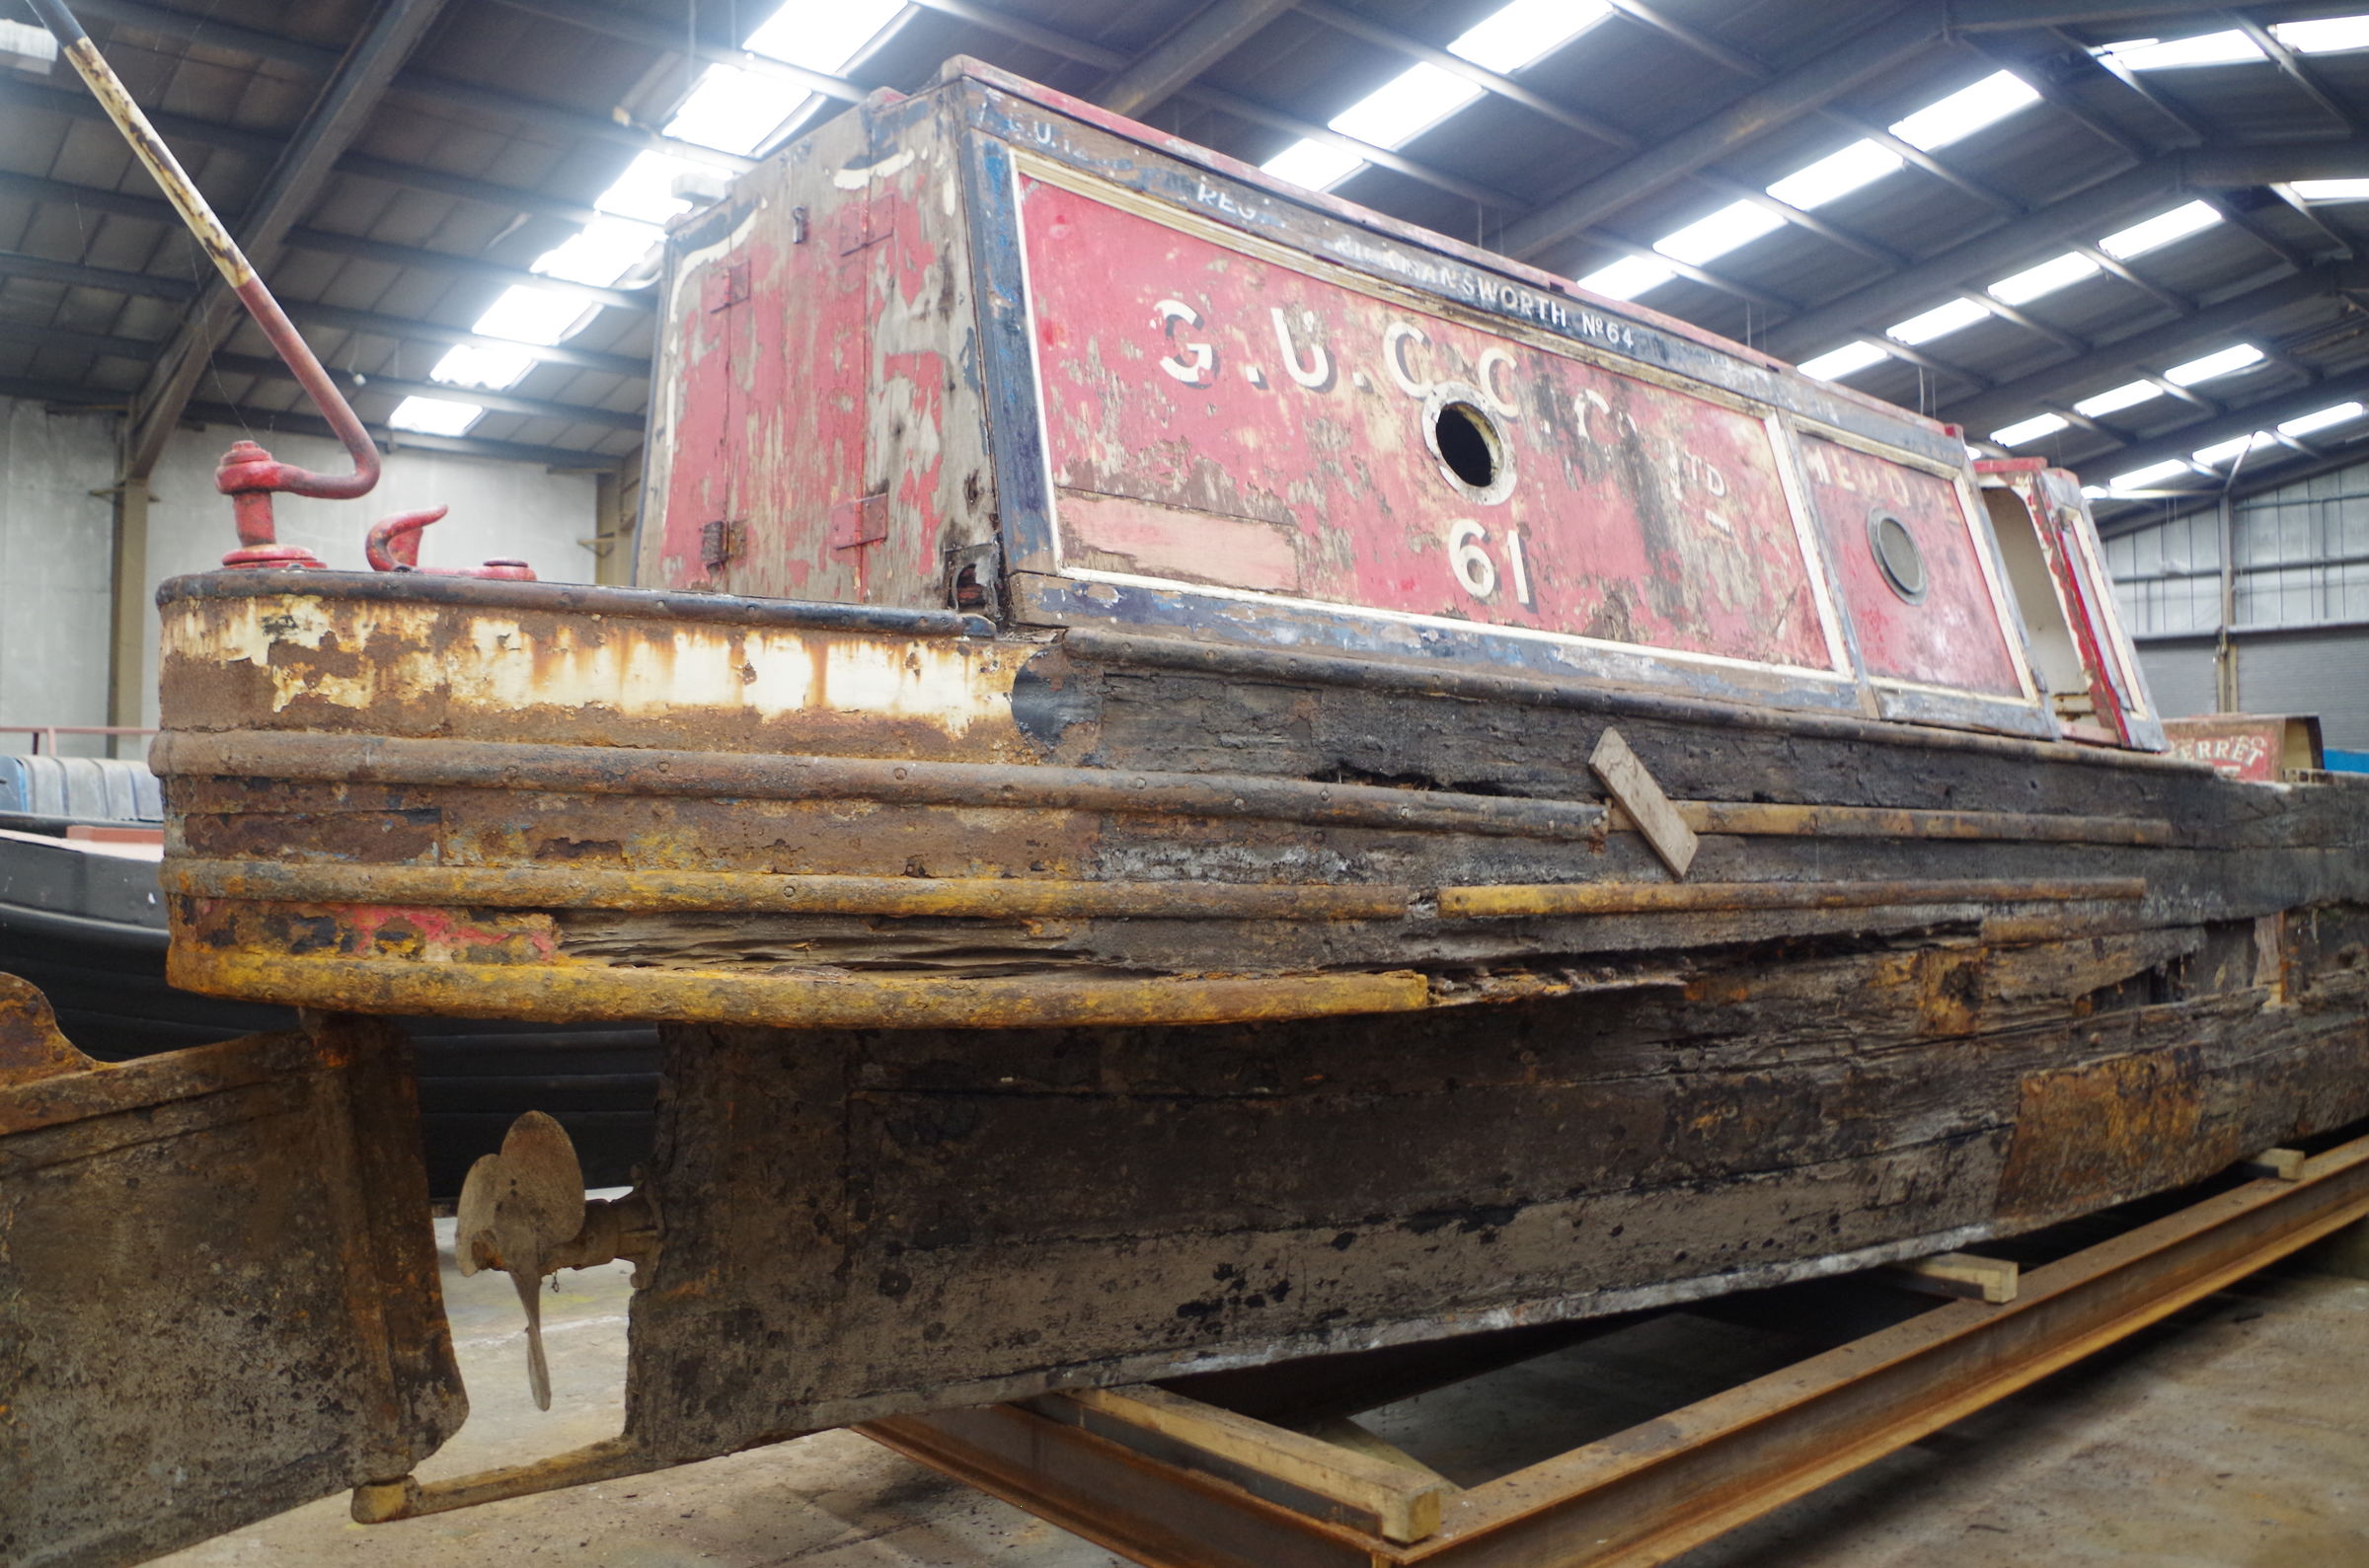
Not that I am aware of, no. What they have done with some of the exhibits they are keeping is to put them into dry storage. They will not be "restored" as the museum reckons it will destroy the historical integretary of how they were originally constructed. I will not get into the ramifications of how the boats came to be as they are as it has been well covered elsewhere. Other people have differing views however. One exhibit that is being looked after in a floating condition is "Chocolate Charlie's" (Atkins) Mendip.
 2 points
 -
For best practice, do this on a slow water point blocking a flight of locks during Easter weekend.2 points
-
I'd be far more concerned about the wastage corrosion around the waterline than the unblacked baseplate. It may well be that the boat has never been blacked since it was first launched - does the OP know its history? A 2011 boat should still be in the first flush of its youth. Yes, me, for one. The deepest baseplate pits seem to be 0.4mm, which is 4% of the total steel thickness. They may well have been there since new. Nothing to worry about at all.2 points
-
This post cannot be displayed because it is in a forum which requires at least 10 posts to view.
-
This post cannot be displayed because it is in a forum which requires at least 10 posts to view.
-
No, tried that but significant issues. Number 1. When I put the deck boards back down, said deck boards interfered with the designed rotation of the fan and made a horrible banging noise that upset Mrs Bob. Mrs Bob does not like loud banging noises. Number 2. The rocker box cover is only at 70deg C therefore the heat required to spin the fan was not reaching th lower limits of accepatability, thus not providing the necessary cooling. Number 3. The only bit of the engine hot enough to drive the fan is the alternator itself, and with the fan sat on the alternator, it was even closer to the deck boards. See point 1. Number 4. Unfortunately the alternator is round in profile so said fan does not fit properly to get adequate heat transfer from hot alternator surface to bottom plate of fan so fan rotation is severely compromised. Number 5. There is no number 5. Number 6. Given the base of the fan is not magnetic - a serious drawback in the design of these articles- it cannot be mounted sideyways without the aid of some other supports. I did try some plastic tie wraps but unfortunately these melted causing the fan to fall of and make a load banging noise. See point 1. Number 7. When I finally tied it on sideyways with a bit of string, It did rotate but unfortunately this was in the wrong direction i.e. In a plane parallel to the alternator but not impacting on the alternator instead. Maybe some form of duckting might work. This time the duck was not impressed. The duck doesn't get impressed often. Number 8. I did wot Peterboat told me and bought a bilge blower with a pipe that directs the cold air from the bottom of the bilge for <£50. It doesn't make a noise so the duck and Mrs Bob are happy. Number 9. The motor on the fan (a 5 blade baby equaliser) is b**gered again so it's currently on the naughty step.2 points
-
This post cannot be displayed because it is in a forum which requires at least 10 posts to view.
-
This post cannot be displayed because it is in a forum which requires at least 10 posts to view.
-
This post cannot be displayed because it is in a forum which requires at least 10 posts to view.
-
This post cannot be displayed because it is in a forum which requires at least 10 posts to view.
-
You will not find a larger stock in one place anywhere else than Whilton Marina. However, if you are unfamilar with Whilton Marina, it is worth using the forum search facility to see what people think of them, as they undoubtedly have some sharp business practices. But if you just want to crawl freely over many boats unaccompanied with nobody giving you the hard sell, to get an idea of what's around, you probably will not do better.1 point
-
This post cannot be displayed because it is in a forum which requires at least 10 posts to view.
-
I'd say that regardless of your good intentions, a project boat is likely to be a money pit, a hole in a bucket, an unknown. With skills, resiliance and a job, you might be better with a sailaway ... camping on a boat of known provenance ... PS you come across as a bit arsey [oops did I really say that@ ... Sorry.1 point
-
This post cannot be displayed because it is in a forum which requires at least 10 posts to view.
-
This post cannot be displayed because it is in a forum which requires at least 10 posts to view.
-
Ok I see. Then I guess the OP is screwed!?1 point
-
1 point
-
⬆️ He knows1 point
-
This post cannot be displayed because it is in a forum which requires at least 10 posts to view.
-
First thing is that your surveyor should be answering these questions for you. You've paid for their opinion because it is more reliable than a bunch of strangers on an internet forum. Part of the service is them explaining it to you (by phone/in person) in a way which is useful to you. If it is one of the surveyors I'm thinking it might be (based on the prose style - feel free to message me to check) then they are good at this - just ask! In terms of blacking the bottom of your boat... There are bits at the back of it which stick down further than the majority. You don't expect to knock them off regularly in normal usage so you don't expect the blacking to be completely scraped off either. Hulls rust from the inside too but it is much easier to paint the outside. Which at least reduces than chance of rusty bits above and below meeting in the middle. I have two boats older than this one insured by a pretty big company (and not just for third party) who didn't ask to see surveys. One thing that would bother me slightly (depending on the kind of person selling) is that the boat is young enough to have needed RCD documentation which would probably have specified (I could be wrong here) the original thicknesses. It seems this wasn't provided for the surveyor to look at (as it sounds as though they had to guess this)1 point
-
Me also, painting baseplate is a waste of time, effort and money. You will be dead before that baseplate needs repair.1 point
-
This post cannot be displayed because it is in a forum which requires at least 10 posts to view.
-
There are a few members of this Forum that will not agree with Recommendation 5 regarding painting the baseplate . Overall that seems a reasonable survey , the base plate on my boat when built was thinner than that boats 10mm minus the 1.8mm pits . I would ensure the base plate is cleaned and the pits treated with Vactan and then coated with Sealex 'B' bitumastic. . How old is the boat ?1 point
-
Lightweight Mind you, a Yorkshireman flash with the cash? Rare indeed!1 point
-
This post cannot be displayed because it is in a forum which requires at least 10 posts to view.
-
If you are looking to insure it fully comprehensive your insurers will probably "suggest" that you have the pits welded up. The minimum thickness that they will generally insure is 4.0mm, and with a 6mm plate with 1.8mm pits and the following comment :- May mean you cannot insure it without the additional work being done. This is typical of surveyor 'speak' "it looks like it may be 4.2mm, but it may be thinner as our test meter doesn't work very well". What age is the boat ? Is it a low priced boat (compared to similar boats) ? Even if it is not 4.0mm now it could be within a year or two. I'd suggest that before committing yourself to this boat speak with the insurers to find out what they require, and, get the surveyor (or someone else) to give you an estimate of the costs of filling in the pits. You can then make an informed decision - BUT - just beware that there are many examples of 'once the repairs are started the damage is found across a wider area and cost a lot more than planned'. If it is 'the boat for you' and you can get another £5,000 knocked off the price to cover repairs it may be worth going for it. Good luck.1 point
-
Blimey, there's a blast from the past. Being an outdoorsy gurl both by leisure and profession I used to see (and use) these quite a lot, thankfully you hardly see them any more, they were such a footer, and have probbly gone the way of the lorrymans wrench (or hitch depending what part of the country you hail from). They may be a footer but they are easy to do to the point where you can do them by feel so as easy to tie in the dark as in the day, and you're right they can be done from both sides, and if you can get the tension right can be undone quickly by running your hand up between the two sheets. You used to get them on covers for lorries and trailers where the loops were slightly elasticated and secured at the bottom by hooking the bottom lace/loop over an anchor point of some sort, the elastic allowed you to pull the whole thing tighter making it less prone to trouble from the wind; but of course the elastic didn't last for ever. If I was fitting one I wouldn't be using a knot at the bottom, I would have the last lace elastic so I could easily pull it over on and off a hook but my experience is that the wind will always find a way to get in about this kind of tie method so it needs to be really well made with a good over flap, the correct length laces, and the last lace really tightly secured or you just give the wind something to play with which will eventually cause damage. I wouldn't say this method is any more robust than a really good zip but possibly for different reasons; I'm not trying to sound like a rain cloud but unlike with a zip every one of those laces has the potential to provide the wind with a little pocket to get in and buffet around, so can work well if made well but can can also get trashed pretty quickly in bad weather if not. I think they look really nice cos I like things like that but on a more practical note the rope laces may have the potential to out live a zip but the stitching of the seams would need to be extra secure, a sturdy over flap thingy (I'm not sure what you actually call them) that maybe also had heavy duty snap fasteners or velcro and either a good anchor point for the bottom lace/loop or don't make it a loop so that you can tie it in a better more secure way, would be my suggestions. Sorry that's a bit rambly1 point
-
I'm sure I've seen the blue plaque commemorating the moment1 point
-
Same here, and set the News of the World alight trying to make it draw1 point
-
We'll try anything...twice, First time may go wrong. It looks simple enough, wouldn't be my first choice but each to their own. In our experience the main reason zips fail are A.The original manufacture of the cover used a coloured thread, these rot as they have been bleached so they colour can be added. ( to fix only use natural or black). B. The zip is a coil zip which can't stand sideways tension that well.( to fix use Vislon Number 10 continues toothed zip) C.Its a small tooth size ( to fix use Vislon Number 10 continues toothed zip) D. It has been caught at gunwale height whilst cruising/in lock or by other boats collision. ( to fix tuck side of cratch onto top of gunwale when cruising, Build 4ft thick wall around your boat every time you moor!!)1 point
-
This post cannot be displayed because it is in a forum which requires at least 10 posts to view.
-
This post cannot be displayed because it is in a forum which requires at least 10 posts to view.
-
This post cannot be displayed because it is in a forum which requires at least 10 posts to view.
-
If the engine runs and the rev counter works (assuming you have one?) then why not use a tachometer on the prop shaft? This is a cheap non-contact one, you just apply a small piece of reflective tape to the shaft and point the laser at it https://www.amazon.co.uk/Tachometer-Roeam-Non-Contact-2-5RPM-99-Reflective/dp/B07RXYRNFF/ref=lp_6286405031_1_17?s=industrial&ie=UTF8&qid=1581671950&sr=1-171 point
-
This post cannot be displayed because it is in a forum which requires at least 10 posts to view.
-
This post cannot be displayed because it is in a forum which requires at least 10 posts to view.
-
Personally I think you would be better off bringing a feed/earth wire from a brush outside the alternator and open circuiting that to give zero amps charge, but what you are thinking should not damage anything. In theory 15V on the sense lead is likely to cause the regulator to shut down but I can not be sure it will so experimentation is called for. If you drop the sense voltage to zero then the alternator is likely to go to maximum voltage and that may well be an "emergency" voltage higher than the regulated voltage. If you disconnect any alternator's onboard regulator then any external regulator that allows you to program the regulated voltage would limit the regulated voltage to whatever you want but I cant see how it would produce a zero charge. I suspect something like a Raspberry Pi measuring a variety of inputs and operating a relay in the rotor/brush feed would be easier and leaving the inbuilt regulator to control maximum charging voltage.1 point
-
This post cannot be displayed because it is in a forum which requires at least 10 posts to view.
-
It does! I painted mine a very dark blue and a few years ago the boat was unbearable. Painted much lighter, in the heatwave a couple of years back it was relatively comfortable, and I've a lot of insulation under the roof.1 point
-
TMA seems to have a particularly large basin as she has to collect the litter out of it - not sure if she'll have a 'pop-up' plug. Said in a Brummy accent :- A) What's the difference between a Buffalo and a Bison ? A) You cannot wash your hands in a Buffalo.1 point
-
She played the trombone better than me too! I had to get a euphonium to catch up, then she got the tuba. I play the fiddle, she plays the double bass. I play accordion, she plays church organ. There's a pattern, if only I could spot it...1 point
-
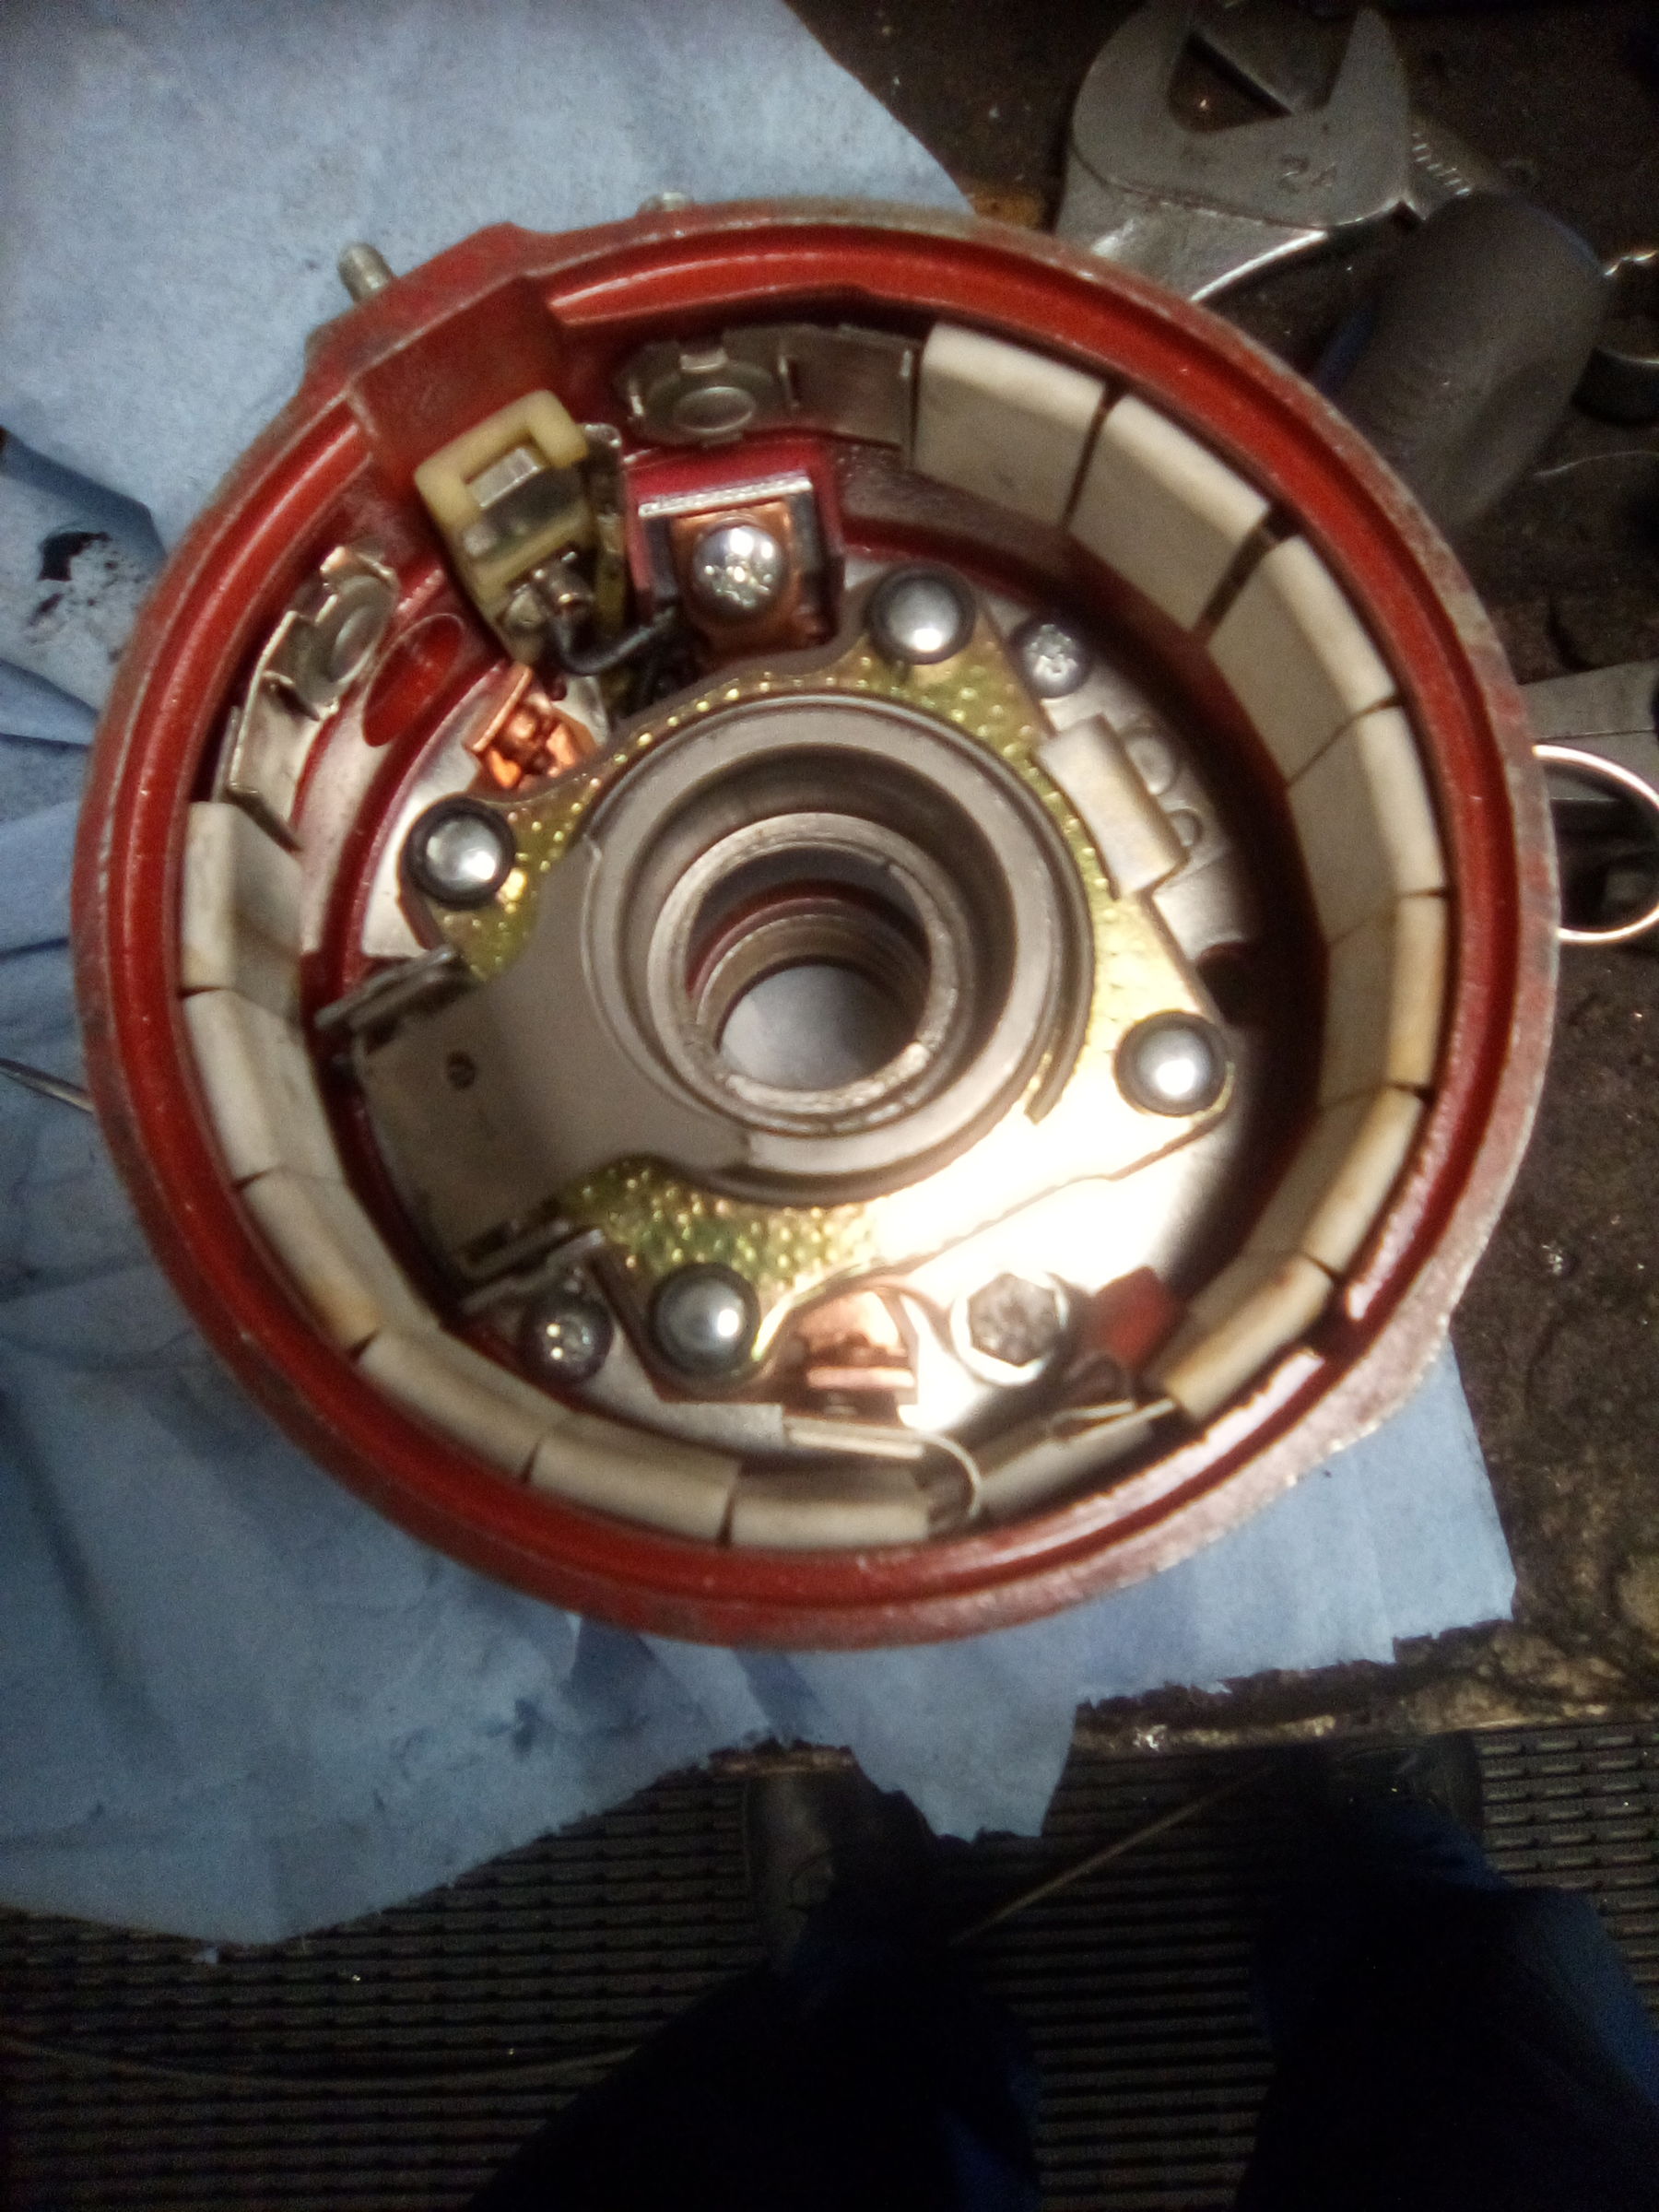
All the complicated stuff assembled. The resistor is visible around the circumference, highlighted by the white ceramic insulators. Connection to the moving contact at 5 o'clock, from resistor to second contact (motor) at 6 o'clock.
1 point
-
If you look at the DVD you will see scenes in the trailer filmed at the Gauging lock at Buckby which don't appear in the film.....1 point
-
This post cannot be displayed because it is in a forum which requires at least 10 posts to view.


This leaderboard is set to London/GMT+01:00