blackrose
-
Posts
30,396 -
Joined
-
Last visited
-
Days Won
19
Content Type
Profiles
Forums
Events
Gallery
Blogs
Store
Everything posted by blackrose
-
Efficiency may be variable from person to person because it's dependant on how or even if a fuel gauge is used. For example, if an accurate electronic gauge is on the wall and is easy to read then there's a fair chance the person using that system will have a better idea of how much fuel is in their tank than the person (like me) who uses a dipstick but rarely actually uses it because of the hassle of finding it, dipping it, wiping the diesel off and putting it away. In my case I hate getting diesel on my hands so I'd put on some latex gloves first too. The electronic version sounds much more efficient to me.
-
Or runaway diesel engines... I had a mate who overfilled an old engine because he couldn't see the level of new oil on the dipstick so stupidly poured a load more in. He had no idea how to stop it once it ran away. The engine was wrecked and he was very fortunate that the boat didn't catch fire. Apparently smoke was pouring out of the boat and the harbour master at the French marina was at the point of setting it adrift to protect other boats when it eventually stopped. That's interesting. Why is there that difference between the two? Well, I've only ever had one battery explode on my boat and it wasn't lithium. I was just lucky I wasn't in the engine space at the time as I'd have been seriously injured. Yes indeed! I can't help thinking that some of the anti-lithium naysayers don't realise the benefits of LFP batteries on boats, especially for off-grid liveaboards. Combined with a decent solar system it's almost like being on shore power. Even in the depths of winter I only need to run my generator once every 10 days or so. Once you install LFP, lead-acid batteries seem like something from the dark ages.
-
Which exclusion? Sorry, I'm just catching up...
-
I disagree. I think we need more pinned threads, not fewer. Then we wouldn't have so many repeated topics and some of our more aggressive forum members wouldn't need to get so frustrated and harangue newbies for not searching in the archives.
-
What made you imagine someone putting some decking over scaffold poles would be an engineer? It's just a DIY job that wasn't finished. Perhaps whoever did it didn't own an angle grinder. Your friend managed to find the only mooring at Staines that wasn't suitable for his boat. I used to moor on the other side of the river, sometimes overnight down by the riverside pub/restaurant by the railway bridge. But I always had a couple of tyres on rope attached to those handrail hooks.
-
Yes better standards and attitudes on the Thames in my experience. 😊.
-
No you're not being unrealistic but your approach is all wrong. It's very easy to fall in love with a boat that you've viewed but you need to resist that temptation until after you've had a positive survey done and agreed the price with the vendor. If you fall in love with a boat before that point your heart may lead your head which can result in all sorts of problems.
-
Whoever fitted the bolts from the gearbox case to the bell housing was a bellend. 🔔
-
How real is the linseed oil sunlight combustion risk?
blackrose replied to Gybe Ho's topic in Boat Building & Maintenance
Passed. When using any of these spontaneously combustible oils, for me the risk is real enough not to leave used rags on the boat or anywhere where they could start a fire. Why would you? Put them in a metal bucket away from combustibles if you want to reuse them, or if it's not windy lay them flat on concrete to dry out. -
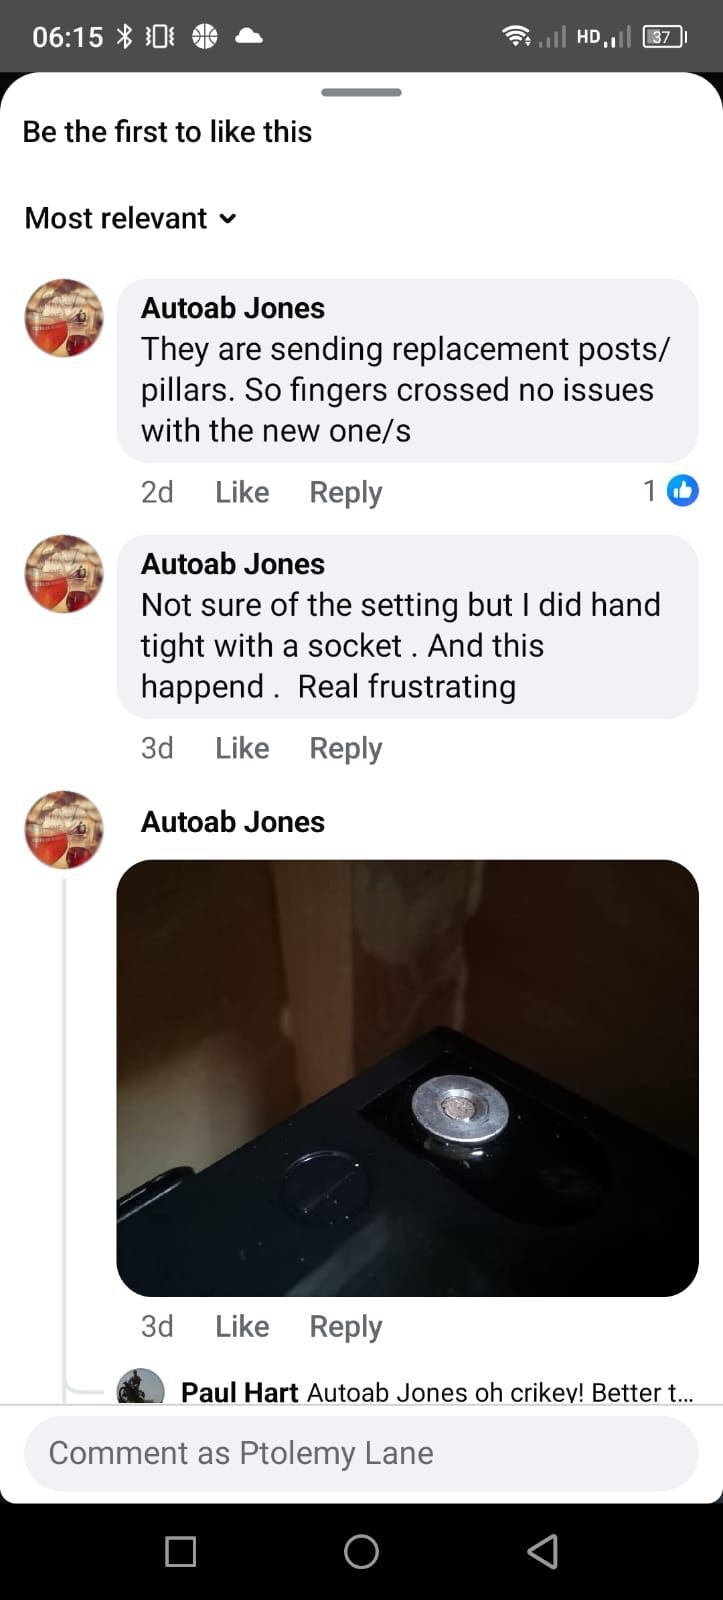
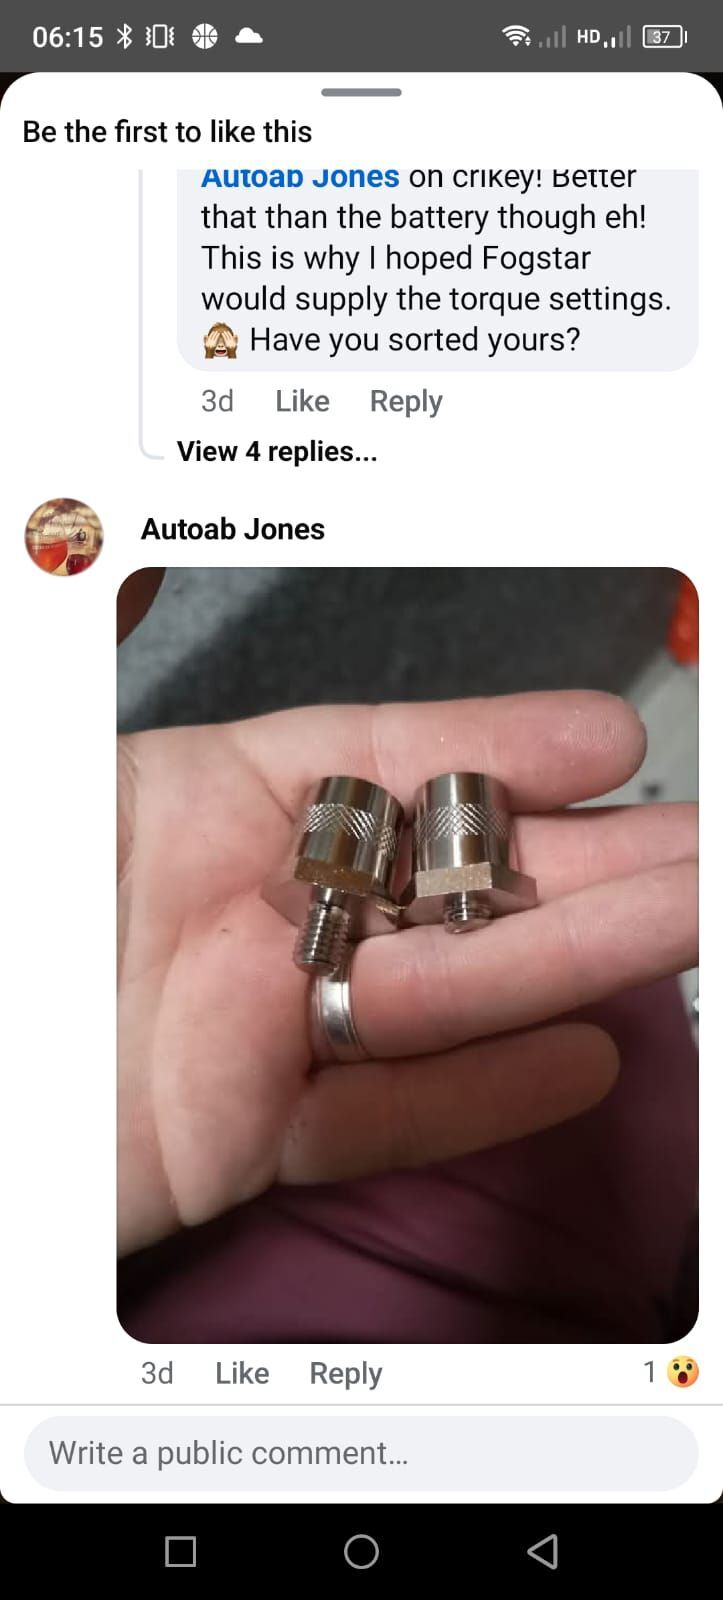
I agree, but I think the idea is that the posts allow users to either use bolts into the posts or use standard battery terminal clamps onto the posts
-
And you sound like another one with a large mouth if I'm being honest. There's no more a "typical wide beam attitude" than a typical narrow boat attitude. That's just a figment of your own prejudice and bigotry. So you intentionally insulted someone because you didn't like their boat and then you got offended when they returned the favour? Can you spot the hypocrisy? There are plenty of instances of conflict and insults thrown around between owners of lots of different types of boats including narrow boat vs narrow boat. But if you really want to try to negatively characterise people on the basis of the boats they own it really says much more about you than it does about them.
-
Yeah, as long as you don't mind lots of condensation
-
I knew I couldn't be the only one...

-
Side doors is the correct term if they don't have the top part that hinges onto the roof in which case it's a hatch , but people also use the term hatch for side doors. It doesn't really matter.
-
Why don't you just put a large umbrella or small parasol over the hatch? You need a way of attaching it to the boat so it doesn't blow away and a few thin "guy ropes" from the ends of the umbrella spokes to keep it stable in the wind.
-
This post cannot be displayed because it is in a forum which requires at least 10 posts to view.
-
Yes. Soft copper pipe in reels, not rigid copper pipe in straight lengths.
-
This post cannot be displayed because it is in a forum which requires at least 10 posts to view.
-
If you're onboard and able to spray the roof you may as well just move the boat to some shade. That's what I did today. I left my mooring in blazing sunshine at 12 noon with the temperature at 31C in the cabin. Once in the shade the temperature dropped to 30C and later rose back to 31C and it's still at the same temperature now at 6.30pm. I'll head back to my mooring soon. The air temperature here today was 33C according to the Met office. That means it would have been about 36 -38C onboard if I'd have stayed at my mooring in the sun. I've tried spraying water on the boat before but it didn't seem to do anything to reduce the temperature in the boat. Move the boat to some shade if you can. Being able to move is one of the benefits of a boat, so you may as well make use of it.
-
This post cannot be displayed because it is in a forum which requires at least 10 posts to view.
-
Automotive yes, but you'd struggle to get a refurb marine Webasto for that price. Whether that matters or not is up to the individual to decide. I have an automotive Webasto on my boat and it works really well.
-
Don't the landowners on either side own the riverbed to the middle of the river rather than the EA? I thought that was the basis of riparian rights?
-
What principle is that? If you key the old epoxy properly it sticks fine. Just get rid of the rust with a wire wheel on an angle grinder which won't take off good steel, key the old paint around the area with a medium grit paper and key the bare steel too. Then just apply a few coats of the new epoxy taking care to follow the minimum/maximum overcoating times according to temperature given in the TDS. Forget about the Fertan because if you don't get rid of it completely it could be a steel contaminant.
-
32C in my boat too now. I'm going for a dunk in the river later to cool off. I'm not looking forward to Monday, it's meant to be 33C outside which probably means 36 or 37C in the boat 🥵
-
That sounds like a good idea. There's not much point me accessing the router dashboard because even if I did manage to get into it, I wouldn't know what I was doing once inside. Perhaps it's just me, but that 1p website isn't very clear and doesn't make any sense to me. Are these phone SIMs or data SIMs for routers (or are they the same) and it doesn't even say which network? *I was told by 3 several years ago that a mobile SIM in a router wouldn't give the internet speeds of a dedicated data SIM intended specifically for broadband. But perhaps things have changed and they're one and the same now?