

harrybsmith
-
Posts
343 -
Joined
-
Last visited
Content Type
Profiles
Forums
Events
Gallery
Blogs
Store
Posts posted by harrybsmith
-
-
It's a bit like the MOT rule- "If it's there, it's got to work."
BSS can be a bit of a lottery, the inspector that did my latest one checked about 3 things, then demanded a coffee, complained about the weather then left, which is worse for everyone involved than someone who is excessively thorough
-
Hang on, I've got a 32ft boat I'm about to sell, with a shower (and many other things) that's had all work there possibly is to do to it done for under £20k. Has been a comfortable liveaboard for 6 years
-
- Popular Post
- Popular Post
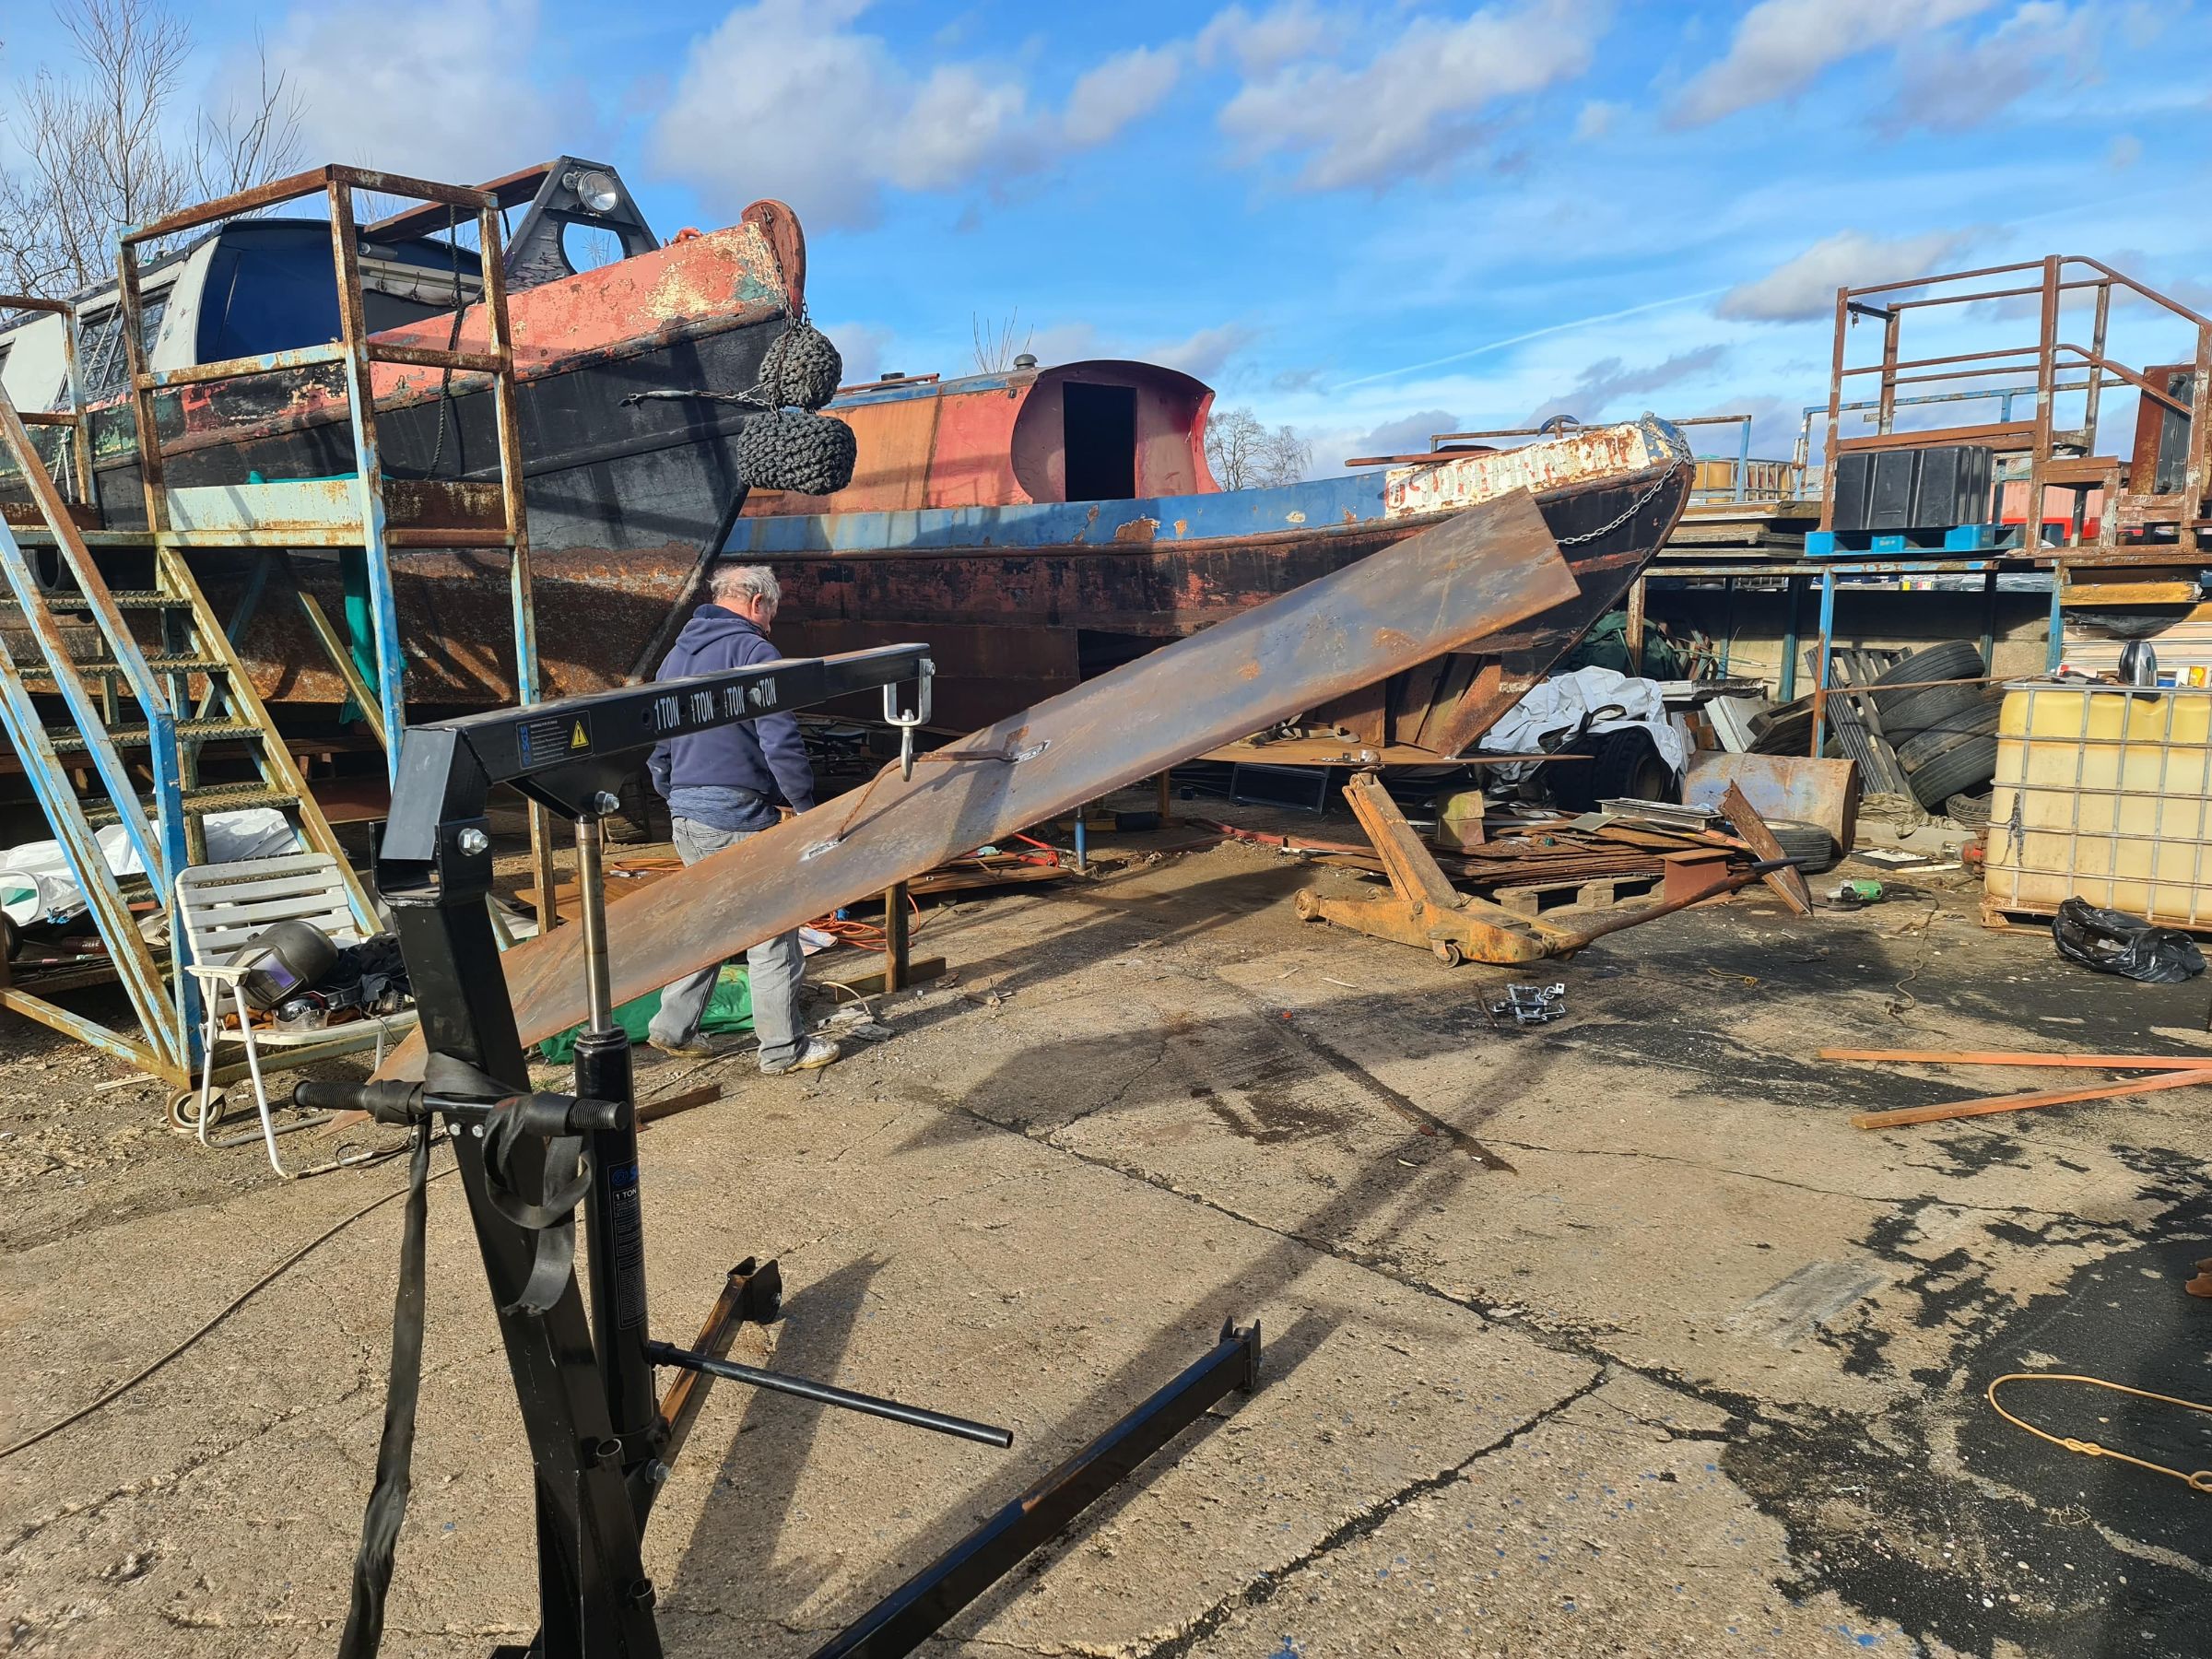
Take a bow (and chop a hole in it)
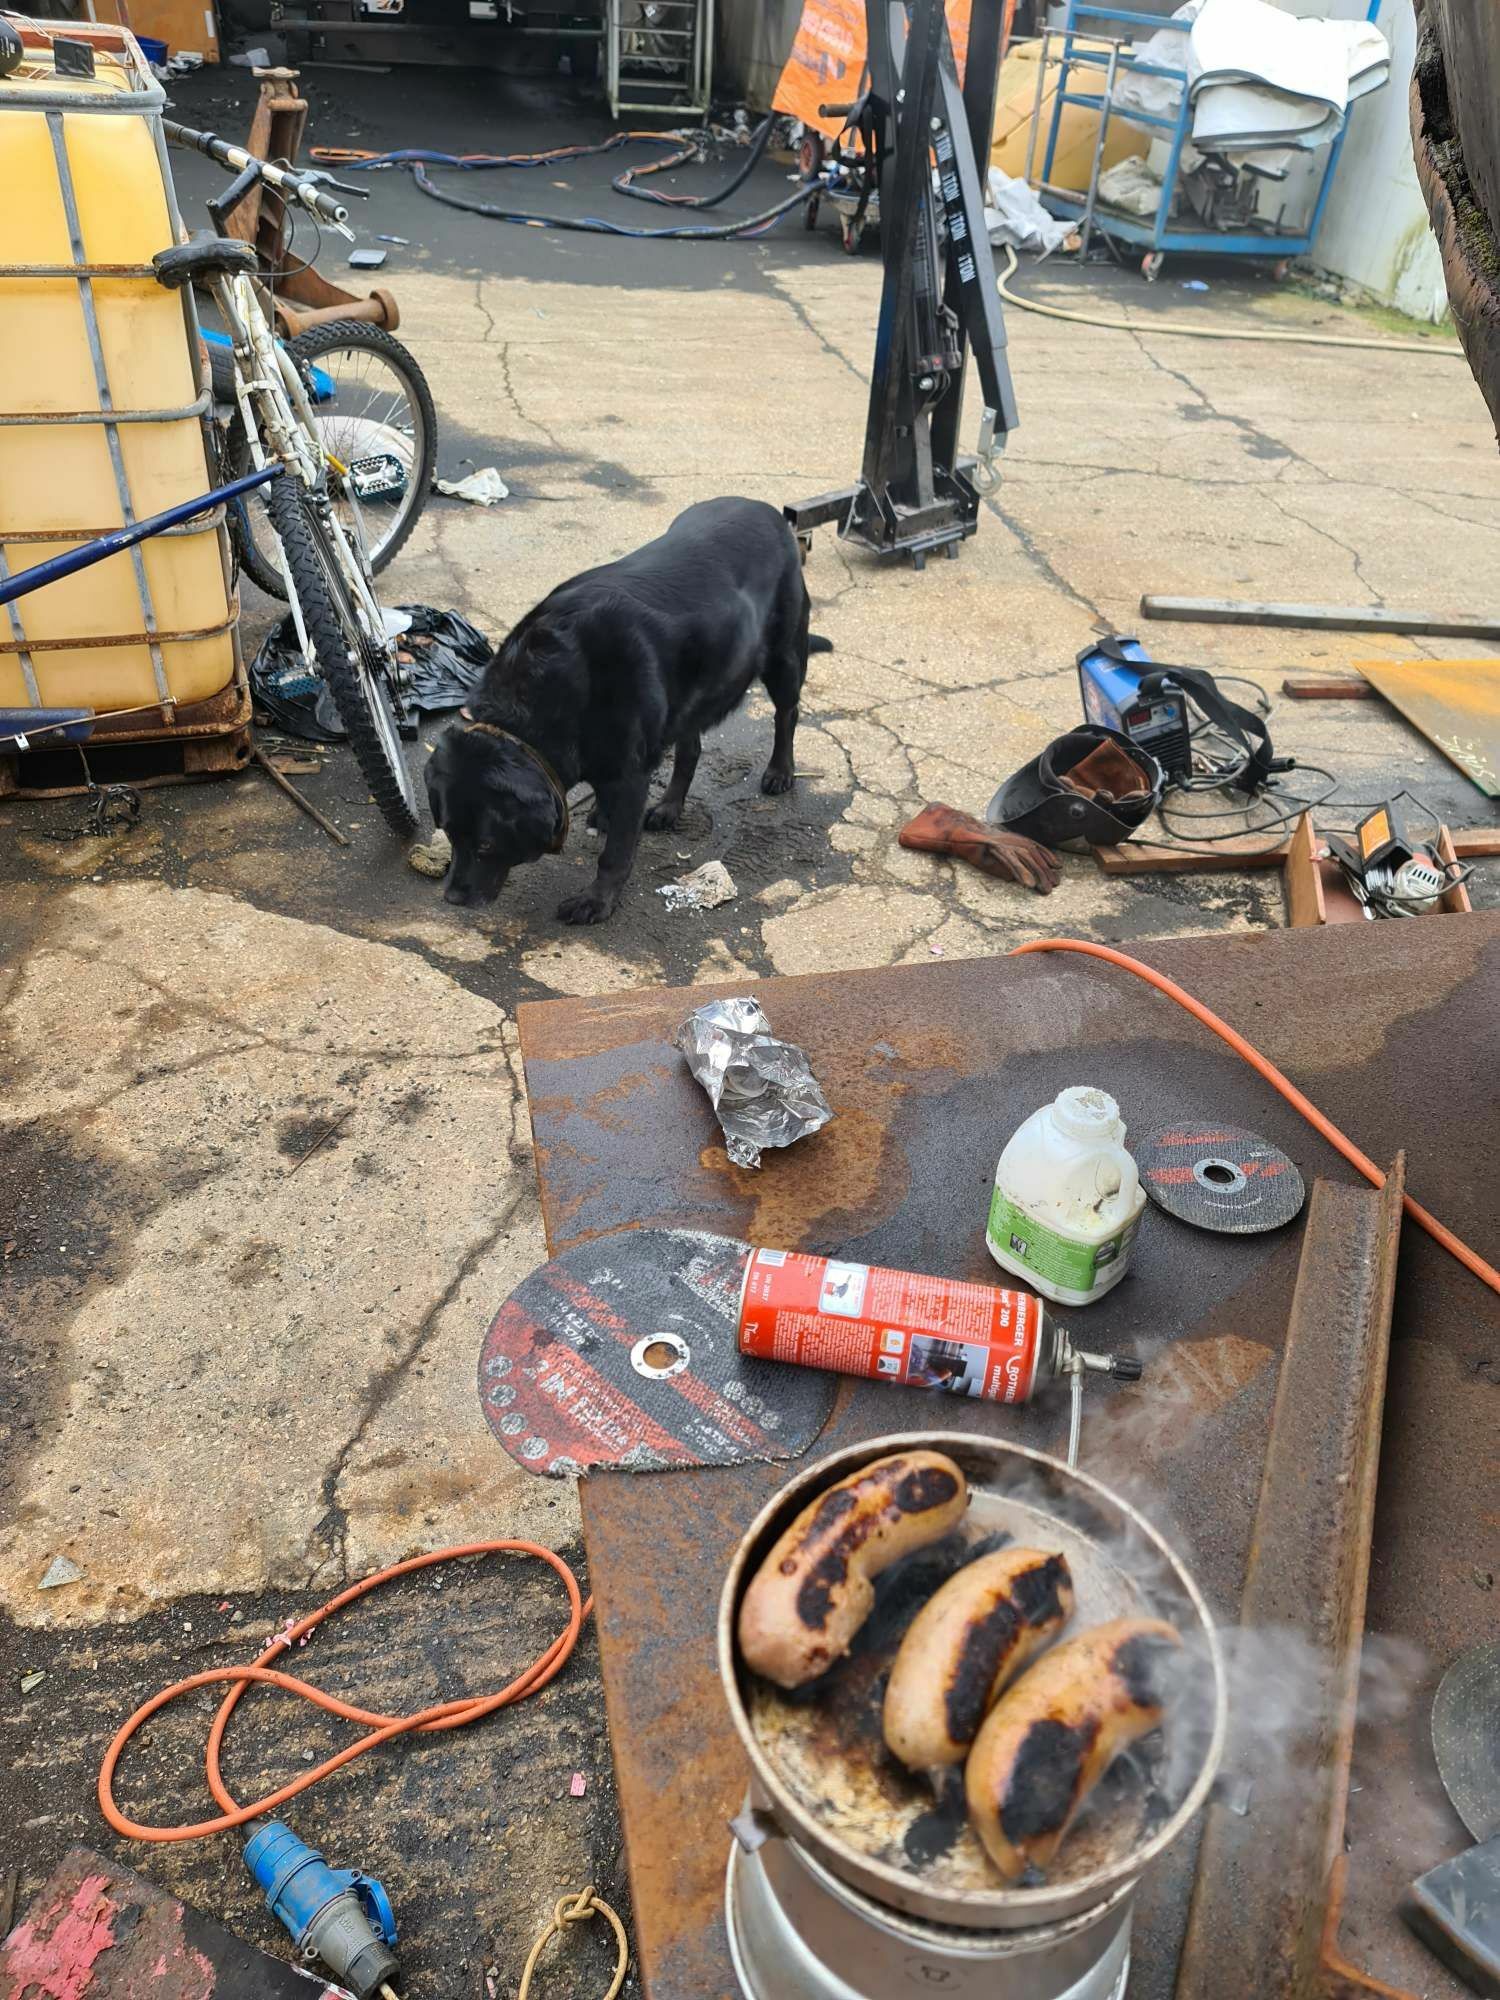
The day started out with a visit from HM Sausage Inspectorate to check that breakfast was of adequate quality. Dissatisfied by the lack of samples they decided to make it a thorough visit that lasted all day

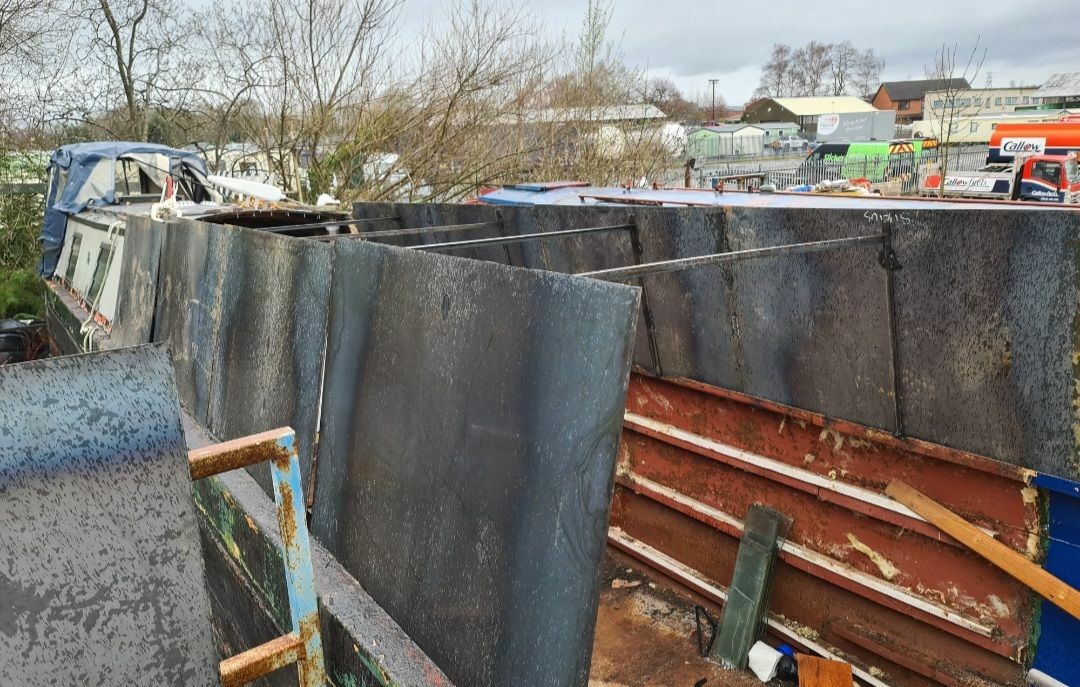
As per the other side, a big, undersized hole was cut and the plate craned into place using an engine crane
With it welded in place at the back then the plate could be pulled round to follow the curve of the hull. Pull, chop, tack, you know the drill.
Trim it to fit the stem bar, and does it line up to the baseplate? Does it heck. Stick a centreline down the boat, measure at 30cm intervals perpendicular, measure the height to the "good" side from them, transfer that to the "bad" side, do a dot to dot and chop it to match.
Chop through the stem bar (catch the baseplate first...) then jack the baseplate up and weld in place
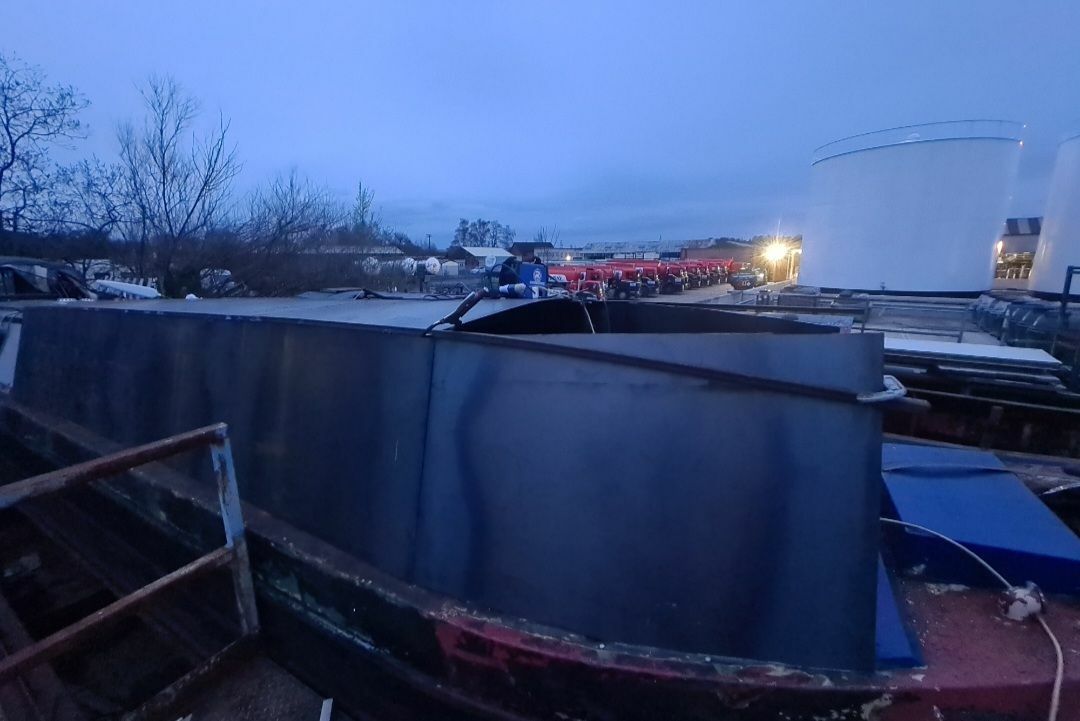
Then trim off the baseplate to the hull profile, leaving a 1" wear edge. It still needs seam welding on this side, but that's the last bits of work I'll be doing in this particular yard before moving it by road to another one. I've recently changed job (which massively helps this project as I actually have evenings and more weekends now) so the boat needs to come with me
Tug deck next
-
 5
5
-
45 minutes ago, blackrose said:
Do you use it in conjunction with some water based gel to get a proper contact, or has the technology moved on now and you don't need the gel?
Yes I do use gel, and yes it is necessary
Accuracy verified as I've been chopping lumps out my boat so can caliper the thickness of them when removed
-
I have a cheap one (bought 2nd hand), for the first 10 or so measurements after calibration it's dead accurate, after that some measurement drift creeps in and it needs recalibration. A hammer can also be used as a thickness sounder (used extensively in industry, I did a lot of it in my last job), learn what good, thick metal sounds like when hit and you'll soon hear the difference on a thin bit
-
As someone who has lived on a Highbridge (snooty cousin of a Dawncraft) for 6 years as a comfortable home I feel fairly qualified to answer
Yep, they can leak, and yep that central "division" (called a bulkhead) is structural, but also you'll be fine. Boats and excessive worrying don't go together, for that reason my mum is banned from visiting...
Unless the wood is properly rotten it can probably be salvaged with "wood hardener" and plenty of good paint or varnish on top. This isn't the "rolls royce" solution but it's not a ¼ Million Crick winner, it's an affordable, usable liveaboard.
GRP tends to "wriggle*" under fittings and things like windows that create leaks, it's to do with rates of expansion and slight moisture absorption. The best solution is to remove them and apply a flexible bedding sealant behind, the easy way is to use something like Capt Tolleys squirted around them to seal up leaks
Wooden box over the centre sounds a bit rubbish if I'm honest, they're expensive but consider a proper canopy, sheds are for gardens, not for boats.
And most of all relax and enjoy it, that's what boating is all about
-
1
-
-
Well @MtB, you just had to jinx it didn't you... I had a couple of days free, which just at the moment is something of a rarity. Did I do my own boat as would be sensible? No, of course not. I got suckered into building a cabin (or half of one so far) for the boat next door. Bums.
-
2
-
-
1 hour ago, magnetman said:
Do you mind saying which boat it was. You described it as historic which must have piqued a few peoples interest.
I didn't want to distract from the actual topic of the thread as it was a bloomin controversial boat in need of massive amounts of work, but it was ex Thos. Clayton tanker Pearl (wooden)
Was a few years ago, I imagine it sank too many times and they got fed up and chainsawed it to bits.
Once the current steel (nearly historic) boat is done then I will do a wooden one to make up for not saving it ; )
-
1 minute ago, matty40s said:
Then it's probably down to CRT and the amount deemed owing in fines and outstanding fees. If this and the boats value arent met, CRT would rather destroy a boat than let someone have it for a song.
The use of section 8 is always a dubious move, deny someone a licence and then sieze their boat for being on the water without a licence.
Given the boat in question I can well believe that actually. Still, a blessing in disguise really as I'd be a very poor man had I bought it and done the required work...
Other S8 operators (Redhill and Sirius come to mind) are more straightforward, I bought my current project off one of them and it was pretty painless
-
2
-
-
3 hours ago, magnetman said:
Indeed. It was on for about £25k ten + years ago in London area so it seems a bit odd it would be worth more. Commercial Boat Services do seem to have put excessively high asking prices on the L&L boats the CRT took as well. Some might say they don't want to sell them for some reason.
ETA having said that the L&L boats don't seem to be on the list any more. I'm sure they were still listed very recently.
CBS are sometimes a bit funny about selling the boats they have advertised, a little while ago I tried pretty hard to buy a boat they had advertised ('twas a historic too) but they refused to sell it. The boat then ended up being scrapped
-
Another thing to bear in mind (because I've not seen it mentioned much) is wet film thickness, it's very difficult to achieve the specified wet film thickness for many epoxy blackings with a roller, so few do. This makes it worse.
-
Only you can judge whether it's good value to you or not, but there's nothing in that survey that scares me nor that I'd personally bother to rectify immediately especially if you're not doing much cruising, just budget that you might need to have a bit of work done next time it comes out. I'm not a professional marine fabricator but I have done extensive work on my own hull and do charge by the hour in my line of work (get your mind out the gutter, please...) and I'd expect to be spending £2-3k to have the sacrificial edge and pitting sorted, at some point
-
I have a LIDAR, I have a boat. Shall I just start doing this? Open source project, perhaps integrated to Open Canal Map? Could even lend the LIDAR to trusted boaters who cruise more than I do
-
8 hours ago, DHutch said:
There is some of this, mixed with a bit of gently allowing the 'brand' to fade. But yes, I'll be 36 this year and now have a young child of my own!
We're going off topic, but if anyone is interested how it got there, this is us loading the car.
I tried to engage with them pre 2020 but didn't get very far, appears to not be a thing any more. Still, plenty of other ways to get involved, i'm off to play with Spey at the weekend (because obviously one boat build isn't enough)
Also a colleague of mine has planted the idea of sticking a Ransomes MG crawler tractor on my tug deck, I suppose Daniel had the idea first with an equally slow and heavy contraption...
Back on the actual topic of the thread Debdale Wharf have containers that are available to rent for moorers there. Not sure if using one as a workshop would be frowned upon but does seem like the ideal answer
-
While it doesn't excuse it, this level of customer service (long, unexplained delays, shoddy work and poor communication) seems pretty common within boating. Dealt witha few marinas and other boating businesses and if I'm honest most of them have been pretty poor in this regard.
All the best with getting the problem sorted
-
1
-
-
Ventilation is generally a very good idea, on some boats for some people (my boat and me, for example), the driving factor behind putting the heating on is quite often condensation rather than actually being cold. More Ventilation is helpful to solve this, and as a liveaboard you'll be doing a lot of breathing and boiling kettles and maybe some showering, all of which will generate plenty of condensation
-
Wow, the plot thickens. You are indeed correct about windows
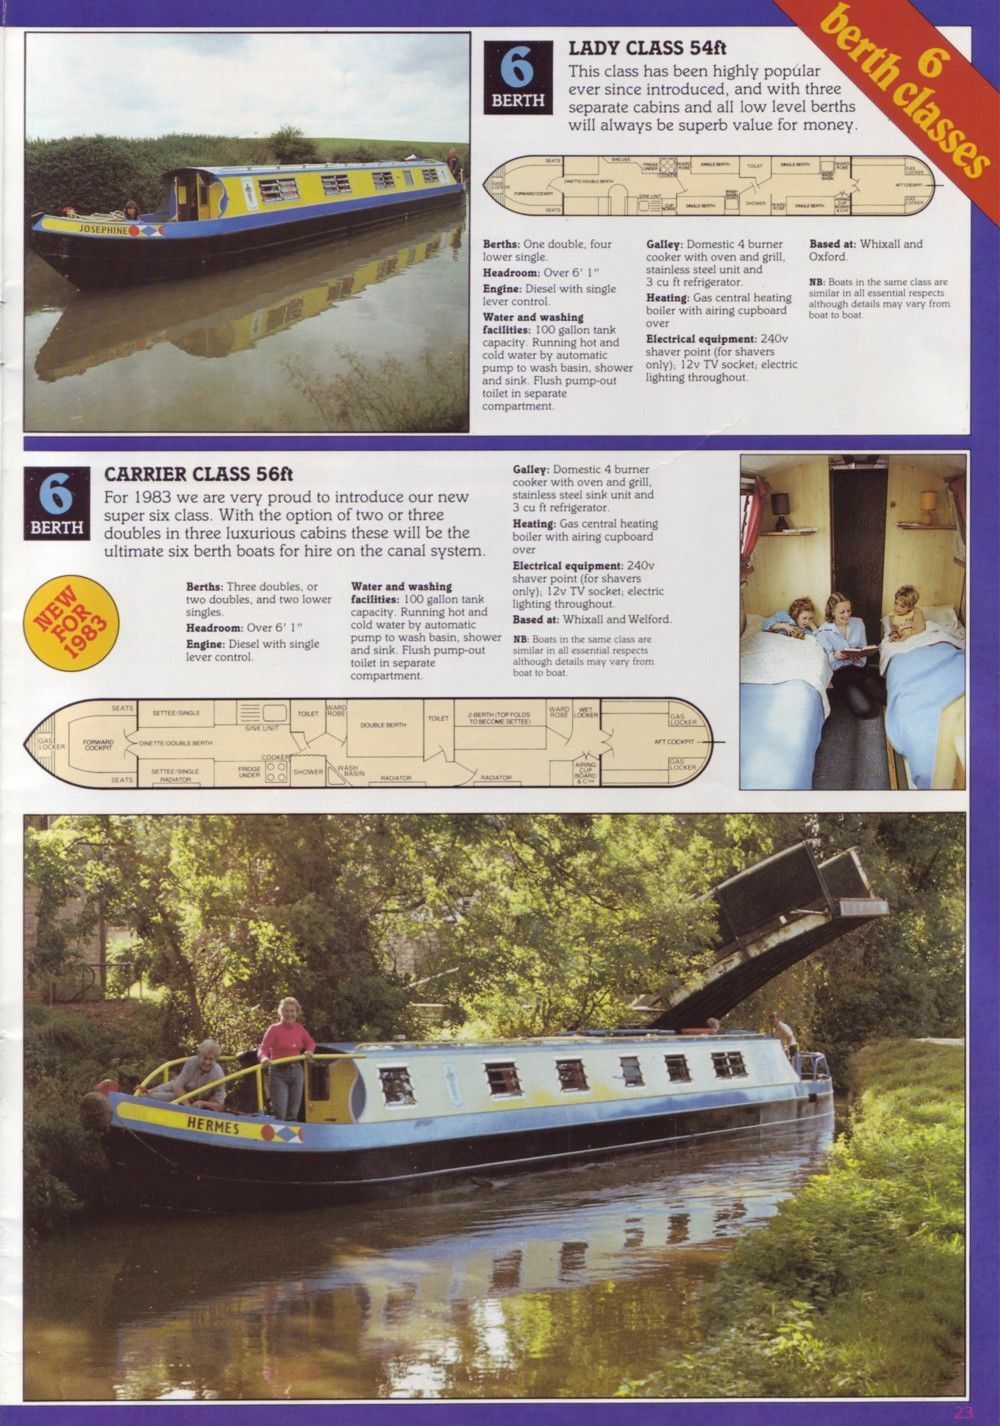
My Reg number is 62740, although it's registered as a Hancock and Lane, so whether it's on its original reg or not I don't know
It is categorically 50ft, (Well, 49ft 11" without fenders) and there was no evidence of cabin work before I got my welder out...
There is yellow paint under the red, although I hadn't found the orange pictured earlier, I think the roof has always been blue
-
@DanH Thank you so much for that! Amazing archive material
I think I've just decided on my colour scheme too, back into original orange and white, which is actually startlingly similar to my current boat but a nice nod to the past.
I don't feel guilty for chopping her about to get the boat I want, but one day I might do a historically accurate resto on one, they're just as much a part of canal heritage as any ex-carrying NB.
-
1
-
-
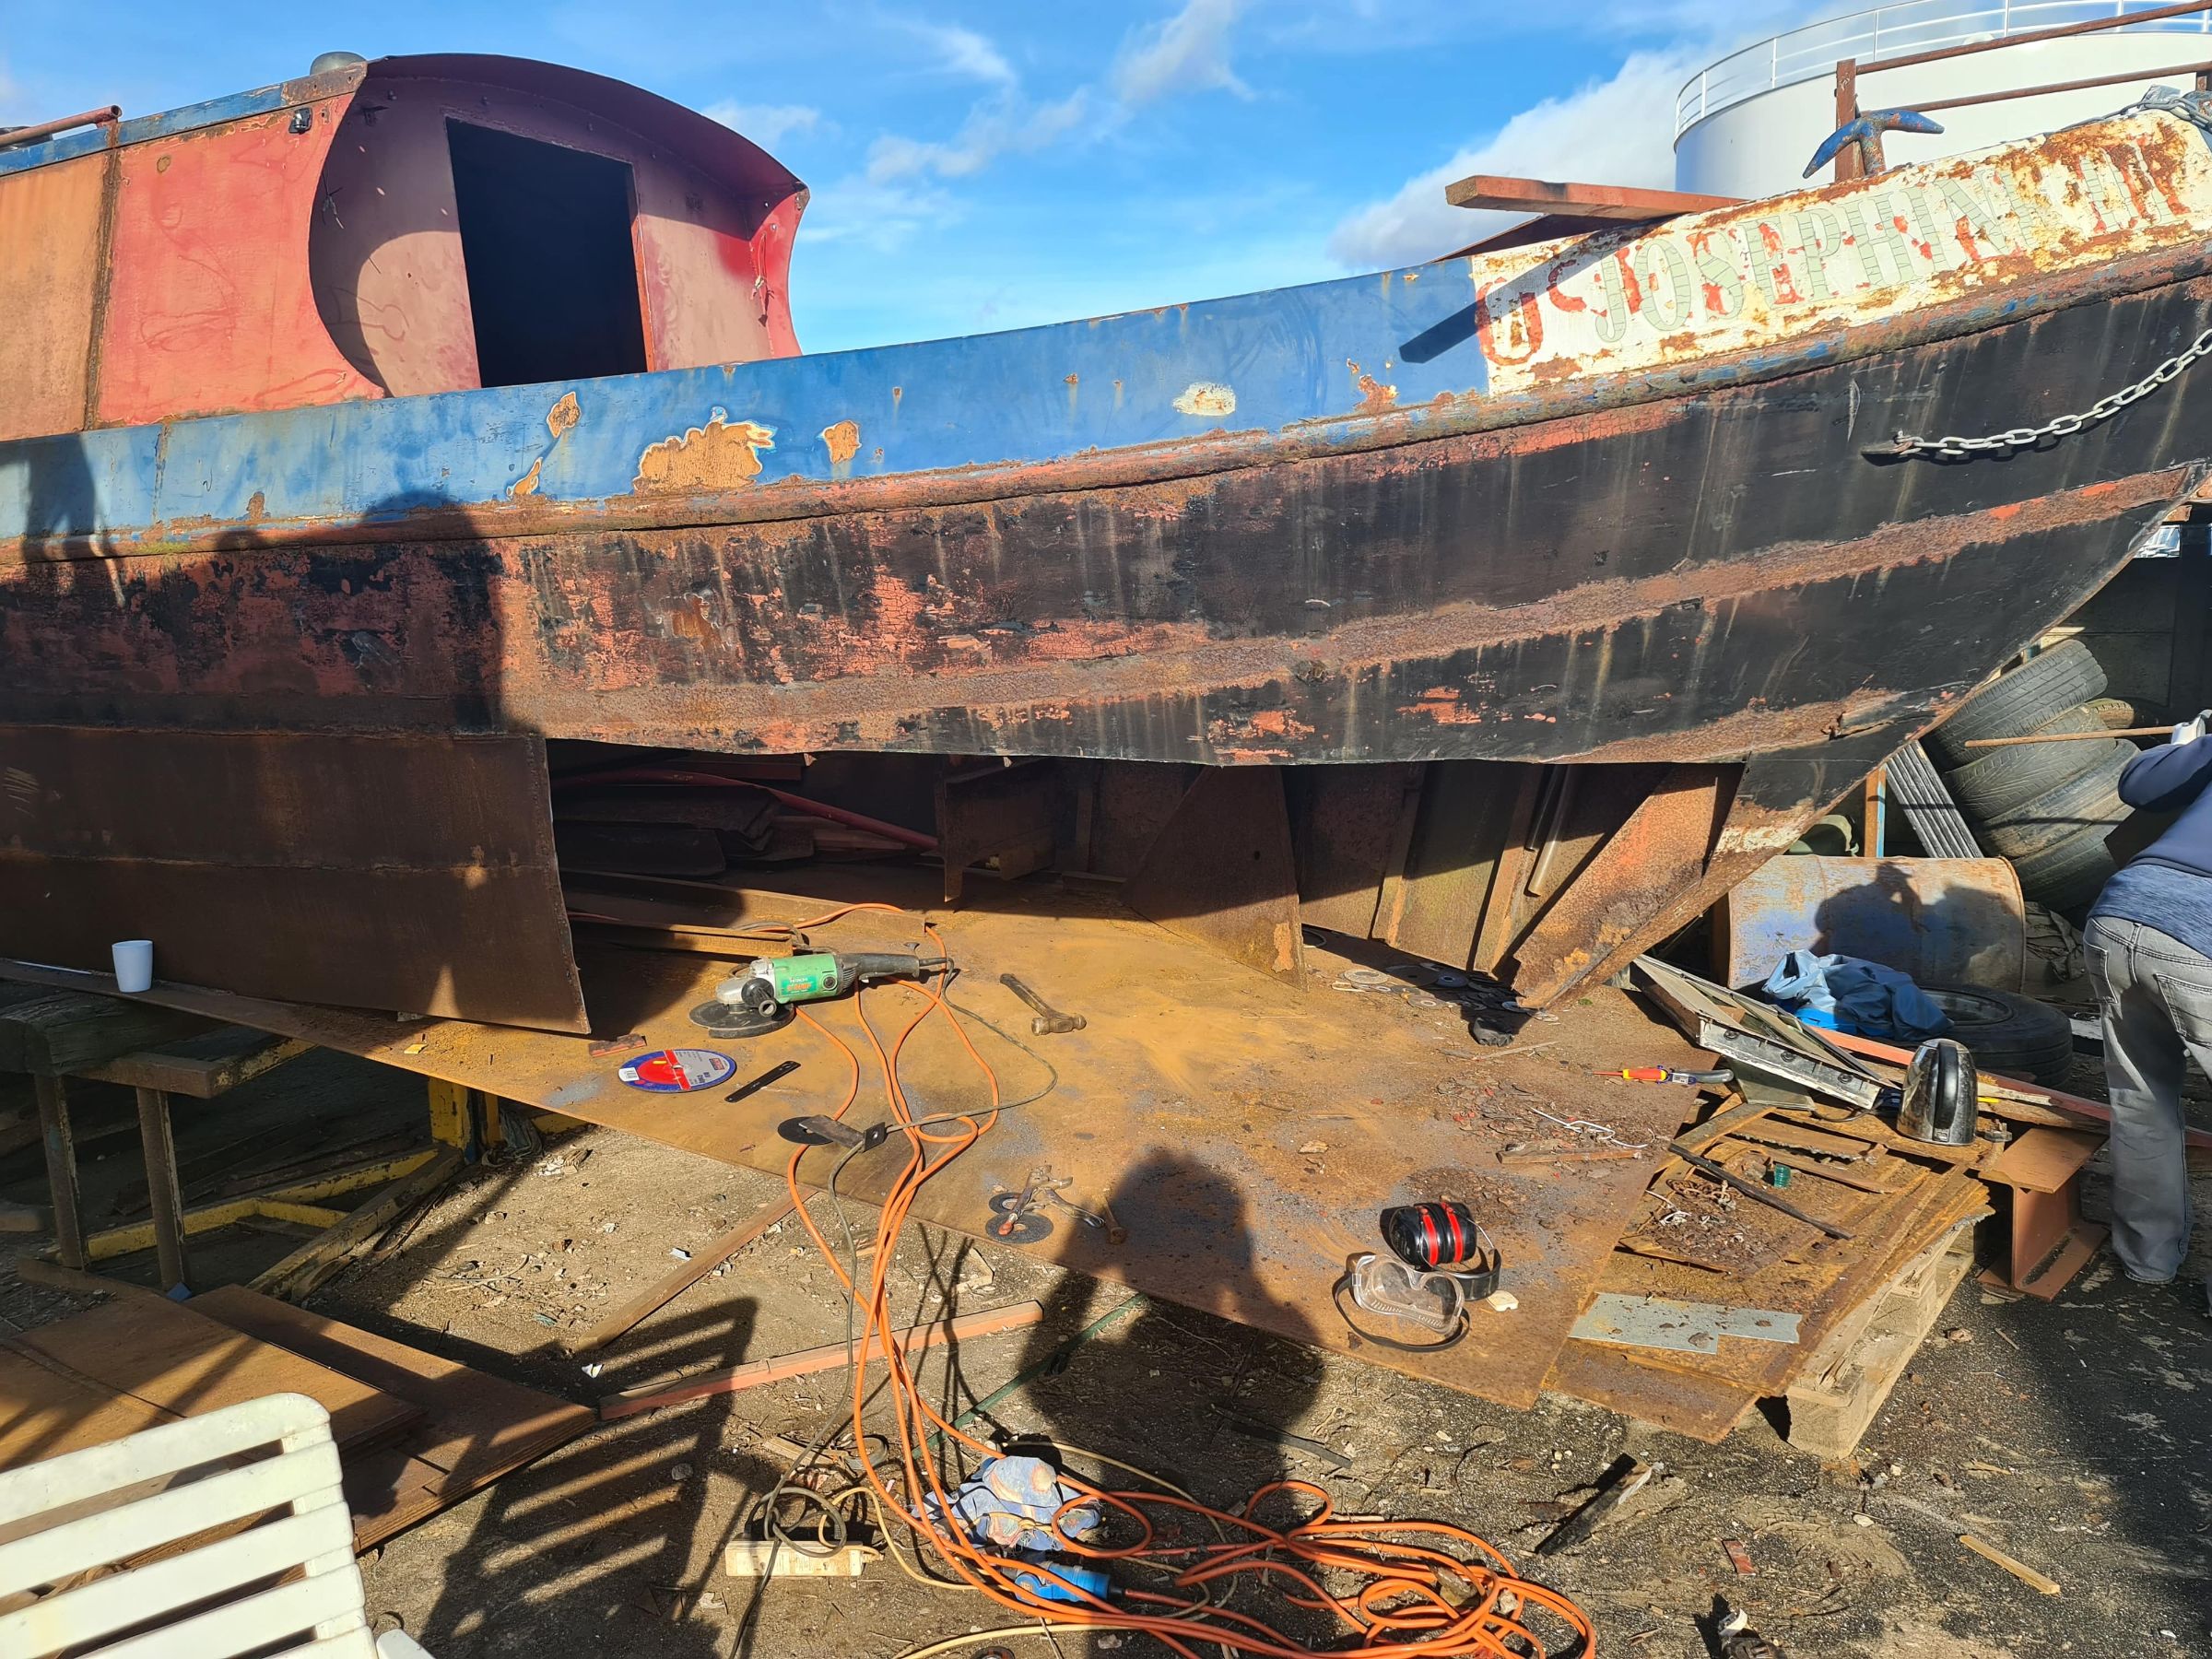
Part 3- Hole removed.
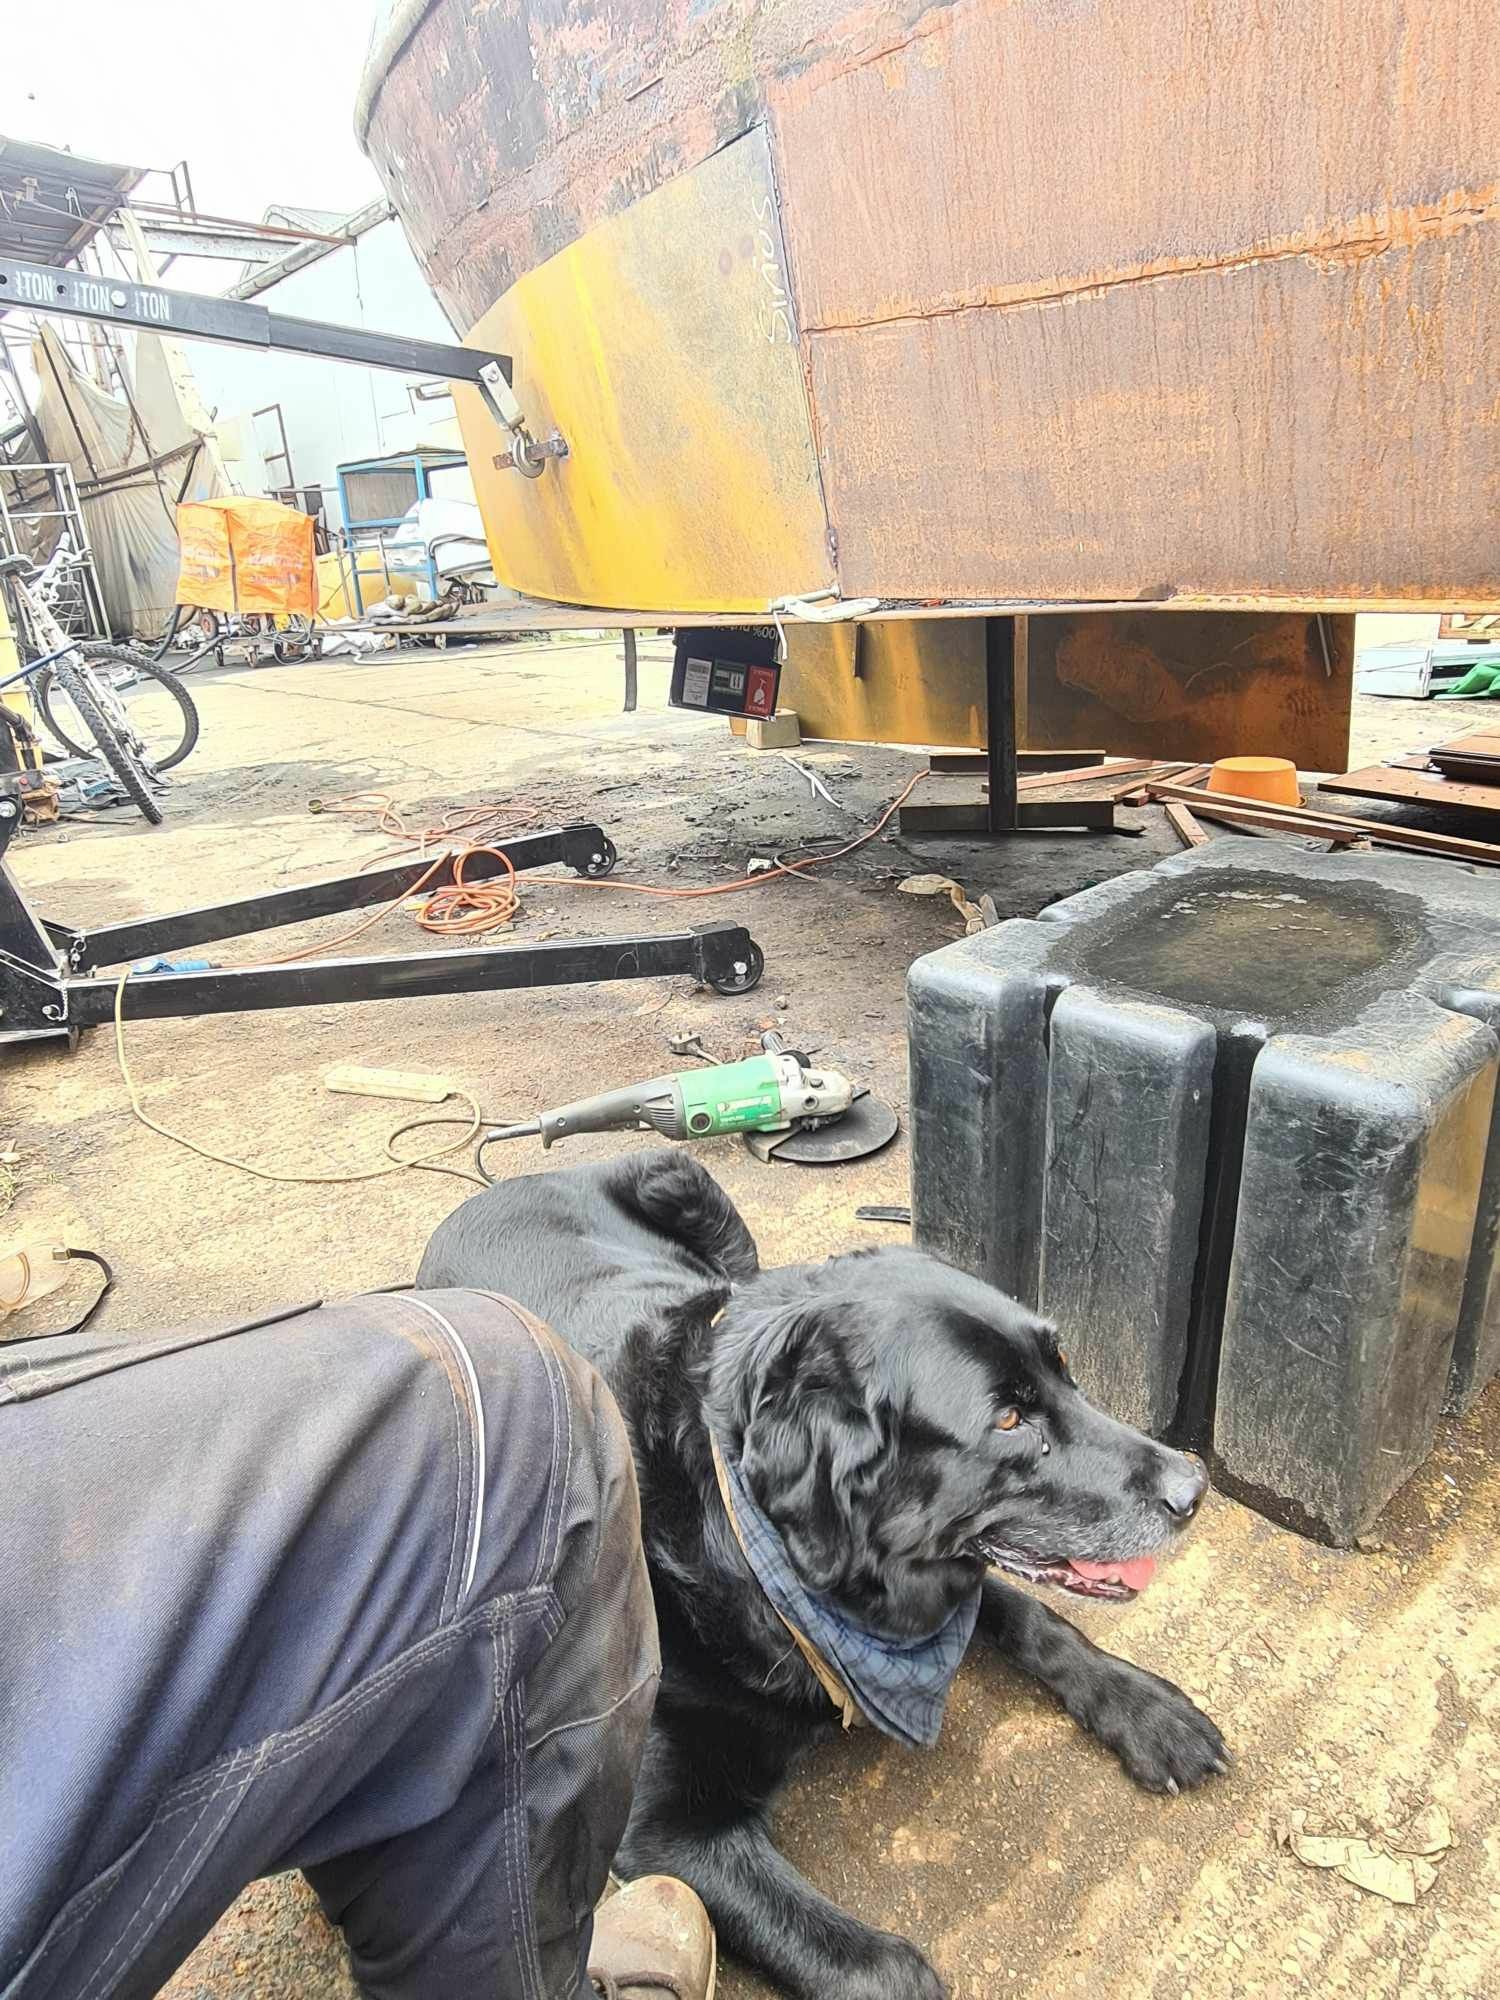
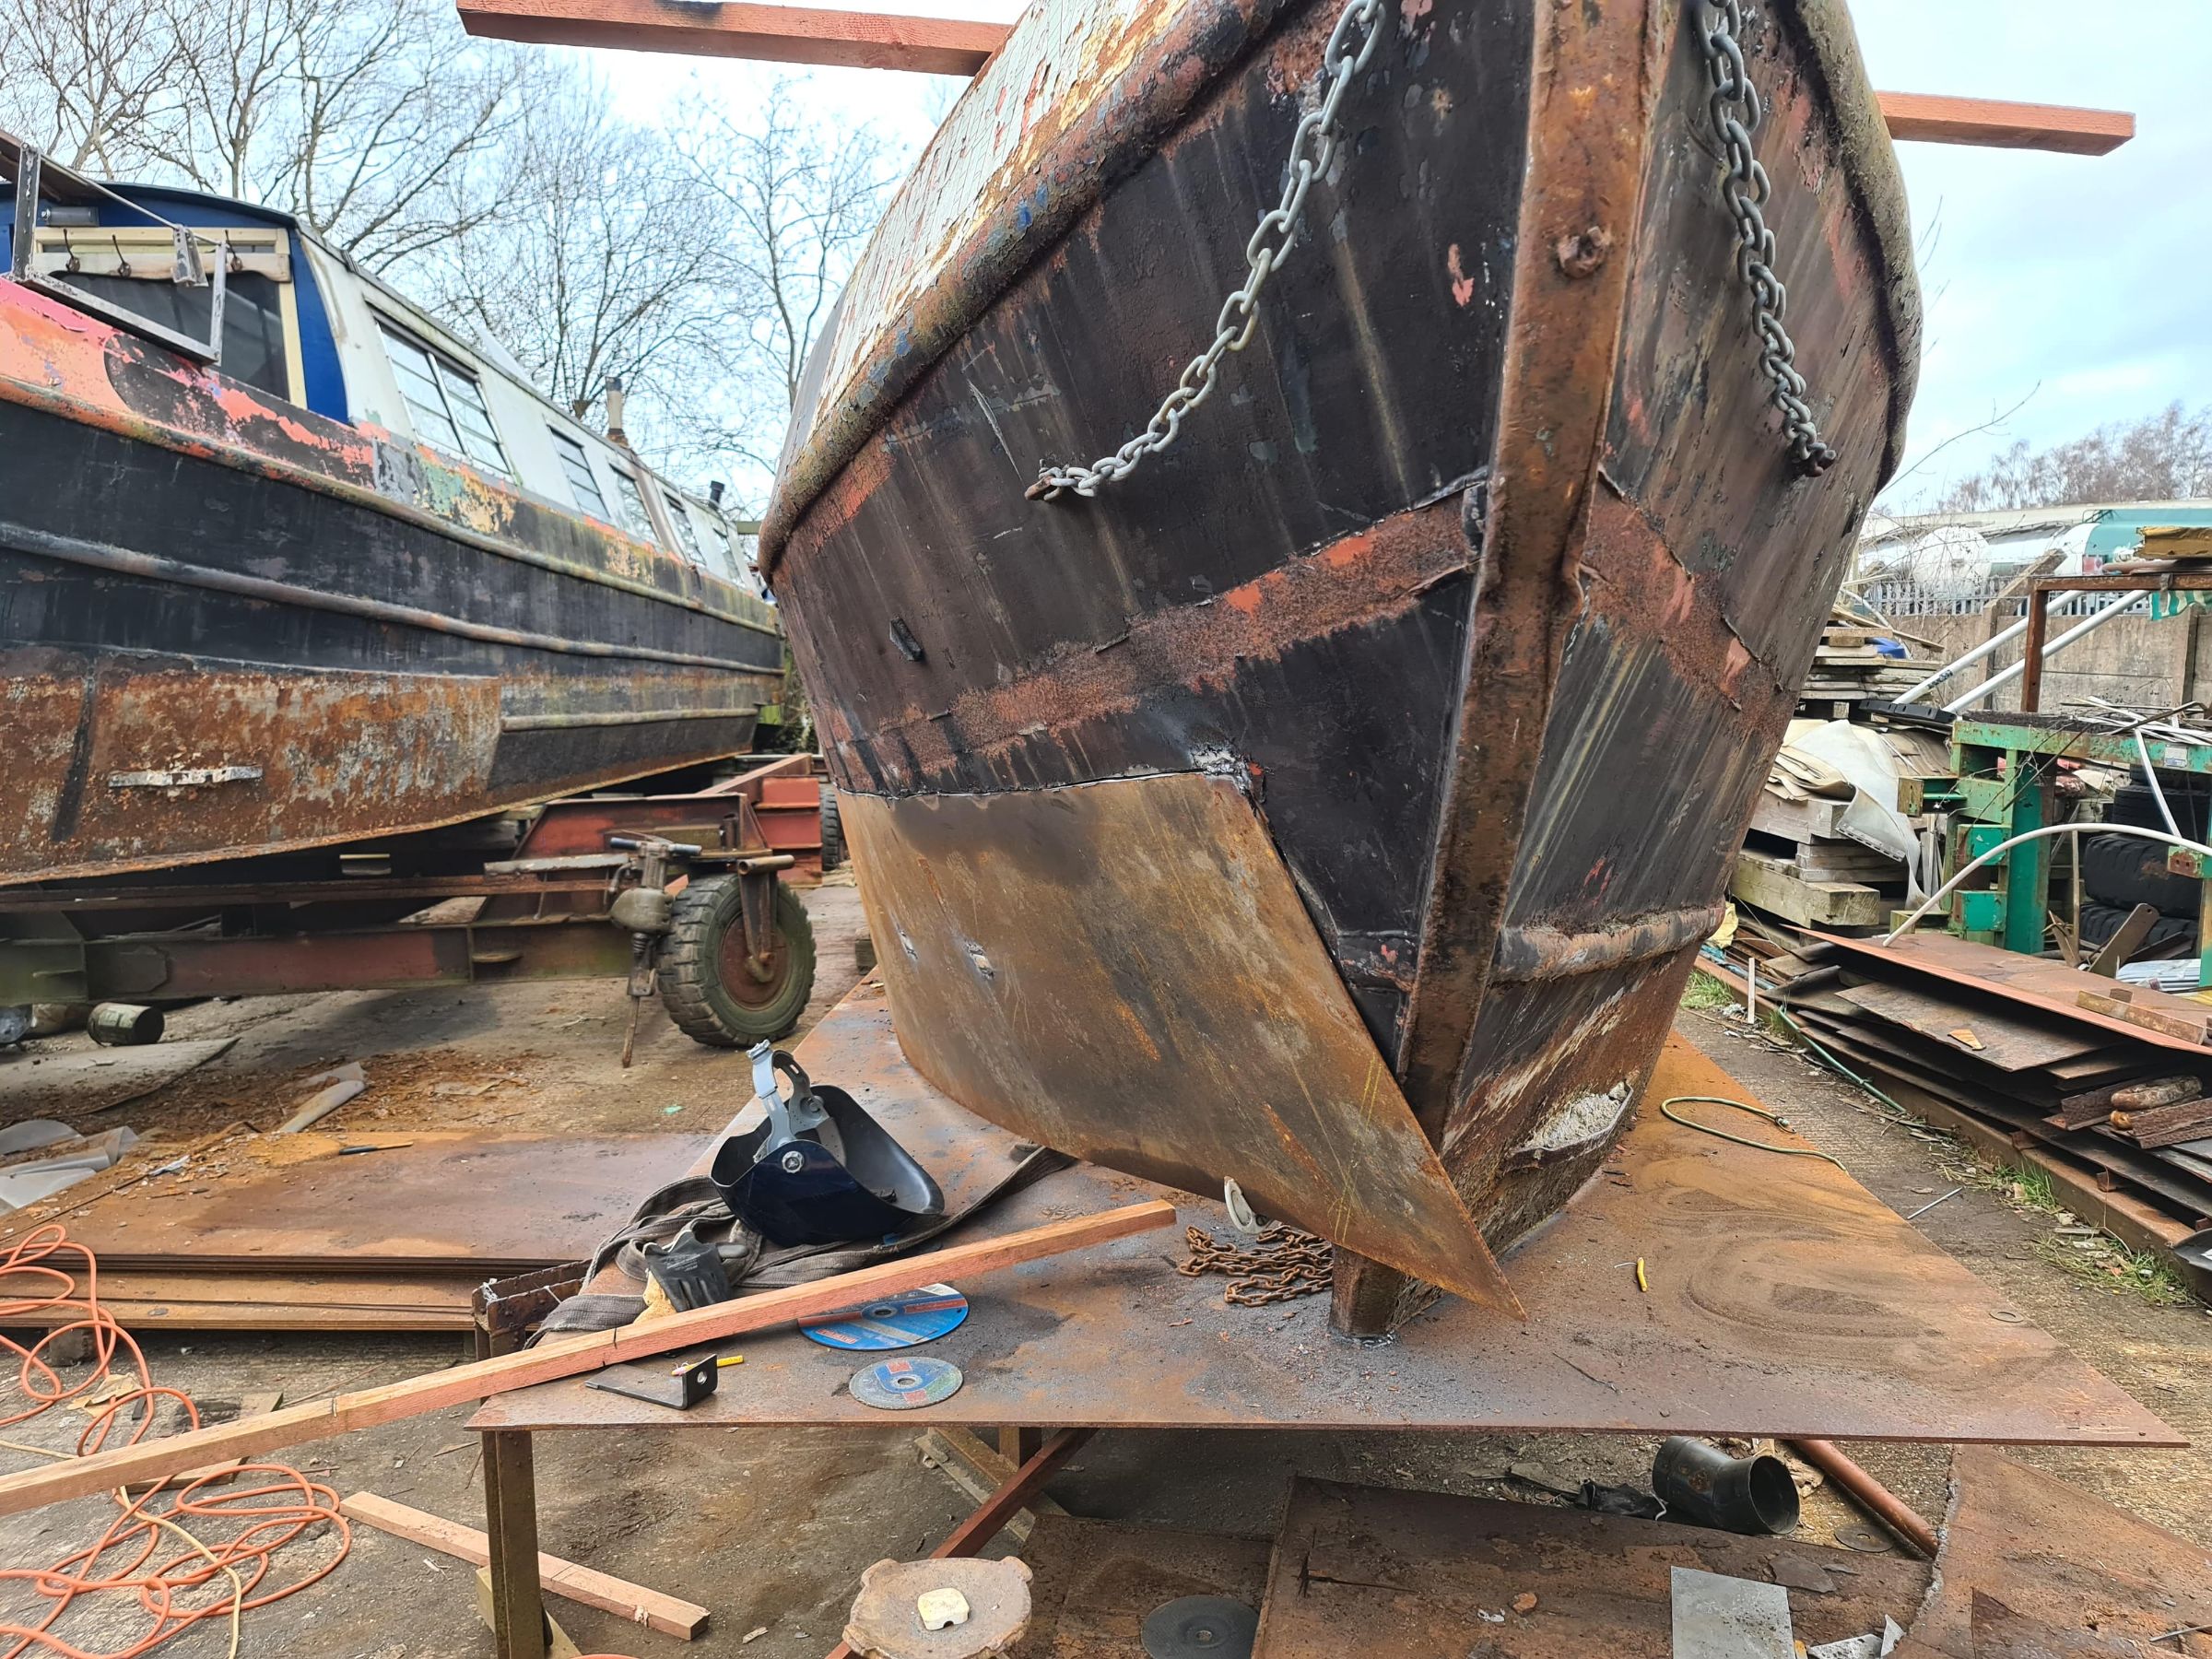
If you continue running the grinder along the top of the sheet then eventually you reach the stem bar. At that point you should stop, and your work should look something like this
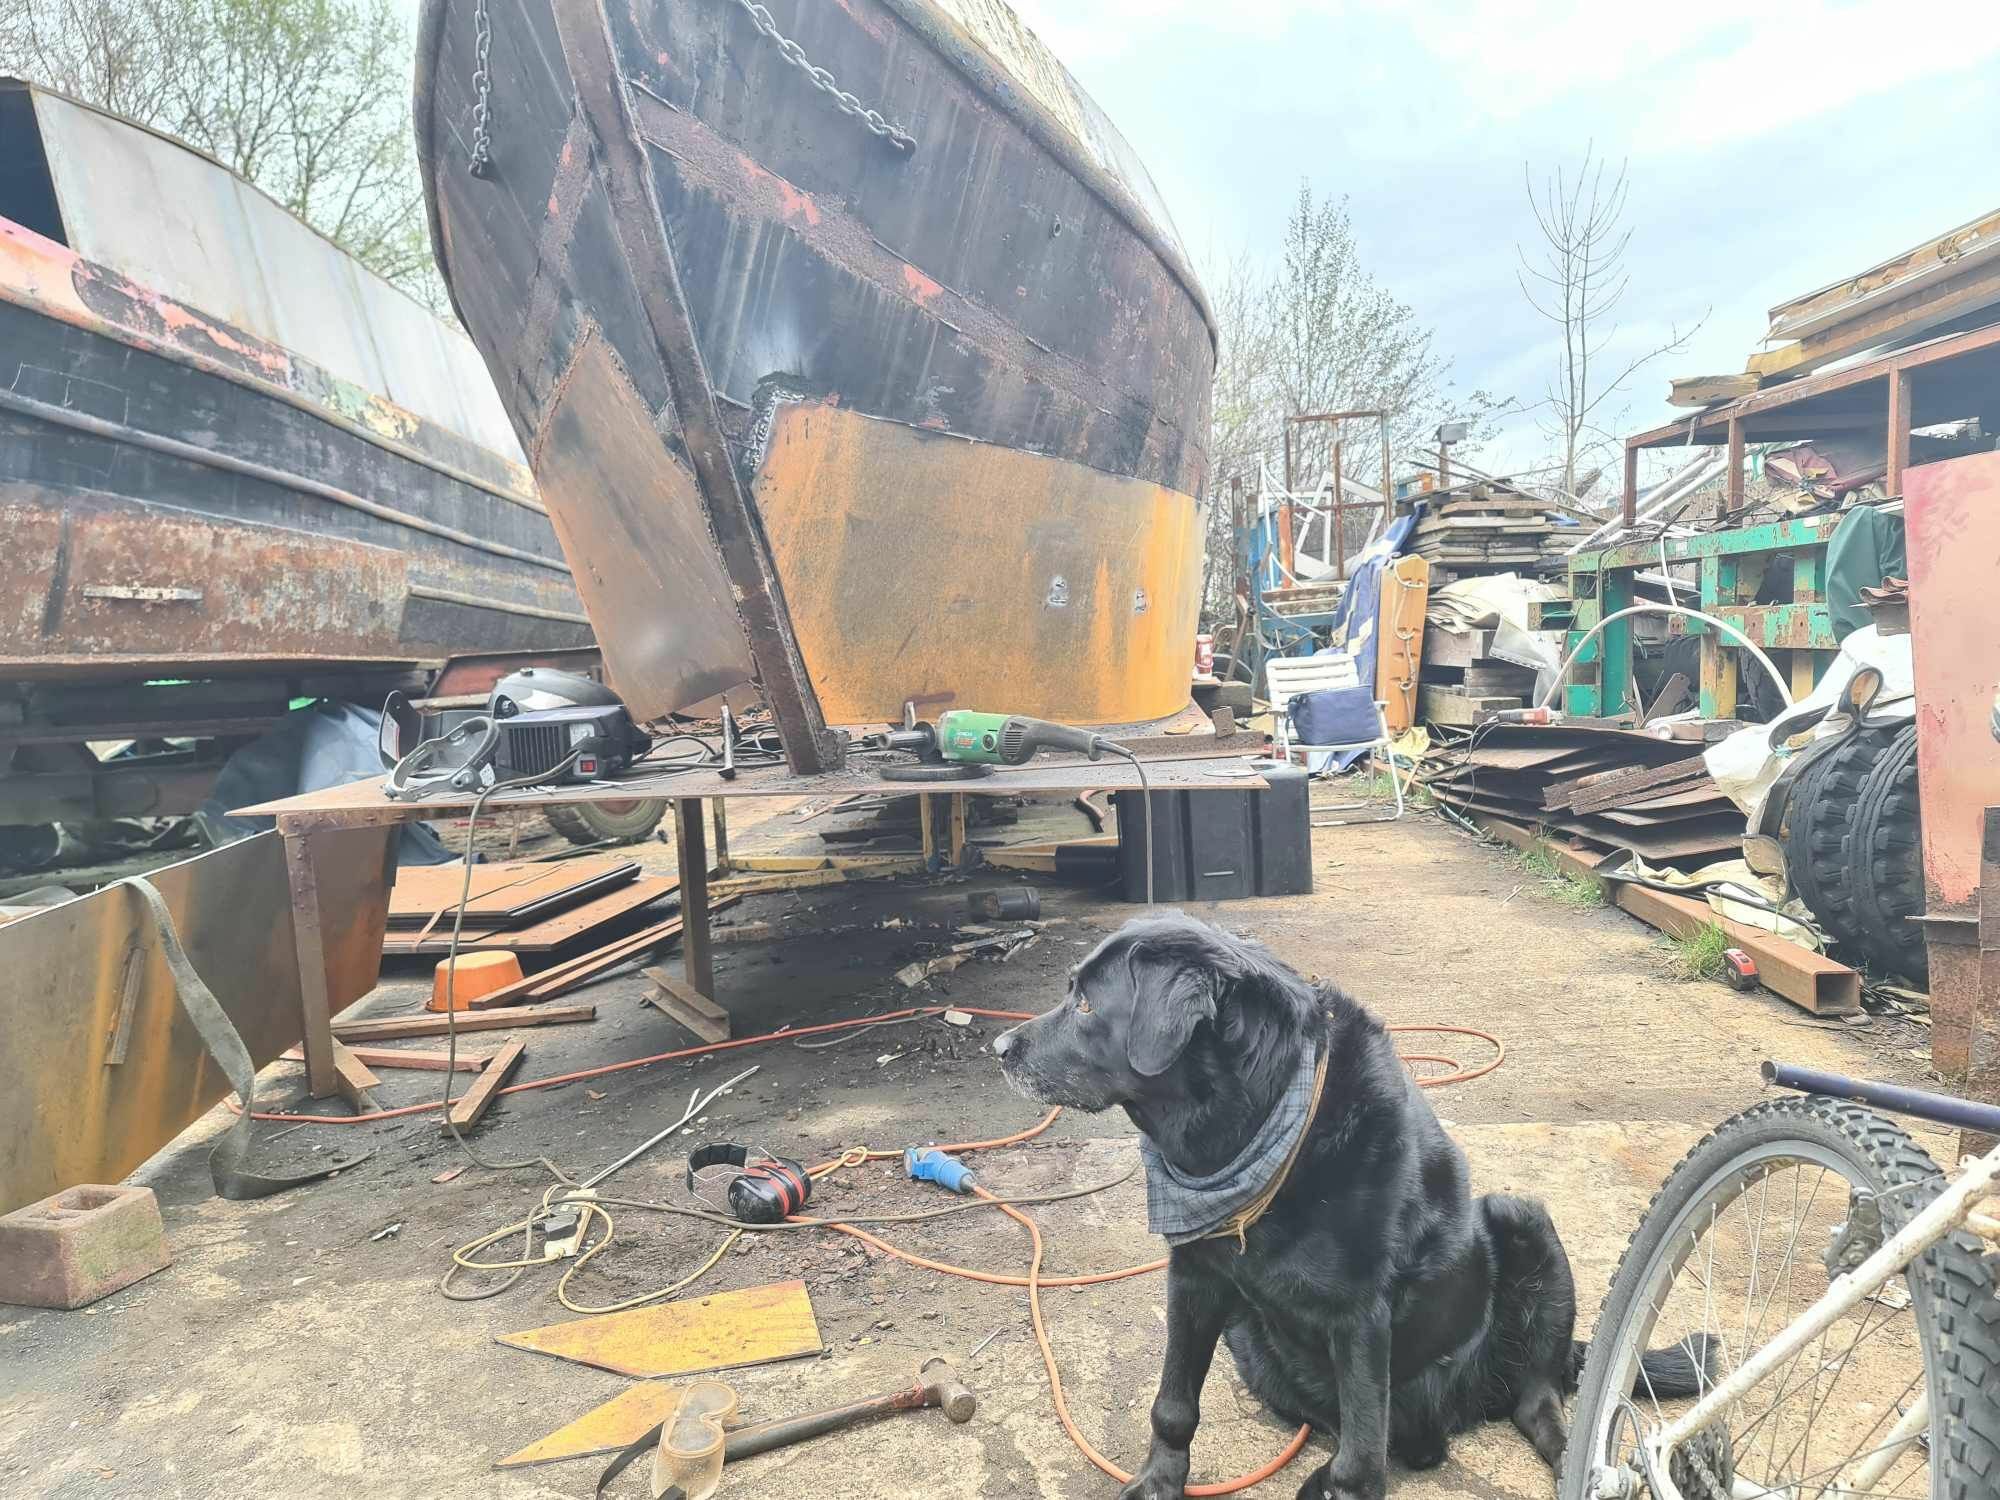
At which point simply trace a line off the stem bar, cut down it, pull the bottom in and job done! I'll seam weld this up soon, but I was fortunate enough to have "the apprentice" helping out (My dad) and it's not the most entertaining thing to stand around and watch someone wave sparklers about, so we went to the pub.
The observant among you will note a gaping triangular hole under the plate, this forms naturally when the plate bends round. Originally the shell builder filled this in to give a flat baseplate, and this was my plan, however another way of doing it is to jack the baseplate up to meet it. Seeing how rusty the bottom 2" of the stem bar was sealed the deal for me, and i'll be bringing the baseplate up once i've done the other side. A lot of boats are done like this, i've a sneaky suspicion it might make more wash but if it's really terrible it would be easy enough to rework at a later date as there will only be water tank behind it.
-
1
-
-
1 hour ago, Bee said:
Bl***y H**l!!!!! What've you done to it now!!! Ten out of ten for courage! Actually, filling that hole in could be awkward, You might find that making a hardboard template or two from the existing side could make the job easier but I would hesitate to offer any advice to someone who clearly is tackling something that would scare the pants off me.
I promise you, it's really easy. Let me show you how...
With the top left corner of the sheet tacked in, the bottom of the sheet could then be pulled in to match the bottom of the hull side where it meets the baseplate. This was done (as ever) by welding an eyelet on the inside and pulling it into shape with a chain hoist, then tack it into place
With that in place the front of the sheet can then be pulled round the existing bow, and used as a ruler to run a grinder along to ensure the plate fits spot on. The original hole is deliberately undersized and is effectively just cut for access. You'd be stunned at how little force it took to bend it, I could get it most of the way round by simply leaning on it.
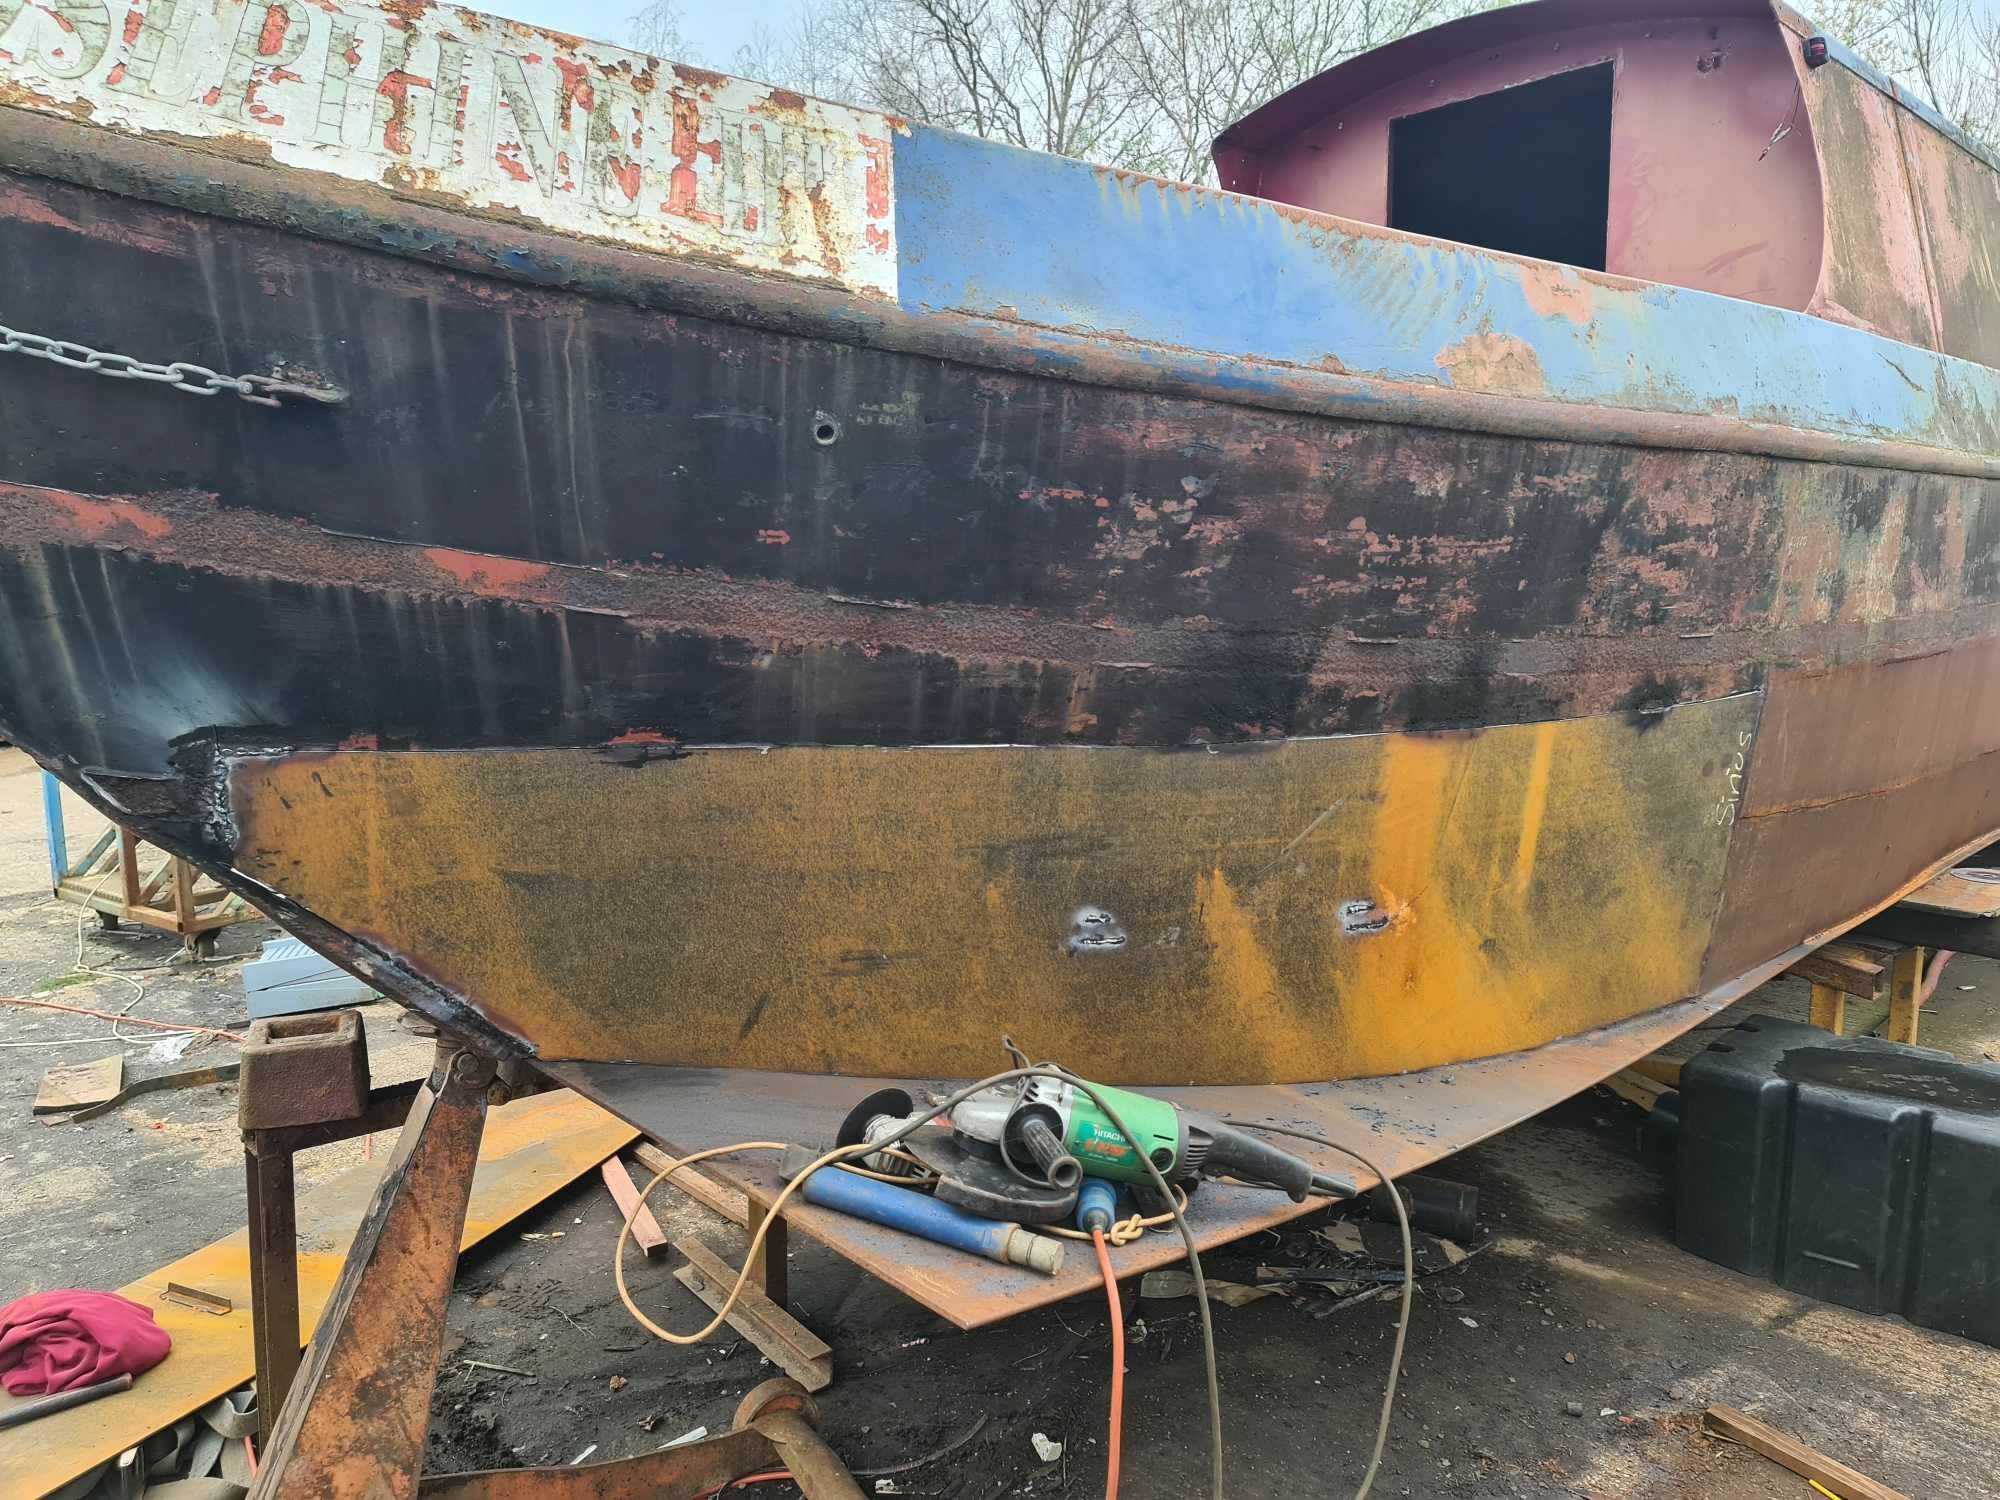
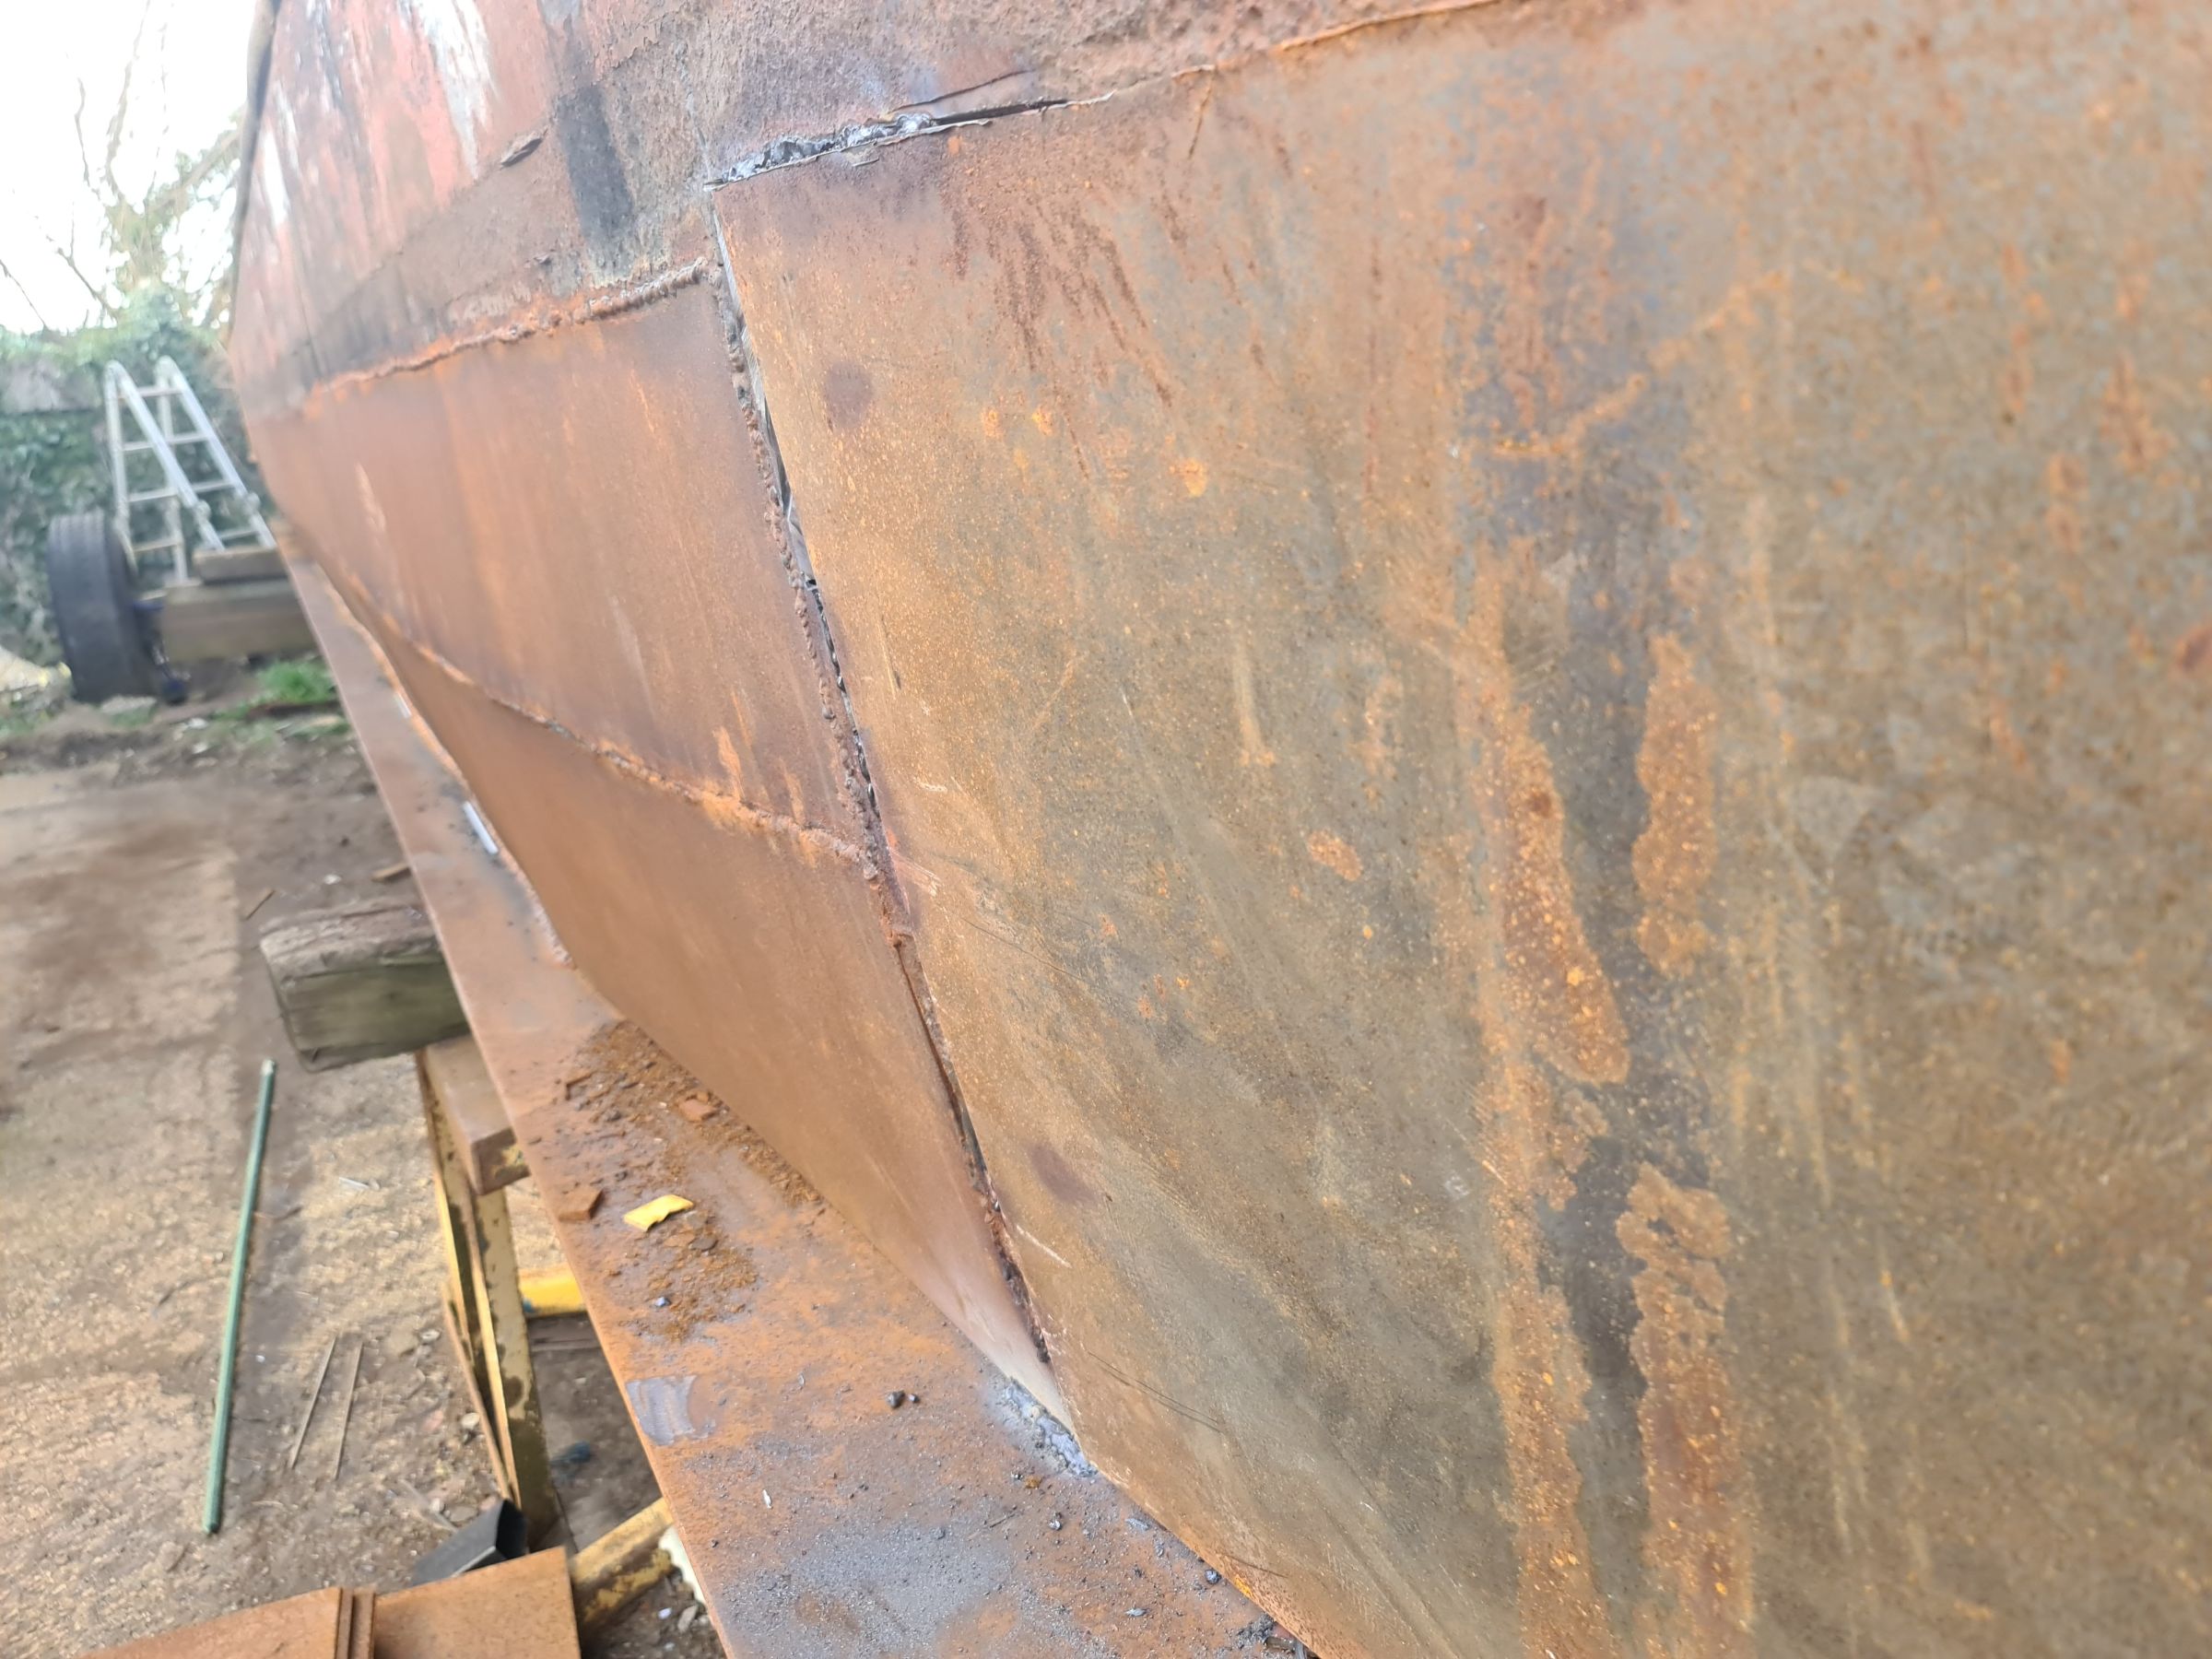
When the grinder has been run along it a pretty decent level of fit-up is achieved. Note the pitting above where the new steel is going in. It's a bit annoying but it's well above the waterline, i'm contemplating the best way to fill it in, possibly an epoxy fairing filler, possibly lead loading, open to suggestions
Part 3 soon...
Oh, and the fitment of bridge guards is a non-negotiable yes in my book, they look flippin great and they'll serve a 2nd purpose on the edges of my tug deck (whick you might be able to guess from a background theme in earlier posts...)
(Edited due to weird duplicate)
-
4
-
-
Updates... This will probably be a multi-part update because of the upload limit, so bear with.
1. My friend has bought the boat next door, i'm trying not to get too involved but we'll see how that goes...
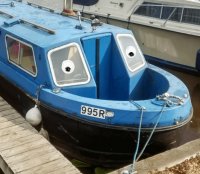
2. I found this MEGA picture of my boat in action as a hire boat with Black Prince from this thread:
(It's the one at the top...) Weirdly it doesn't have its banana irons on in the picture, maybe a spirited hirer had knocked them off?
3. I chopped a big hole in the front then filled it in.
A hole;
Because of the size of the sheet being twice the size of the bits we were putting in by hand we thought it was a good idea to crane it into place rather than try to lift it. I welded an old anode frame onto the sheet and picked it up with the engine crane, which worked very well
The Plate was then welded in its top left corner (as you're looking at it there) and then the manipulation began. Brace for Part 2...
-
2
-
-
Do you want a Dawncraft 32 (would be a centre cockpit and pretty rare) or do you want a Highbridge 32? Highbridges are brilliant boats related to Dawncrafts but of significantly higher quality and built more recently. I happen to know of one that's coming on the market this summer with a particularly nice spec that will be good value for money...
-
1
-
-
Additive manufacture (3D printing) is quite a clever way of making something like this due to the lack of tooling ang mould costs. I keep coming up with various crap ideas about how historic wooden boats could be rebuilt using it, it's essentially possible to print moisture resistant MDF (and of course plastics and metals and composites)
-
On 29/01/2023 at 20:10, MtB said:
And...
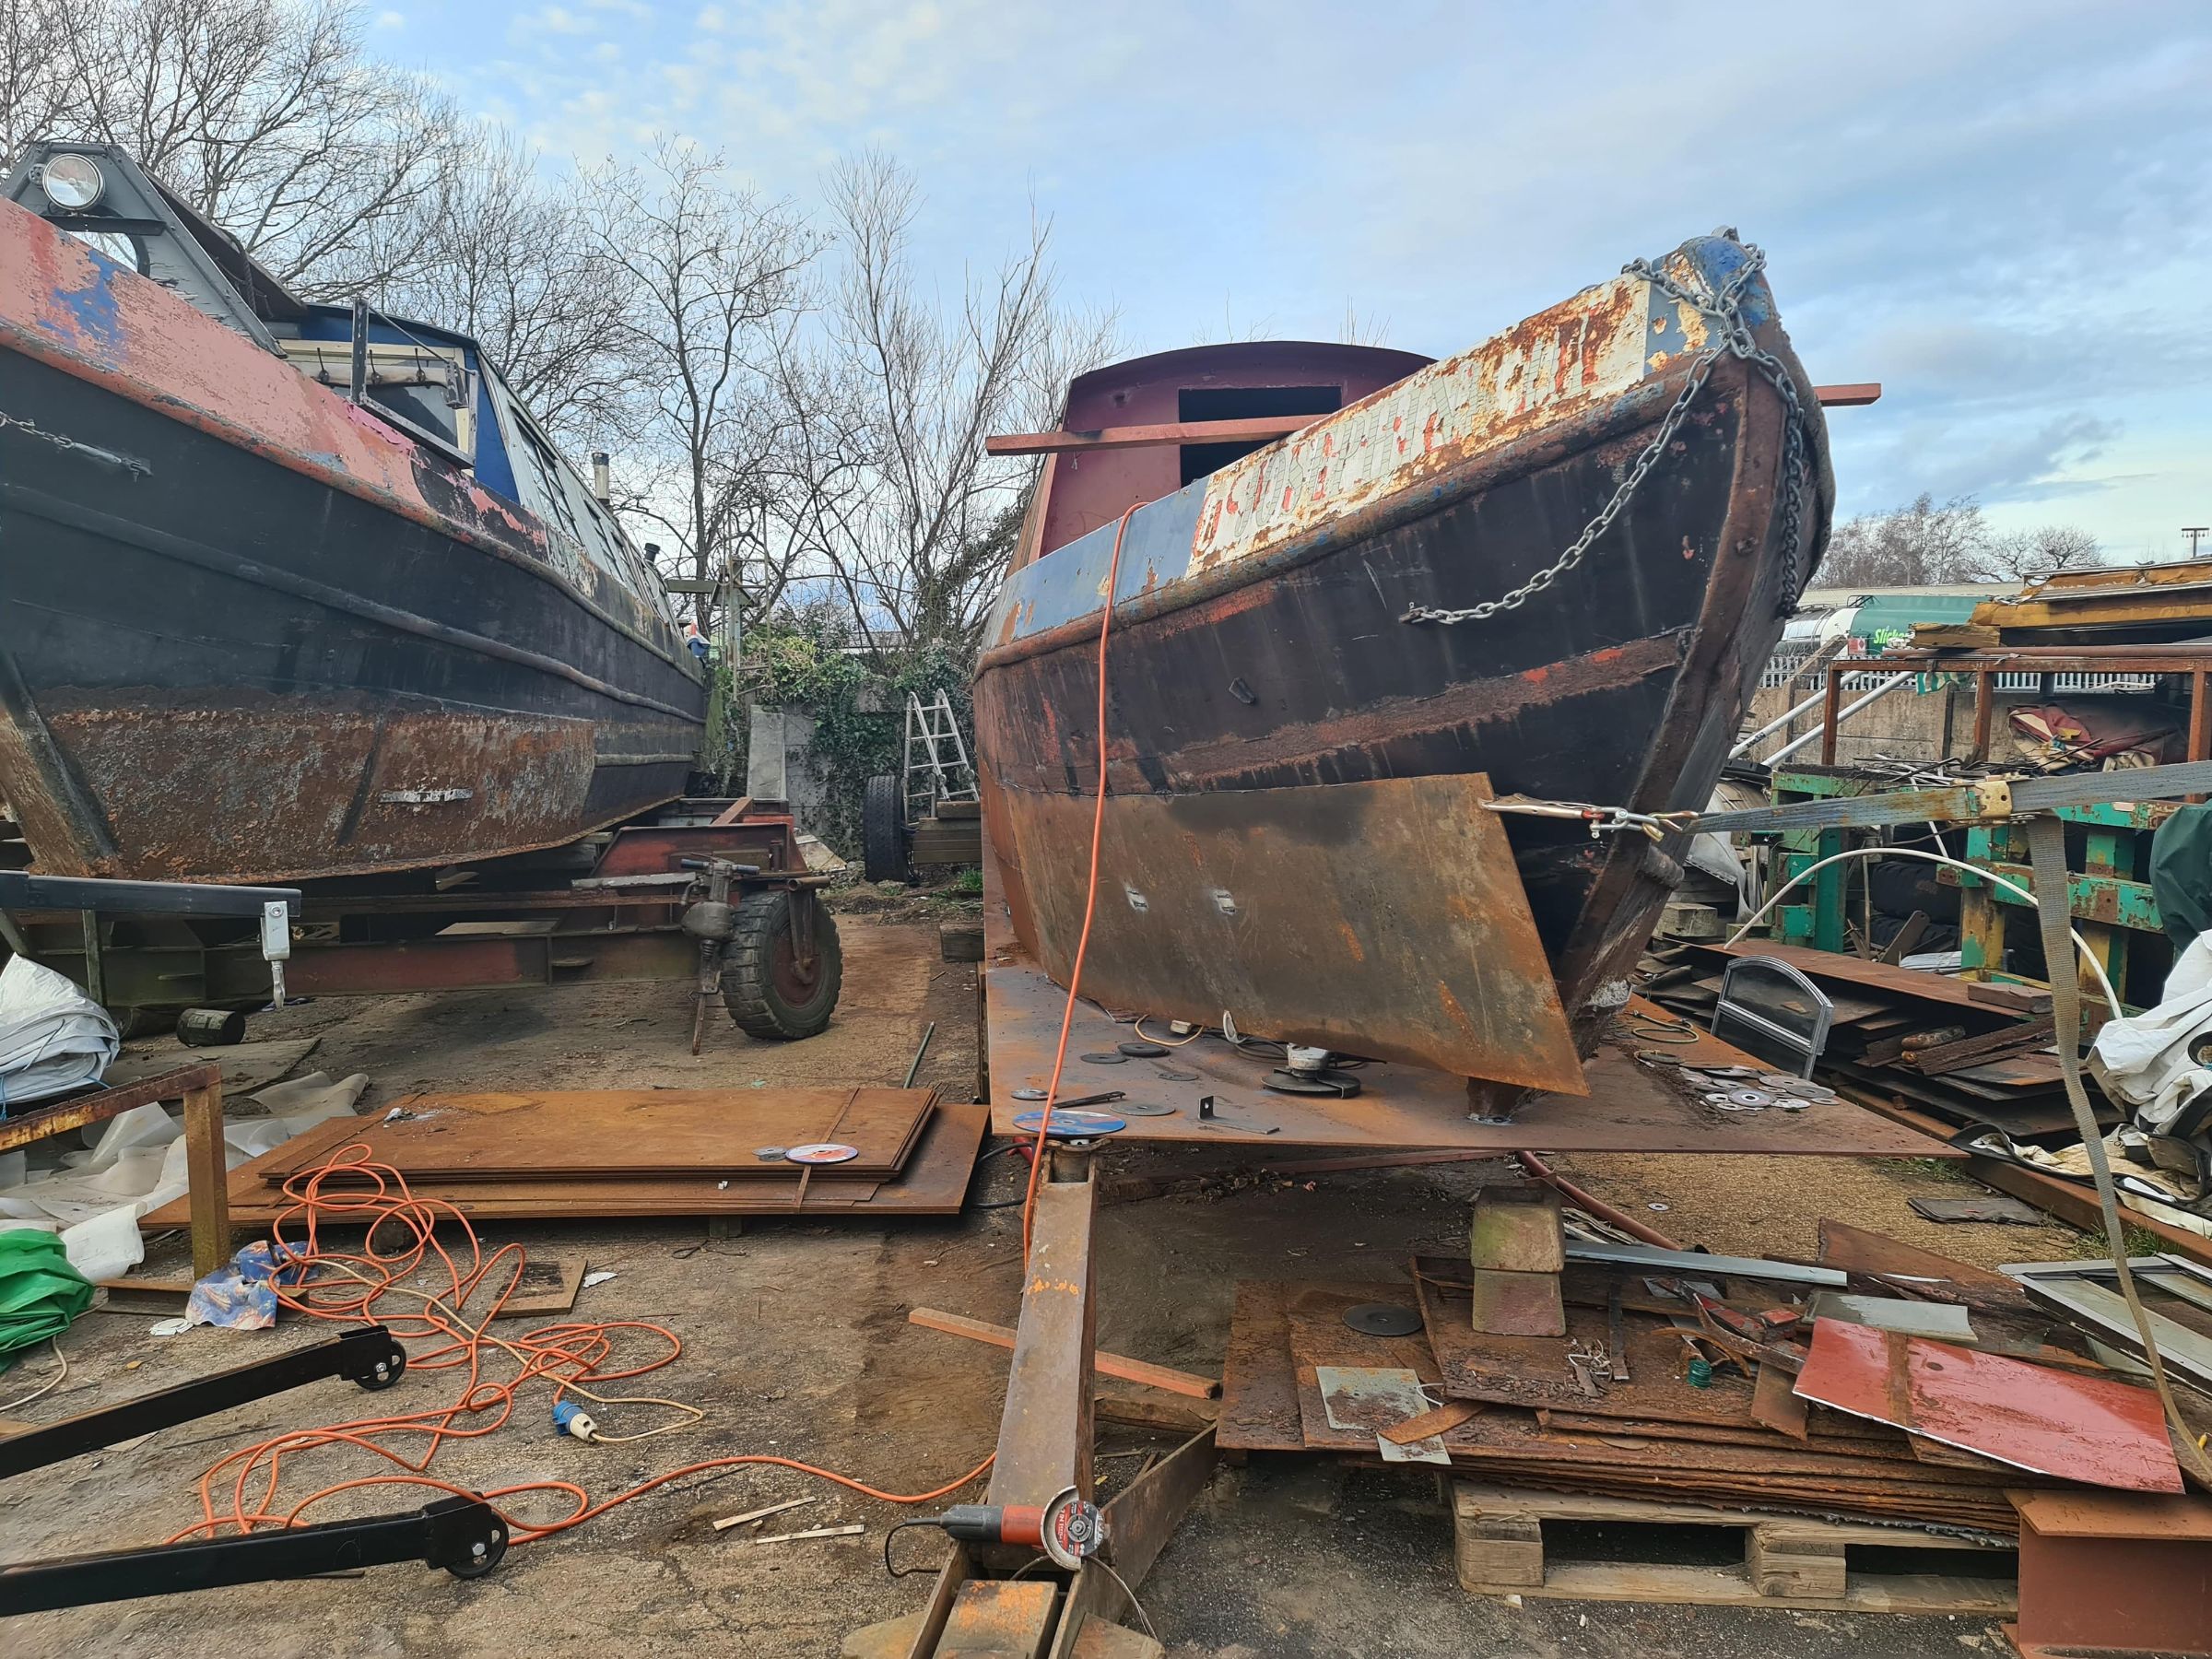
Are you moving on to the that equally interesting-looking Harborough-style boat next to the "Josephine"??!
Not sure it is a Harborough but I recognise that faintly odd way the top bend on the bow widens towards the prow.
If not a Harb, what is it?!
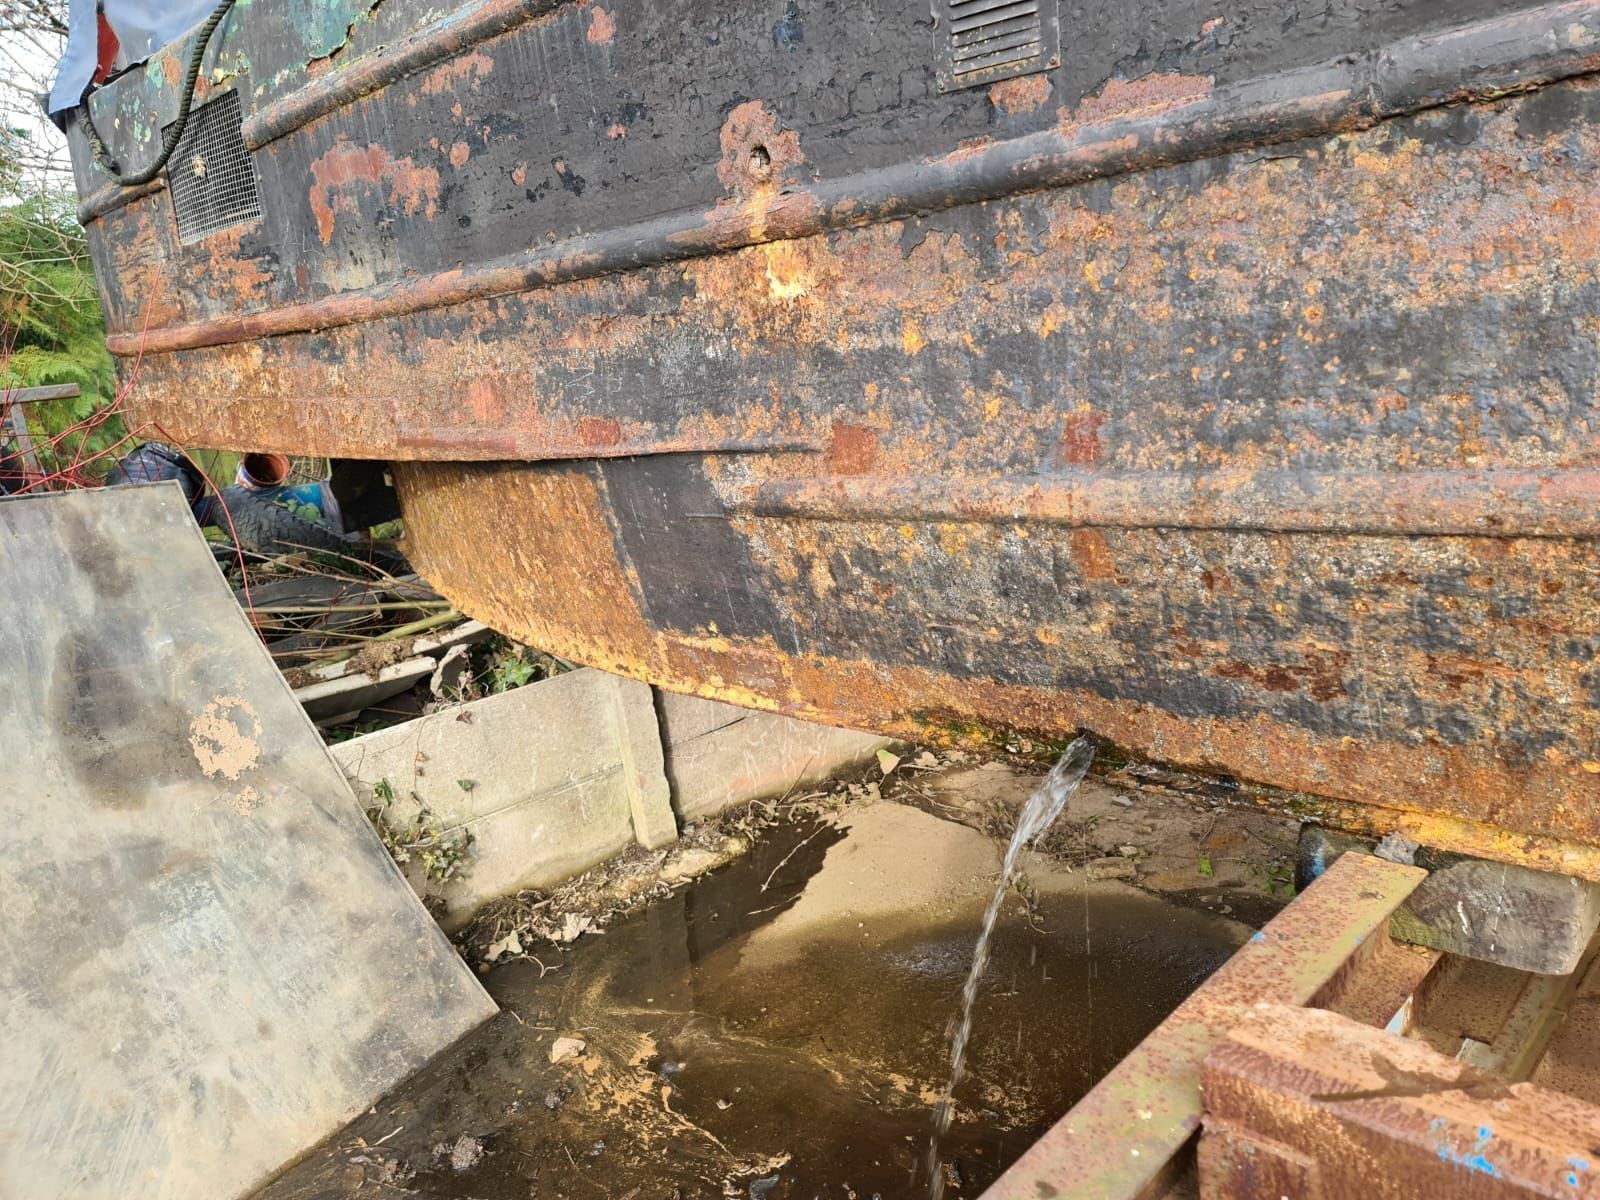
You just had to tempt fate didn't you... A friend is after a project boat currently and came to look at it today, I think he's putting an offer in. It didn't fare well when I hammer tested the hull though...
I'm hoping to not get too involved... Anyway, I did manage to get a bit more done on mine, another 10 or so metres of welding and prep for a couple of weekends time where the front is going to lose its convenient access hole
-
1
-


-min.jpg.87657d24ca5c8640a15b8a738d769264.jpg)
-min(1).jpg.3a30043d80e3f651b7acf09cca4118c4.jpg)
design software?
in Boat Building & Maintenance
Posted
I use Autodesk Fusion 360 professionally and have a reasonably accurate model of my boat on it, if you want the files to modify for yours then please let me know- mine have mainly been used for quantity surveying and working out routes for pipework etc