


Onewheeler
-
Posts
880 -
Joined
-
Last visited
Content Type
Profiles
Forums
Events
Gallery
Blogs
Store
Posts posted by Onewheeler
-
-
4 hours ago, Just Heaven said:
Yes, it will be a bit awkward but it should fit out through the rear doors and slide.
Hi Martin
That's not what I wanted to hear! At 3mm that makes ours about 60 kilo.
We wont be able to lift that out. So I may have to think about cutting it up.
Was yours a particularly messy job ?
Steve
The tank hadn't been used for some years and I like to think that the stuff in the bottom was dry rust. If I'd removed that thoroughly it wouldn't have been too bad for mess.
I reckon that tank was about 85 kg and was in any case too big to go through the engine room hatch. It took about 6 m of linear cut to get it into manhandleable chunks to pass up to the missus. A combination of reciprocating saw and jigsaw did the business, both needed as only one or the other could access some areas.
Took about 3 or 4 hours work. A lot of dust from the rust or whatever but not too bad for metal swarf or filings.
If anyone wants my leesan tank it's 40 cm h x 60 x 90.
Martin/
-
The one I cut up recently on our mainland boat was 3mm steel.
Martin/
ps I've got a leesan polyethylene tank taken out of the uk boat looking for a good home
-
6 hours ago, Dr Bob said:
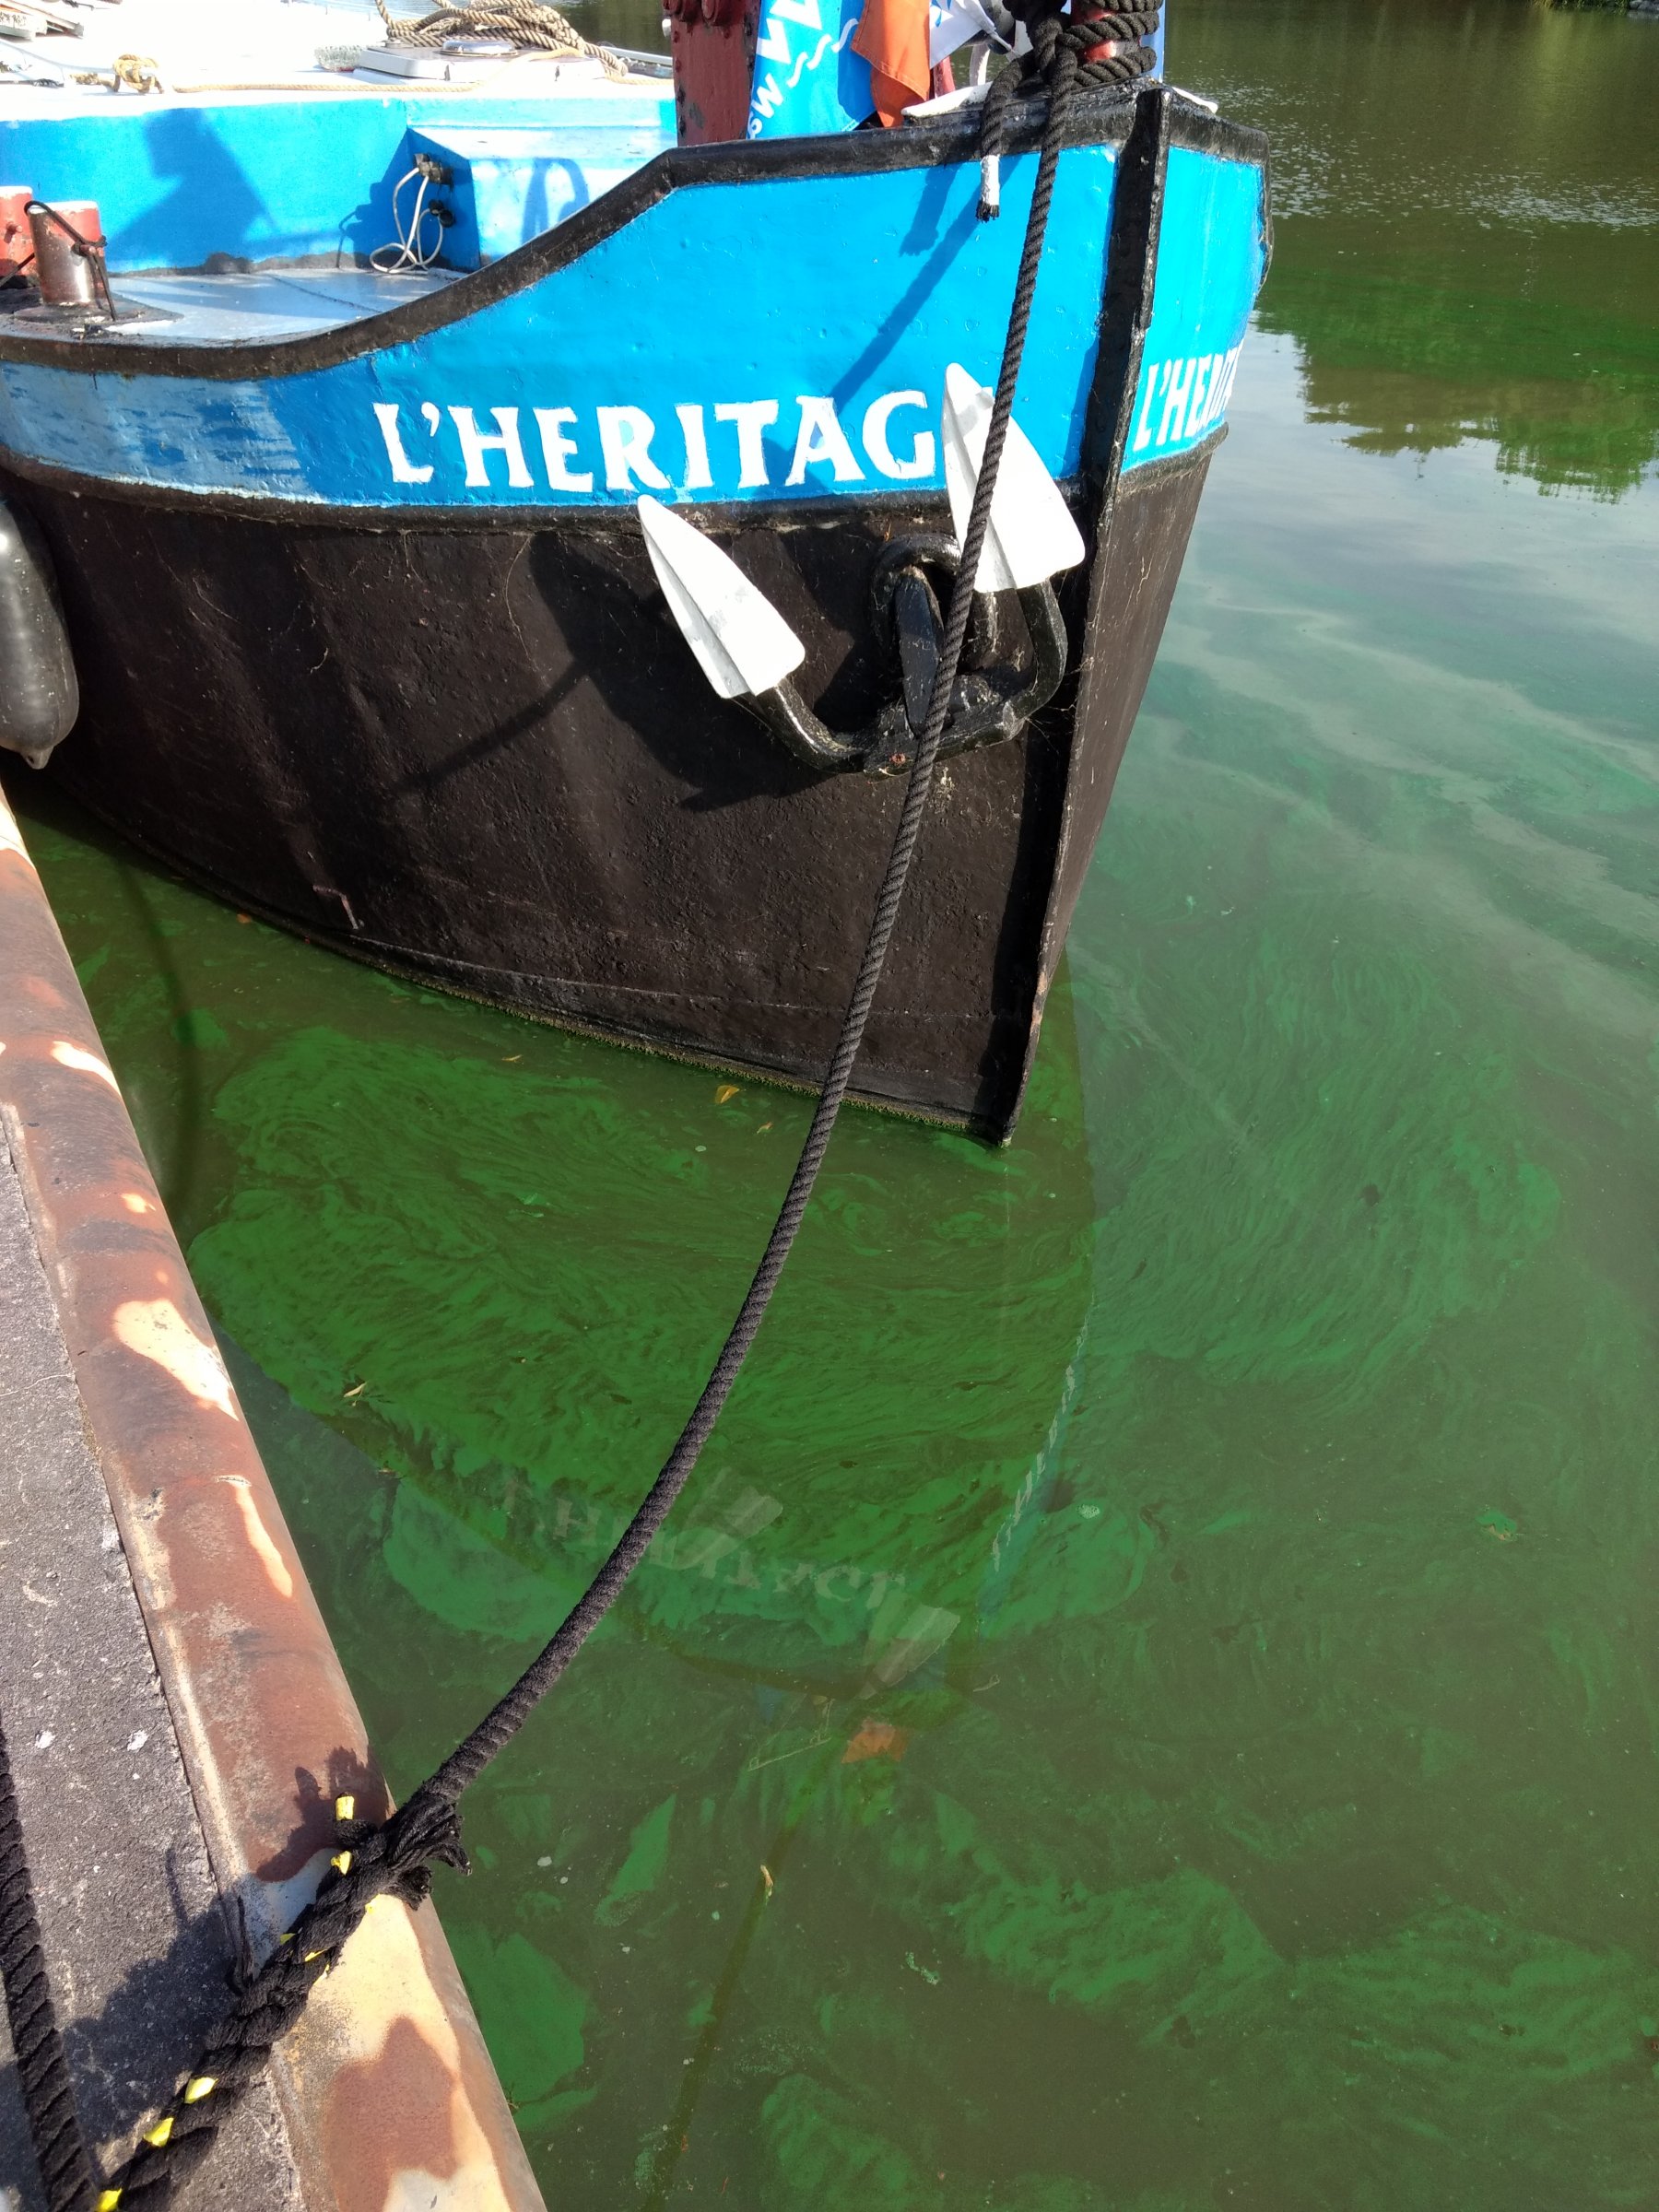
Certainly looks like it. Where are you? I will go the other way! Not nice stuff. Don't let dogs swim in it.
Reckon it is then. Rather disconcerting to see it in such quantity. Kids swimming in it, water skiers etc. Canal Roeselare - Leie, BE.
Martin/
-
Is this stuff blue green algae or something else. I thought we'd sailed into a fluorescein spill. Had to clean a bright green scumline from the toilet flush.

-
7 hours ago, koukouvagia said:
I've discovered this: https://www.amazon.co.uk/dp/B007WMHZQ6/?source=ps-sl-shoppingads-lpcontext&psc=1
It requires no hole in the tank, no 12v supply and costs peanuts.
It measures the volume of water consumed. So I know when it reads 250 litres, it's time to fill up.
I've got two of them, one for each boat. They are jolly good. They also work installed the wrong way round, which can make fewer adaptors necessary. Now in a competition with the missus as to who uses the least water when showering. She's winning with 2.4 L, but she is smaller than me. However, she did point out that she has two bottoms to wash.
Martin/
-
 1
1
-
-
How does the examiner know what sort of threads or olives are used without dismantling the joint?
-
Also worth checking that your prop is properly matched to engine and drive chain. I think that engine should be topping out at about 3000 rpm under load but the manual will tell you. About 10 - 15% less than no-load max. It made a lot of difference to my engine when I replaced the over-large prop.
Martin/
-
1 hour ago, OldGoat said:
Umm - your original question was how to remove the tiller arm? Now you've moved to 'bearing'...
There is a bearing and it's in the plumber block (that's not the right term as it's really an end bearing block and is should hold a (possibly) sealed bearing - which is what the grease nipple is for. These get quite wet, so I hope it's still intact (mine wasn't) so bung a lot of water resistant grease into it - the same as you should be using in your stern tube greaser (unless you've got one of those fancy Vetus eater type ones)
Just saying...
Nope, the original question was someone else's. The "bearing" in mine appears to be a crude affair of rudder stock in a steel hole and there's no nipple. Rather like David Bowie as Newton the alien in"The Man Who Fell to Earth".
-
I have completely failed to get mine off, despite using big hammers and a three-legged puller. The only plus side is that I'm now fairly sure there's no bearing underneath to replace, and I can get grease in from a grease gun.
-
You could put a small recirc pump on the domestic side, arranged to be on when the engine is running (or under manual control maybe better so you can get HW from a short engine run).
-
8 Bloke with bad aim in the toilet
-
On 16/06/2018 at 15:45, pearley said:
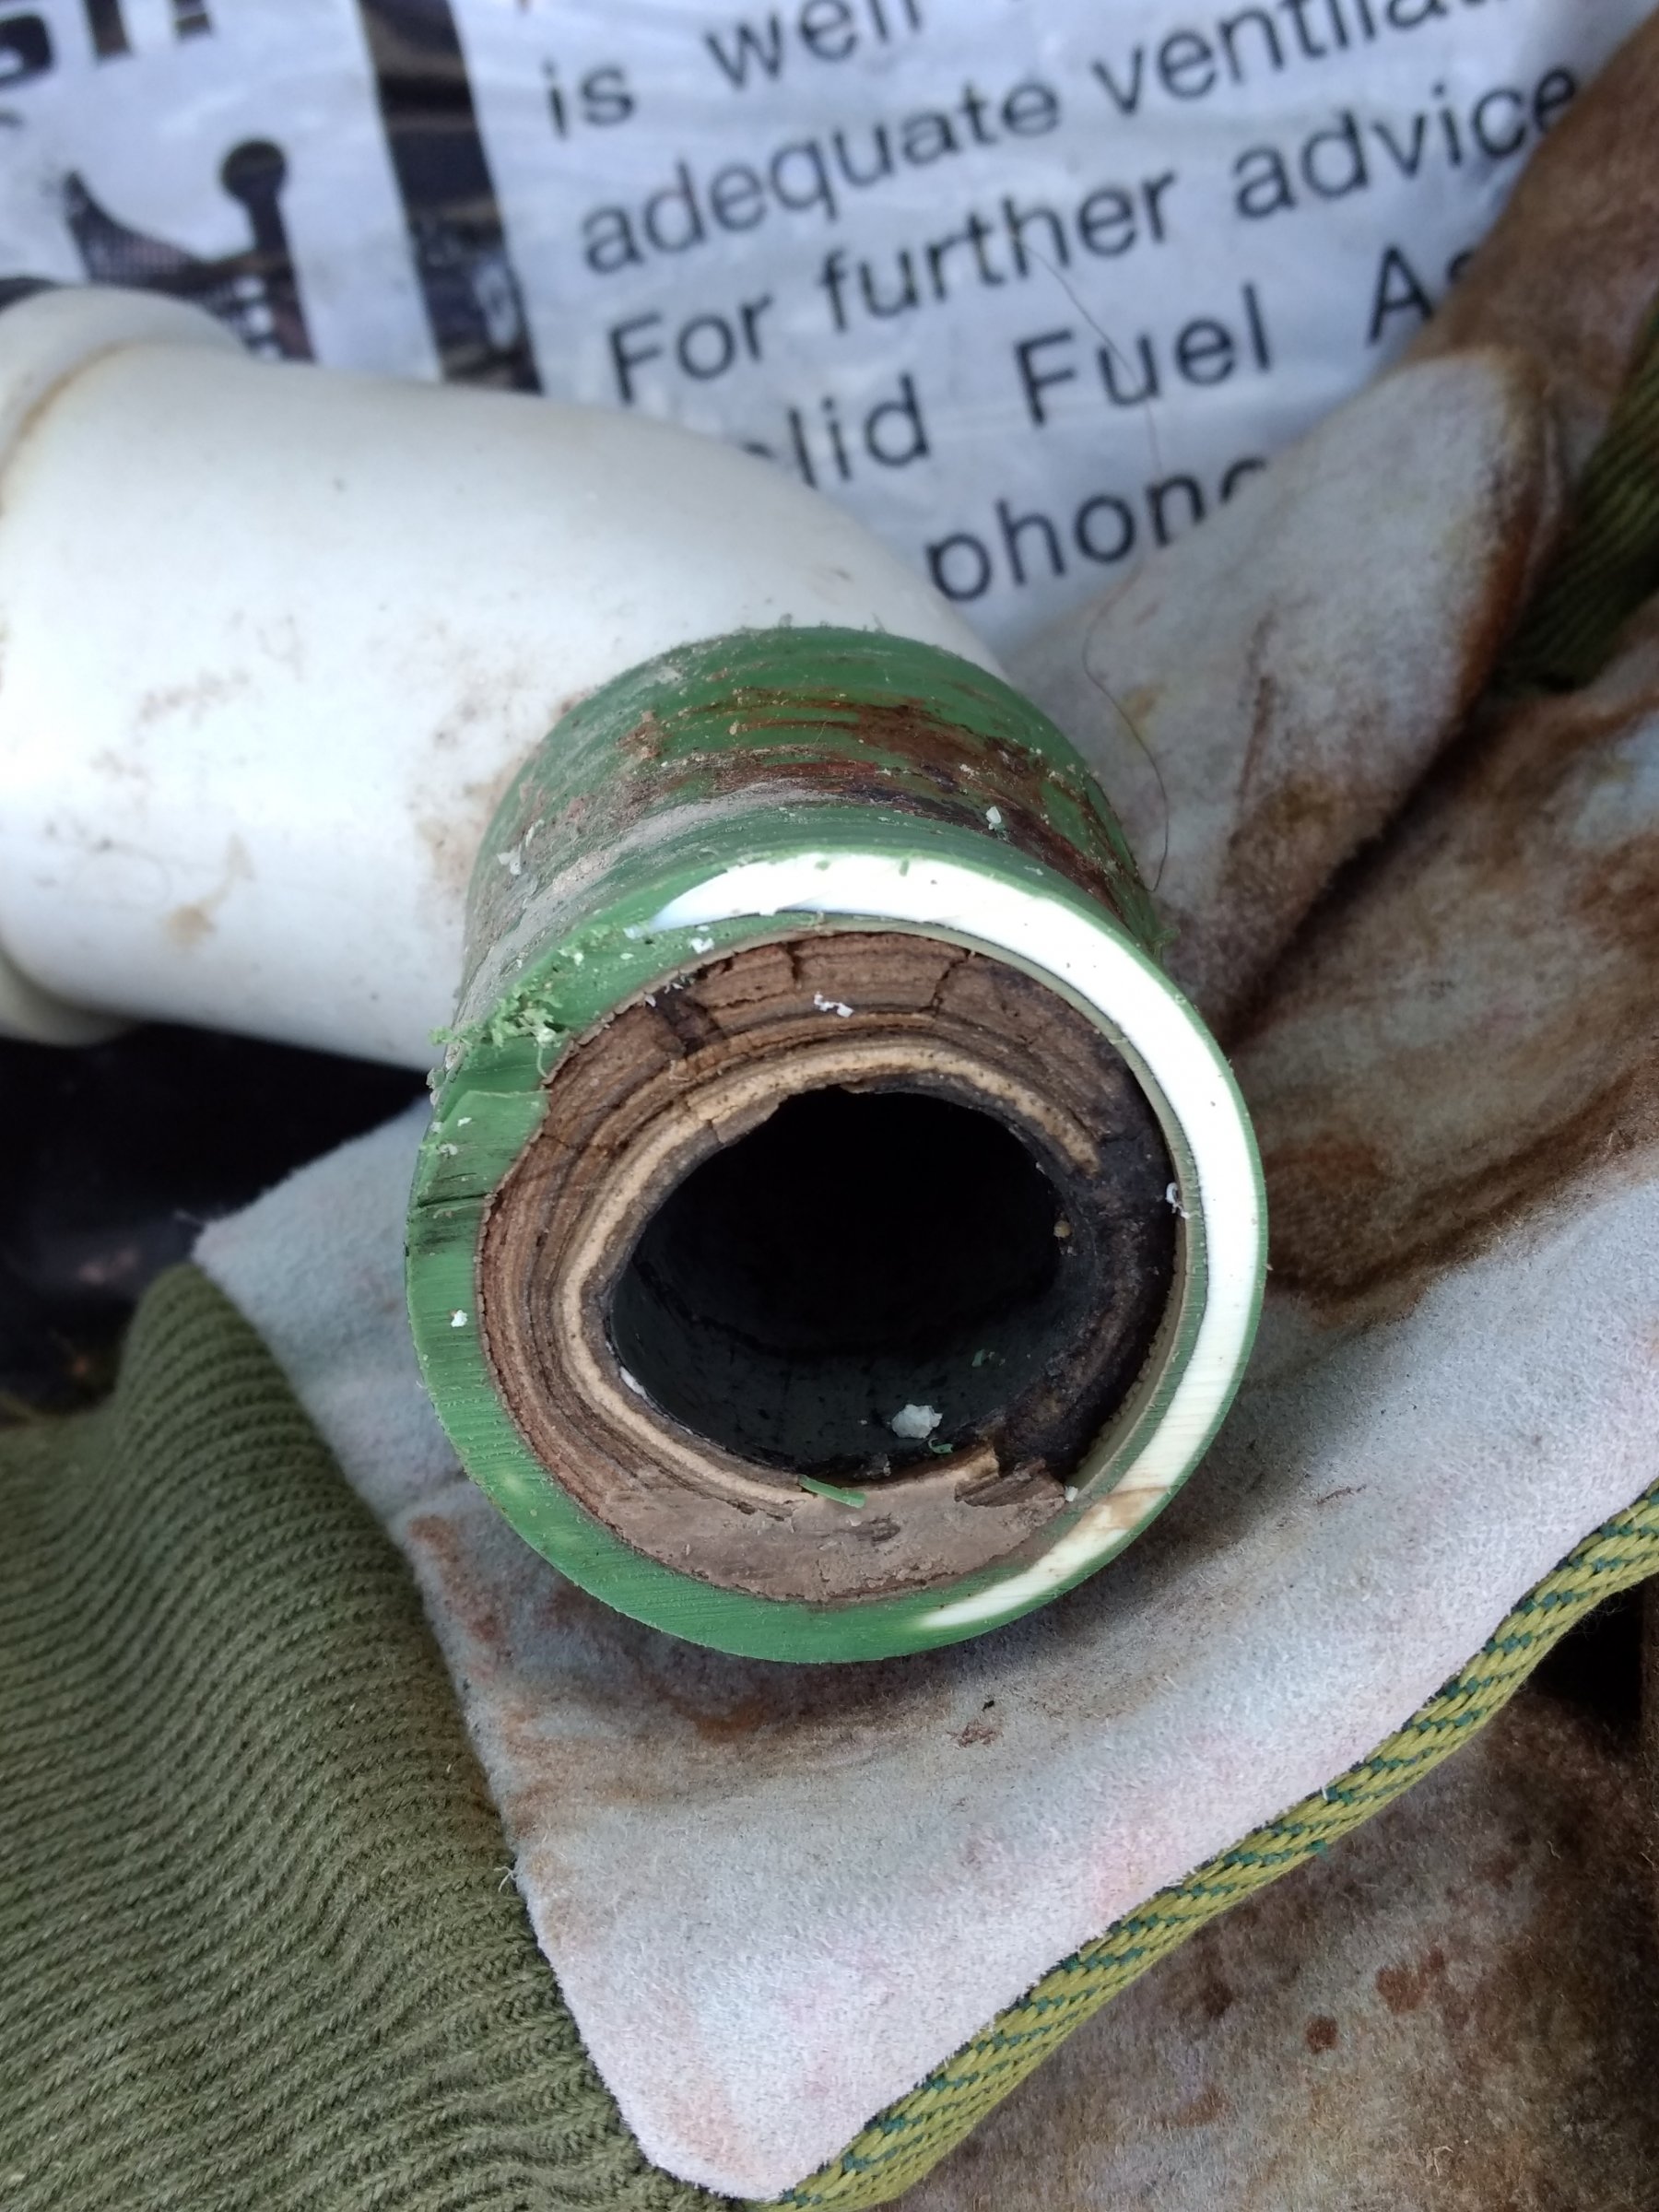
We replaced the pipe on ours last year, when I cut it in half we found it had reduced to less than an inch internally due to limescale, etc build up.
Here's a bit of toilet discharge pipe I took off our mainland boat recently. I guess it had been in use for at least twenty years. The pipe wall thickness is ~ 4 mm, the scale 6 - 8 mm. Some of it had spalled and caused a blockage near where it goes through the seacock.
-
8 hours ago, ditchcrawler said:
I have always moored under the bridge
There's a few feasible places above the Thame entrance (on the Thames) next to a highish wall. The bank is sometimes overgrown but if it's been cleared it's a good spot.
-
From memory there's about 200 m above the lock cut on the left bank with adequate water depth which used to be free and a lovely spot. I'd heard that the land was purchased by a nasty bit of work from UKIP who had put up no mooring signs. Further up looked ok to moor but was on the wrong side of the barbed wire to access Dorchester. That was a couple of years ago.
-
Our ex-oil tanker is about 90 years old and still floating. She usually has a bit of welding when dry docked. It's routine when they get to a certain age. Of more interest should be whether she has been maintained regularly below the water line.
Martin/
-
26 minutes ago, WotEver said:
And for all the other fans of time travel I’ll be holding a meeting last Thursday.
Missed it, but I was at next week's.
-
Thanks Tony. That makes sense. I'll have to drain it if I decide to fit an external immersion which is tempting me, the internal arrangements will become apparent then.
Funny how oddities like that only become apparent when thinking about changing things.
Martin/
-
2 hours ago, Chewbacka said:
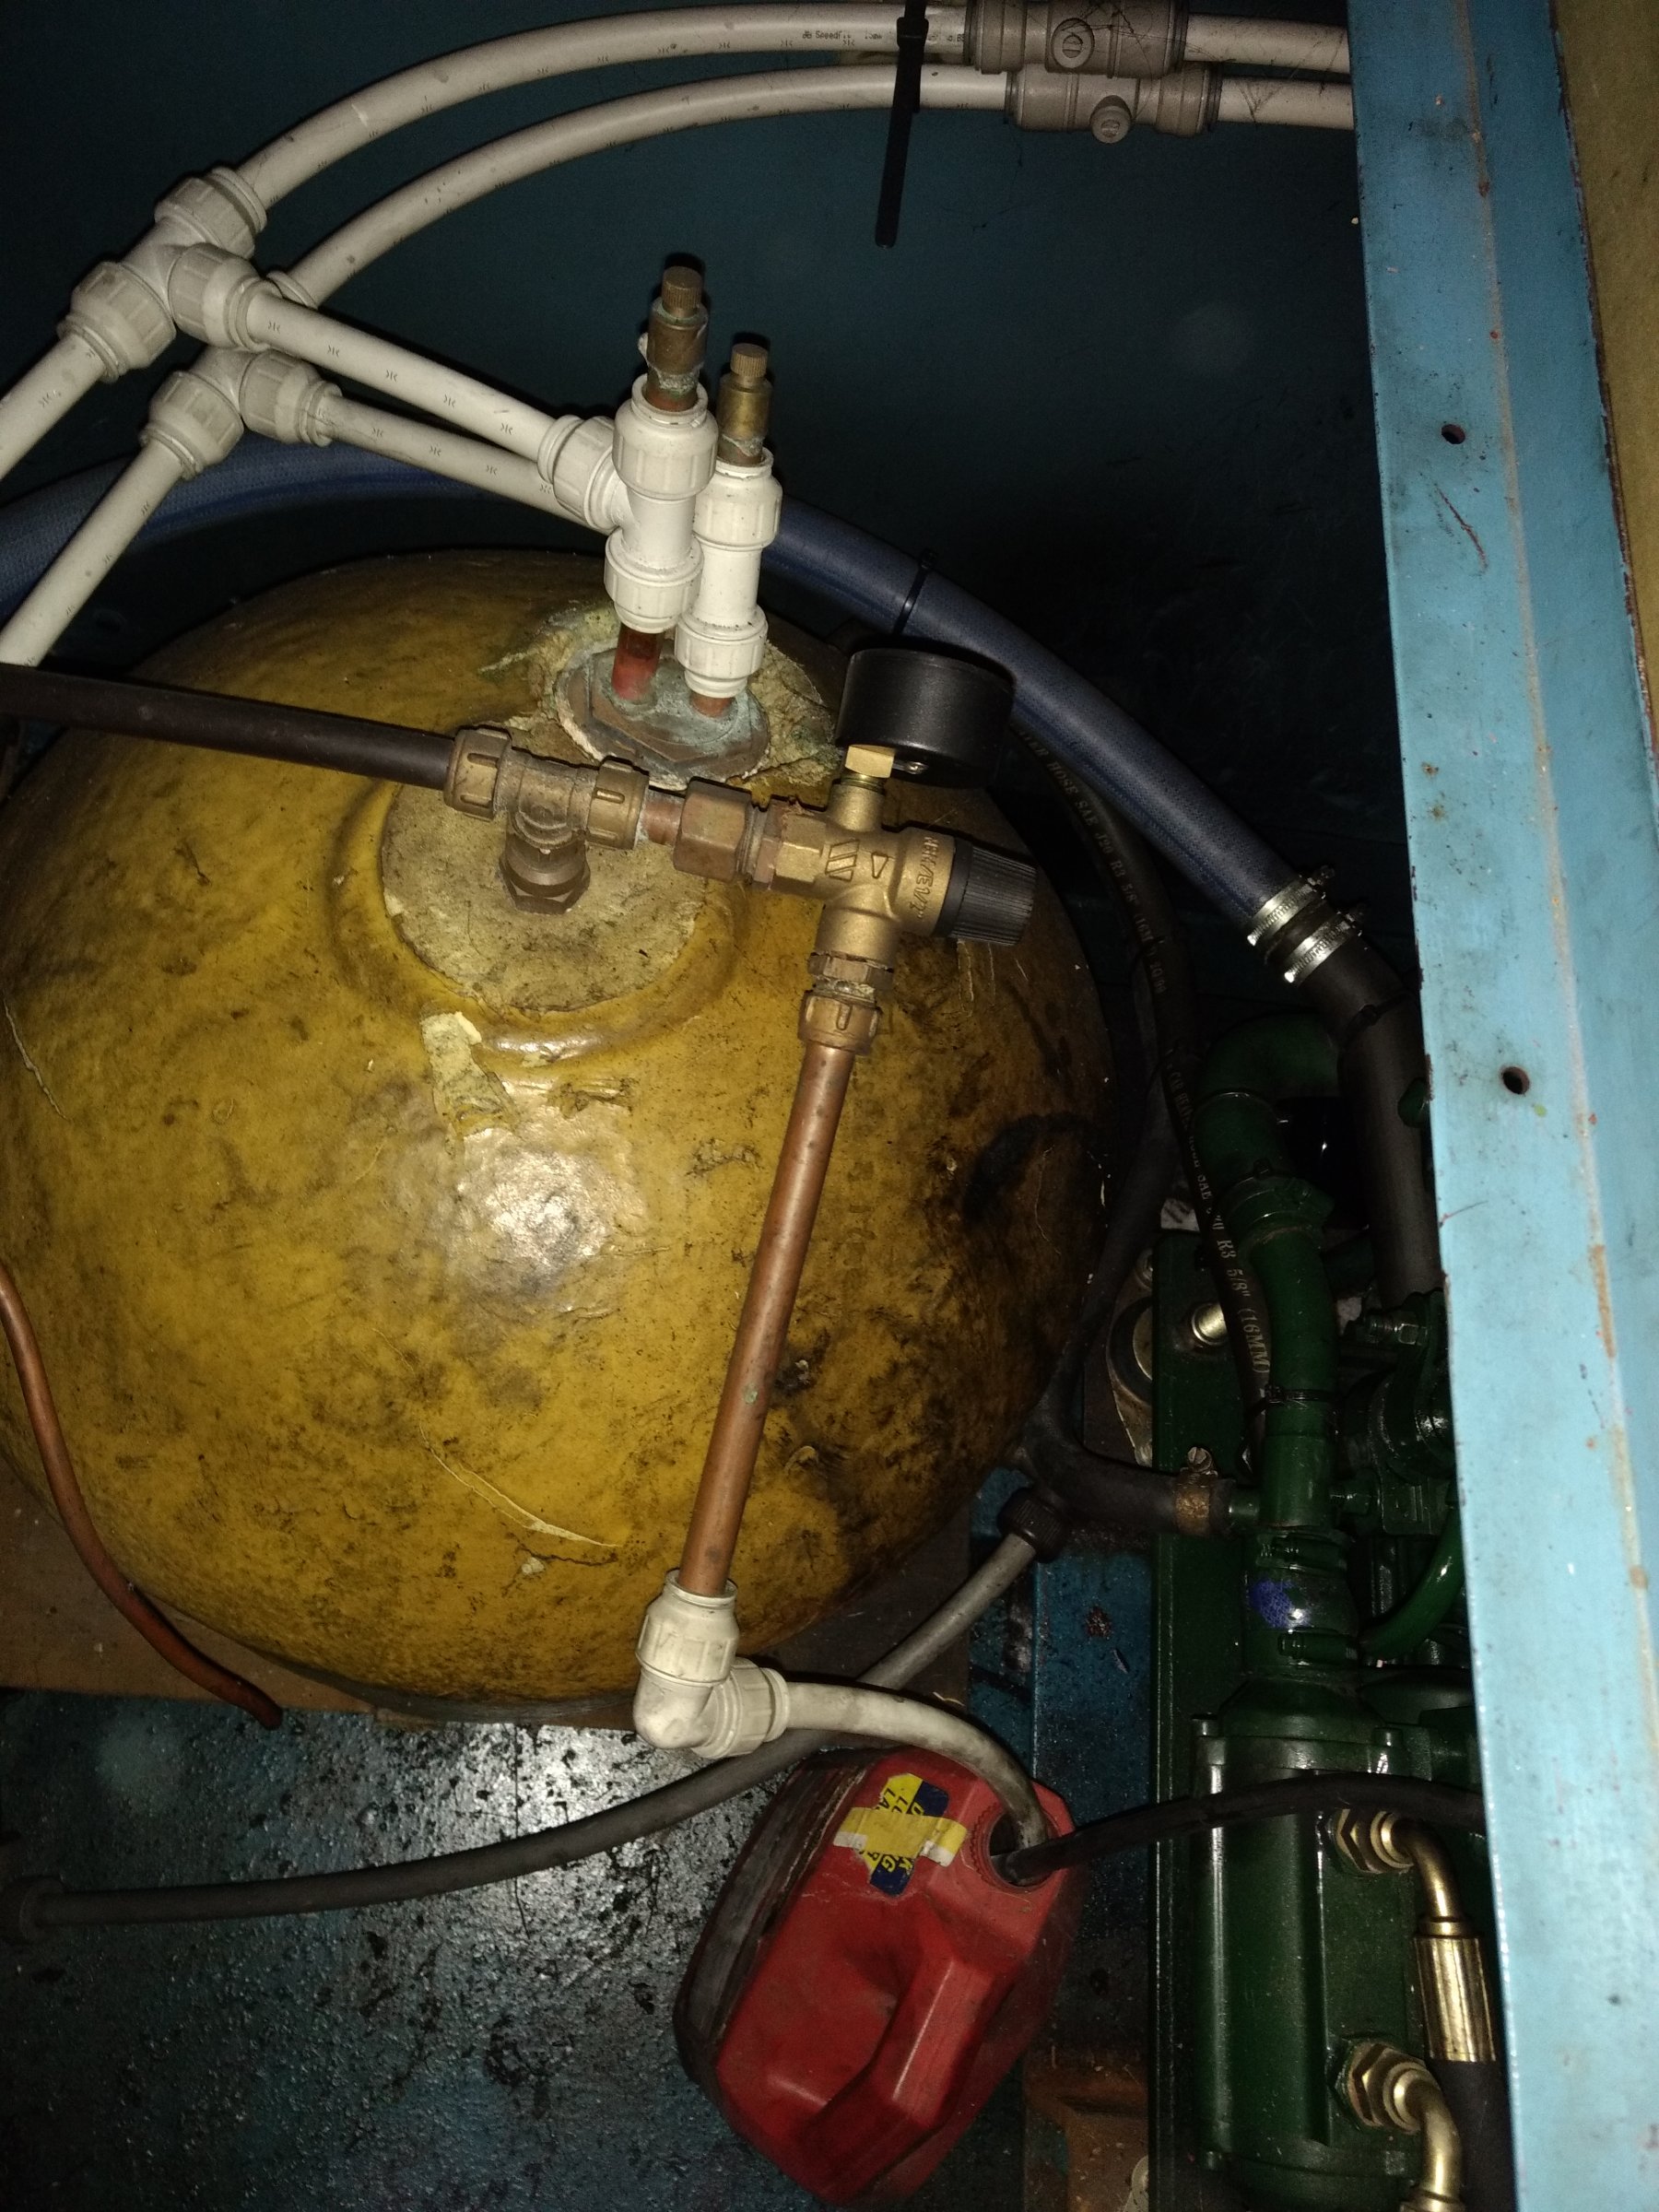
It looks to me like it was a single coil calorifier modifed to twin coil by putting a second coil in the immersion heater hole.
The hot water take off together with the Pressure Release Valve and drain comes off the top.
Presumably the engine coolant passes through the original coils.
Yes, I fitted the salamander about fifteen years ago for the Webasto. I've only just realised though that the secondary side penetrations for cw feed and drain are unexpectedly high.
-
11 hours ago, Sea Dog said:
A photo wouldn't half make a difference to the veracity of the answers...
Ooh, you are high maintenance!
There's a faint line on the insulation about 18 cm up which is where the connections are. You can see the coil connections to rhs of second photo and the cw inlet is just visible at bottom of first.
-
21 minutes ago, Boater Sam said:
I would guess that it is a direct heated cylinder with one coil instead of two and that those connections are for the direct circs. Never seen one with a drain connected to a dip tube, not logical.
Any make or model number? where is it from?
Common for there not to be a drain point but the cold feed has to be at the bottom.
Maybe it was intended for direct heat. It's from the past. I've only seen inside once, many years ago when I took the immersion flange off to fit a salamander coil. Didn't notice what the internals were like.
-
Pure guess, but looking at pictures of dipsticks and tubes (not a euphemism but private browsing might be advised) it looks as if in some models the stick doesn't emerge from the bottom of the tube. So, in a hot engine if there is a good seal at the top where the dipstick goes in (that's a big if) air in the tube expands and the level at the bottom of the tube drops. Pull it out and oil settles to its proper level.
Or something completely different.
-
Nope, hot comes out of the top where it's supposed to. Heating coil also about the same height as the cold feed. Seems odd to have a dip tube (if there is one). It would make it harder to drain (although I haven't done that in 22 years) and seems generally pointless.
-
Just looking at our calorifier with a view to adjusting the pipework. Vertical cylinder type, about 45 cm high. Realised that the cold feed and drain points are both about 18 cm up. Are they likely to be connected to dip tubes going to the bottom of the tank? Why do it that way?
Martin/
-
I can just imagine the bloke in a cap's shirt snagging on one of the shaft bolts a few inches in front of him, and his guts being splattered everywhere.

Pump out tank
in Boat Building & Maintenance
Posted
Here's one I prepared earlier in 38 mm bore pipe: