Batainte
-
Posts
59 -
Joined
-
Last visited
Content Type
Profiles
Forums
Events
Gallery
Blogs
Store
Everything posted by Batainte
-
Hydronic underfloor heating system on WB
Batainte replied to Batainte's topic in Boat Building & Maintenance
Had a look through these posts, nice setup. Is this your system or someone else's whom you found online? If so, what is the heating system that keeps the whole thing going (storing, maintaining and running your hot water + underfloor heating)- is it the Rayburn? Could you share any advice, knowledge or perhaps have suggestions on how not to do things? Couldn't explain this even better- agree with the fact that going hi-tech is equivalent to hi-maintenance (hi-amount-of-issues) and relying on such techy components can certainly end up in hi-costs down the line. With current e-obsession of having anything that has as much software in whatever the components are and being constantly "plugged in" (from wifi fridges to remote doorhandles), the future and ease of convenience definitely lies in lo-tech as long as one is prepared to accept certain degree of.... normality. Perhaps all of these devices/ gadgets etc.. are just a generational thing, however certain comforts or "improvements" on older systems (be it heating, engines, insulation...) offering "potentially" more clever solutions do come in handy, but surely tried and tested is far more reliable than new and heavily-marketed devices. So definitely on the both sides of the fence on this matter- best option would be to marry both lo-tech and hi-tech in a healthy bond and observe their outcome in coming future. Perhaps a bit confused about this- do you mean to add the coolant to the underfloor heating closed loop? Correct, the intended system would be as follows: water tank > pump + expansion tank > webasto water heater > calorifier (thermal storage) > extra expansion tank/ water pump??? > hot water + closed loop for underfloor heating (3 way valve with computer for automated flow) Would the above mentioned systems be what you use on yours? Did you need to have two expansion tanks or two water pumps to maintain the pressure (one from water tank + another from thermal store) for the whole system? This is a mystery which is still being worked out... Thanks, will look into these and take into consideration different opinions about Hurricane... Initially went for webasto (or eberspracher) as they seem to be the ones most heavily marketed so far and others talking about this. Wouldn't know the exact numbers or coefficients on this, but in theory for onshore houses it doest have a more balanced heat output as well as lower energy consumption when compared radiator heating (would knot how this works on boat though). Definitely, was thinking to add the log burner to the whole system, but was advised against as it would mean that water would be boiled continuously even when the system wouldn't be used and therefore would require pressure stabilisation in order to not cause unnecessary stress on the whole pipework. Although surely there should be some way of controlling this, perhaps anyone knows about such options? Perhaps AGA or Rayburn stoves also could be used for maintaining the heat in calorifier? As an addition to this system was considering to install Webasto hot air blowers in the most vital parts of the interior for instant heating purposes. -
Electric cables via engine bay accepted by BSS?
Batainte replied to Batainte's topic in Boat Building & Maintenance
These are all 2 core with 1mm thickness (or perhaps 0.75mm can't recall now). Thanks for that, it makes sense as the boat vibrates throughout once the engine is running (as a result cables rubbing on the sharp edges of the hole) so definitely this requires extra protection. The cables have been laid out, however not connected to switches etc. was mainly concerned about them passing through engine bay really. This definitely requires extra attention in order to protect them. Thanks for this information- its great to have all of this as a reference. Despite the sizeof information, its really helpful. There are plenty of old cables mixing around, but the new ones are in white. So far just managed to lay out 12V cables with the heavy load yet to be laid out. The fusebox and switches are from the previous owner, so this is also getting changed as the job itself looks very diy'ey. The question was whether it is acceptable to wire through engine bay in order to keep everything organised and without having any visible cables on the interior of boat. Main concern was whether the BSS examiner be happy to accept this? Thanks for the link- was considering to use low profile corrugated pipe to keep everything together and protect the cables from chafing against the sharp edges of the hole, but this looks like a neater way of doing it. Oil and petrol smells coming from engine bay was definitely a concern, and grommets seem to offer a good solution to avoid letting them through. This is a relief as there is no need to rewire anything and its possible to leave it as it is. Haven't had a BSS examiner visit yet (this would be the first time), but understand that these type of things are not really looked at in great detail. Must be all about carbon monoxide and gas safety etc...? Spoke to a canalboat sparkie a couple of days ago and apparently there is at least 1-1.5V drop from engine before the current reaches the internal electrics. Supposedly its all the electrical system which has been installed on the boat already (the way the dead man switch has been laid out etc.). Its also the electrical system design which impacts the voltage drop along with the cable thickens etc.. And in order to avoid this, the best idea would be to lay out a thicker cable perhaps? Had to educate own self by watching plenty of youtube tutorials about electrical basics in order to grasp the slightest concepts about its "mechanics". Really regret not paying attention during physics classes (and many other subjects) as this information would be quite helpful nowadays. -
Hydronic underfloor heating system on WB
Batainte replied to Batainte's topic in Boat Building & Maintenance
Forgot to mention the specs... the vessel comes with large-ish battery pack (1000amp) with marine generator on board. The underfloor heating system would be laid out on top of floorboards throughout the interior (avoiding the blank spots of kitchen units etc...) with regular flooring on top of it. In order to recirculate the system properly it would have its own expansion tank and a pump. As hot air is much lighter than the cold one this was the main reason for doing this as underfloor heating is the best way to keep everything on the body level rather than above it. Seen on some videos where instead of ballast the owners poured screed all over and laid out their underfloor heating system- as in traditional way of doing this. Frankly, it seems rather risky going this route, as perhaps at some point (for whatever reasons) one may wish to gain access to their hull... albeit not sure why would that be the case if everything works well. What would be the best way to "hunt" for this ebbersplutter (assuming its meant to be "Ebberspacher"...)? Head height to the sides definitely is a concern as those 2-2.5cm definitely would make a difference. -
Hello all, been working on bringing back to life a 41ft narrowboat to its former glory. It was sold "as is" and ofcourse the safety certificate has expired which needs to be renewed at some point once the refurb has been completed. Currently have reached the stage of wiring throughout and decided to drill a hole into the engine bay (where the steps would be situated) in order to organise all the cables and "hide them" so it all looks much cleaner once the lining is up and walls painted. Although didnt really think it through at the time, as this could be on the wrong side once the BSS examiner would come and pay a visit. Would anyone in the know have any ideas whether this was a clever move or the engine bay has acquired a spare ventilation hole which will never be used? Perhaps anyone can suggest some BSS inspectors in London (or point into the right direction of sourcing one)? Many thanks

-
Looking for an alternative point of view on this matter from anyone who may have any comments, opinion, criticism or feedback. Its a 70x12 with full ballast and flooring already in place, the idea is to get rid of radiators "heating" the ceiling of interior and instead install underfloor heating (using low profile system of roughly 2-2.5cm thickness) for a comfy warm internal climate throughout the year. The system would be installed on top of plywood flooring (unlike using screed in place of ballast itself). Not the tallest boaters so the loss in height wouldnt impact us as much as our taller guests visiting for a weekend on the cut. The concept is to use webasto diesel heater connected to calorifier which would supply hot water for general use and also connected to a closed loop to recirculate the hot water throughout the underfloor heating system. Sounds kinda simple... but is it?
-
Unsure whether this has been covered elsewhere on another thread, but after using creative search terms on the forum was unable to find concise information about cranage, dry dock or boat workshop options in and around London area. Would anyone know if there exists such a list where it would be convenient to find everything in one place? Pasting some of the information which came across in case if hasnt been, please add other boatyards which havent been mentioned. Perhaps this information would help anyone. P & S Marine http://pandsmarine.co.uk/ Bridgewater Basin Croxley Green Watford, WD18 8SN office: 0800 170 7276 | Tom: 07479 514 072 (WhatsApp) | Ralph: 07956 333 892 | fax: 0300 011 7276| info@pandsmarine.co.uk Mostly known for road to water cranage near London with their fully insured 70T crane. Services: Pressure washing & hull blacking Grit blasting & 2-pack epoxy coatings Engine servicing & installation All aspects of steelwork including hull over-plating Short & medium term hard standing Surveying (pre-purchase) Heating & plumbing Carpentry At the time of writing road to water cranage costs are: All Narrowboats £385 inc. VAT All Widebeams £625 inc. VAT Lee Valley Marina, Springfield https://www.leevalleypark.org.uk/en/content/cms/outdoors/marinas/springfield-marina/ Spring Hill London, E5 9BL 020 8806 1717 springfield@leevalleypark.org.uk Services: Welding Boat blacking Antifouling Carpentry and alteration services Plumbing Solid fuel stoves and flues Engine servicing and repairs There is also Chandlery on site which might come in handy. Springfield Chandlery https://www.leevalleypark.org.uk/en/content/cms/outdoors/marinas/springfield-marina/ Spring Hill London, E5 9BL 020 3146 2239 chandlery@leevalleypark.org.uk Enfield Dry Dock http://enfielddrydock.co.uk/ 9A British Waterways Business Centre Navigation Drive Enfield, EN3 6JT (Just South of Enfield Lock) Alan 07836 584148 Paddy 07971 606414 Services: Boat blacking Repairs Fabrication Surveys Fees: Docking Fee £95 Days in the dock £80 per day Rylards Rytex pain £50 per tin Pressure washer hire £45 per week Anodes £45 each (including fitting) Labour (if you want us to paint your boat) £180 per day Labour for welding, fabrication and repairs £37.50 per hour South Dock Marina Lock Office Rope Street London, SE16 7SZ Tube: Canada Water 020 7252 2244 out of hours emergency 07950 805509 https://www.southwark.gov.uk/leisure-and-sport/south-dock-marina Services: Pedestal Crane 20T Pressure Washing Towing (within marina) Maintenance
-
Sprayfoam + Vapor Barrier on newbuild WB
Batainte replied to Batainte's topic in Boat Building & Maintenance
Actually it was on camper forums where people discussed having vapor barrier as an additional option for their insulation. Apparently 50mm is a decent thickness for a boat/ van (in contrast to onshore buildings which have 100mm as per standard in Europe). Did you insulate your floor? If so was it laid out on top of ballast and between the floor boards? Wouldnt this reduce hull ventilation as boaters discussed on other threads about the fact that it is normal for condensation to remain there and the air between ballast would help it slowly evaporate? -
Aluminium vs. Bonded windows- whats the difference?
Batainte replied to Batainte's topic in Boat Building & Maintenance
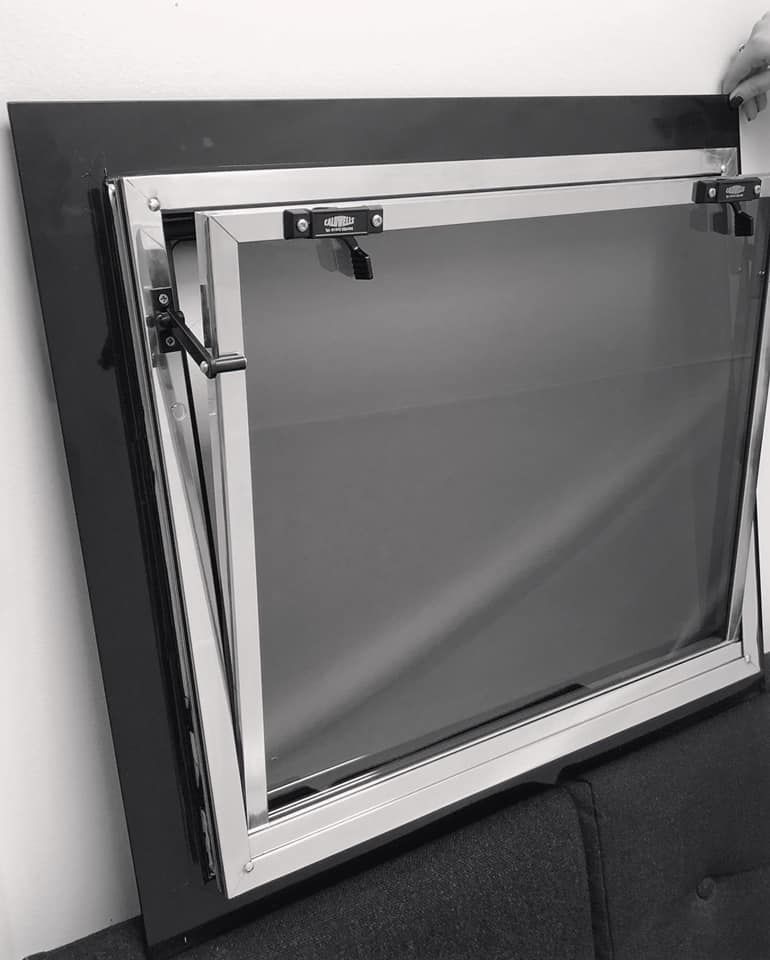
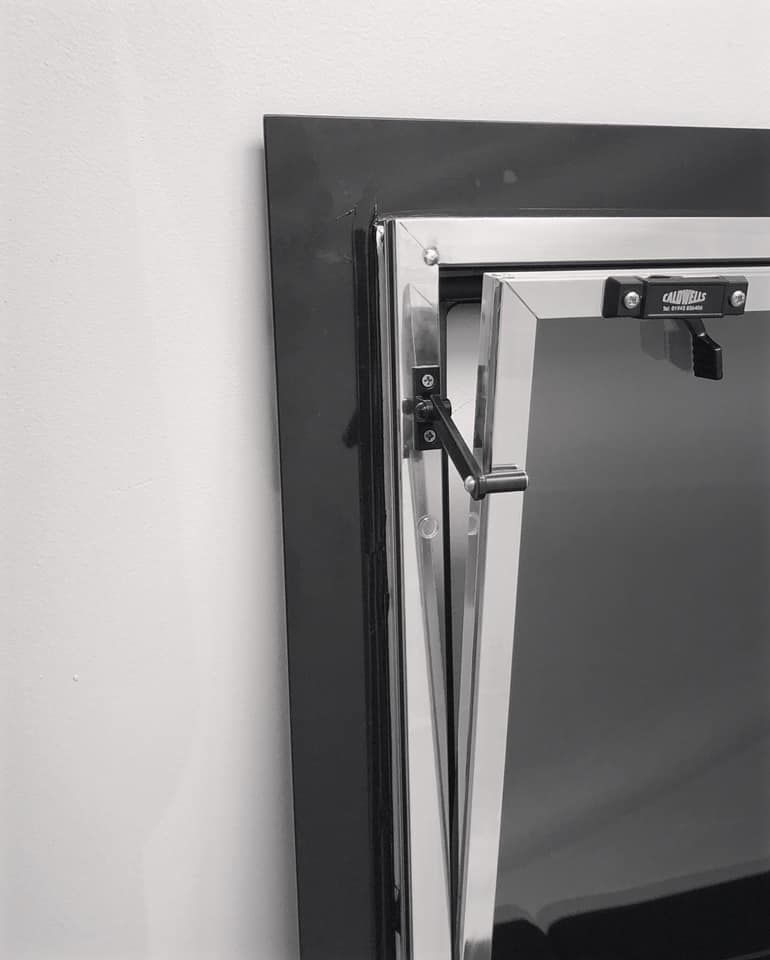
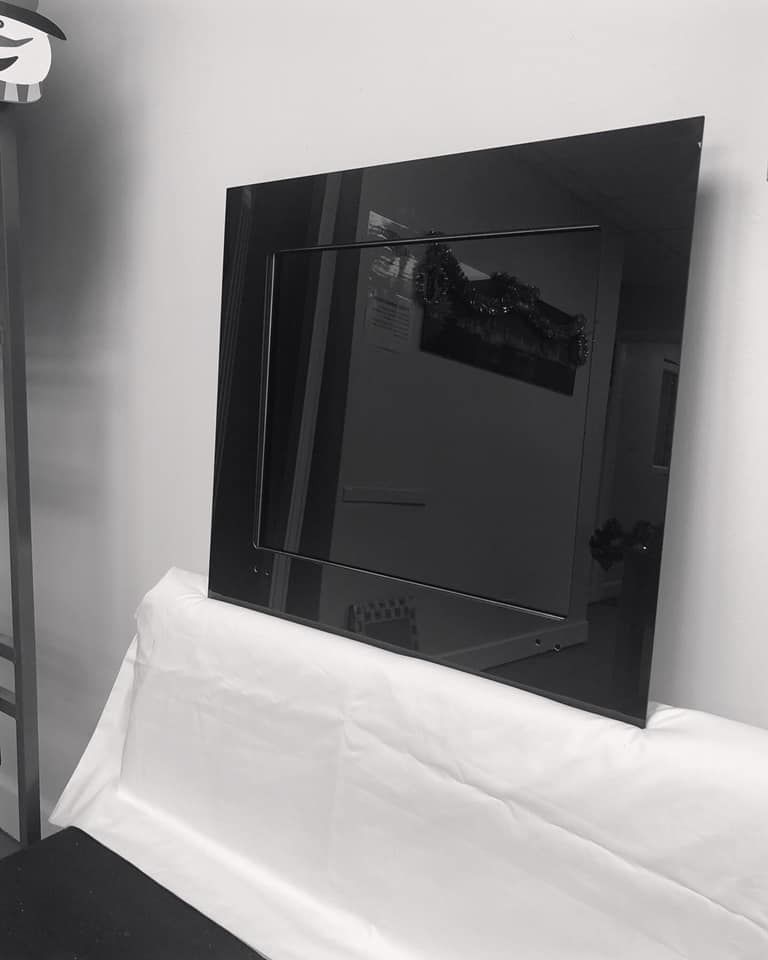
Contacted Caldwells about their bonded range and its been confirmed that outer facing frame is made of toughened glass and there is flexibility in bond after the frame has been attached to the shell itself. The process of attaching the frame is by using industry standard products which seem to be some form of adhesive and once applied, the frame is left to sit for a couple of hours and job done - all sealed, solid application etc.. In regards to ability of changing them in future, it was explained that by applying "cheese wire" between the frame and outer shell it would detach everything from the seal and therefore it could be removed entirely. The glass holding frame is made of aluminium and they offer three finishes for bonded range (polished, ultrachromed, powder coated) for inner frame. No difference in their maintenance or durability apart from the looks. The polished finish perhaps would require a repolish every now and then, but ofcourse this is per boater's preference. Would speculate that type of finish wouldnt be very evident if one would use a window lining anyway? Apparently they have been doing bonded windows for years and so far have had no complaints or issues whatsoever with their performance. The nice thing about this (as well as their aluminium range) is that outer frame colour can be customized based on RAL colour standards, some examples are available on here http://ralcolor.com/ and ofcourse on wiki https://en.wikipedia.org/wiki/List_of_RAL_colors Hope this information helps anyone whos looking for this in future. -
Aluminium vs. Bonded windows- whats the difference?
Batainte replied to Batainte's topic in Boat Building & Maintenance
Caldwells forwarded some of their bonded window photos and it appears to be that these come with aluminium frame and the "bonded" part would be the outside seal. Perhaps the "bonded" part refers to having the holding frame attached via "bonding" method instead of "stapling" or screwing the facial plate onto the aluminium holding frame, thus making it look more sleek from outside. * Posted their pictures below the post Frankly speaking, as you mention being a guinea pig would be a rather costly experience in case everything goes bad, thanks for advice and the question suggestions. Will get in touch with them during their working hours and post their reply once everything is clear. The frame finish mystery is also an interesting one, when asked Caldwells sales team about their differences whether there is difference in upkeep, maintenance, durability etc.. apparently theres no difference apart the looks. Although they advised that powder coated seem to work well as its easier to wash the dirt away with some soapy water. Seems like this method would apply to the buses, trains, lightweight site machinery and other public transport. Assume that you are describing a single glazed unit, if so then what Caldwells mean by bonded appears to differ from the method you have explained. See the photos below for their version of bonded windows...
-
Sprayfoam + Vapor Barrier on newbuild WB
Batainte replied to Batainte's topic in Boat Building & Maintenance
This sort of attitude is what is definitely reassuring to learn that your boatbuilder protected your interests. To embark on a project of this scale one has to go through quite a journey of education, acquiring information (often conflicting) on all sorts of technicalities, details and nuances, surely sprayfoam is one of them. Happy to know it was all done well for your project. Nowadays trust is rather difficult to come by in any section of contracting/ construction industry. Looks like a good type of insulation and reasonably cheap in comparison to sprayfoam. Was so overwhelmed in learning about sprayfoam insulation and comparing it to kingspan etc... that completely overlooked these. Did you use just one layer of 35mm for this or added one on top of each other to make 70mm (if that would even be possible spacewise)? -
Aluminium vs. Bonded windows- whats the difference?
Batainte replied to Batainte's topic in Boat Building & Maintenance
Well said- Had to word it a little better... "future-traditional" narrowboats. Perhap's theyd be classed as traditional in 30/40 years from now. So to understand it correctly- would "bonded" mean that its permanently fixed? The frame on bus windows does feel quite rubbery, would assume that glass gets kinda budged in and the rubbery frame/ seal is what "bonds" the window to metalwork? In terms of bonded glass giving strength for a canalboat (as compared to road vehicle) this probably wont contribute much as the boats have greater thickness as well as different metal for its structure. Or would it? Very valid concerns/ questions, which will get investigated with Caldwells once they are back on monday. Even though when spoken on the phone prior to this thread , they didnt provide much detail when asked to explain about the difference between their aluminium range and bonded ones. Apart from saying that they "...are more modern and sleek..with the frame being 4mm wider than aluminium.." that was all. Before discovering their "Bonded window" section, thought of getting black powder coated as well. Only thing which wasnt clear that being powder coated they must attract plenty of dust and other things onto them or they come off easily even if it rains? They do, as @Jen-in-Wellies mentions below. During the conversation with them, it was confirmed that bonded windows come with full hopper opening (glass can be removed) and can provide double glazed with thermal break system embedded. -
Aluminium vs. Bonded windows- whats the difference?
Batainte replied to Batainte's topic in Boat Building & Maintenance
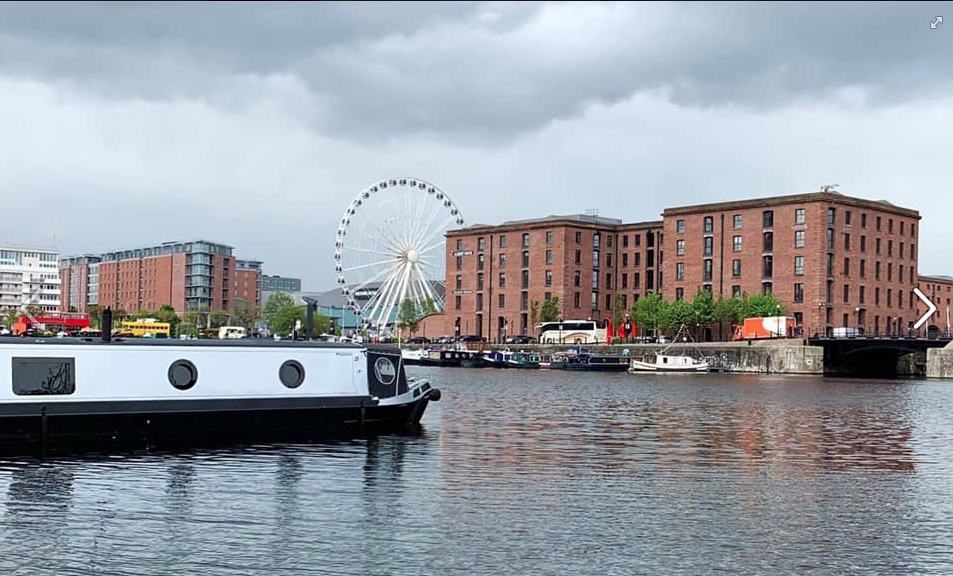
Definitely agree as it suggests sort of gangsta' look as if it were a sports car with tinted windows. Nevertheless, having browsed through photos on their facebook page found a couple traditional narrowboats having installed bonded windows- surprisingly... looks kinda neat.
-
Aluminium vs. Bonded windows- whats the difference?
Batainte replied to Batainte's topic in Boat Building & Maintenance
They actually have a different category on their homepage, its not really obvious as its "hidden" underneath a separate link on "Narrowboat" section. Heres the link.. http://caldwellswindows.co.uk/wp-content/uploads/2019/09/Bonded-Prices-2019.pdf
-
Sprayfoam + Vapor Barrier on newbuild WB
Batainte replied to Batainte's topic in Boat Building & Maintenance
Makes sense, in order to get the money's worth its essential to be onsite for different stages and always be ready to overlook with a suspicious eye. Same recipie for any contract type. Actually received rather attractive quote by another boat insulation company and their figure was a little less than half of original 4k for 60mm throughout cabin. Unsure whether i am to share their details, in case am getting blocked for promotion? Thanks for explaining this, it makes sense that it may be rather hard to get into awkward bits of the boat and those may require more detailed attention afterwards. Would anyone know how long does it take for sprayfoam to dry or is it like any other foam product... fully dried in less than 30 mins. Equally as you id practice obsession sparingly.. especially on a project of this magnitude. The company which provided the quote also include cutting back and disposing of rubbish so id assume anything "not" covered would be exposed and they would redo the part which got looked over :o "Measure twice and cut once" could be paraphrased to "Spray twice and cut once". Sounds like the logical way to work with this. Did you sprayfoam everything yourself? Would like to have a go on a project that would be on a smaller scale and practice this... but believe its like with spray paint- required steady hand and even application. How did you manage to put the boards throughout to sit tightly against the steelwork? Surely the cabin sides and not 90 degree, have curviture and whatnot... Was under the impression that youd want to get your insulation boards as tight as possible to the surface of anything that protects you form outside. -
Discovered this on Caldwells site that they have a new section called "Bonded windows". When spoke with one of their team on the phone in regards to difference between double glazed with thermal break in aluminium and same spec for bonded they just said it looks more modern/ sleek. Also the frame is just 4mm wider than the aluminium one, so in theory not much of difference. Although they do look rather different and in a way elegant, would anyone be able to comment about these from their experience? Why wouldnt someone choose black aluminium frame and tinted windows to achieve the same look, if they wanted to? Meaning why do they offer a different type of window frame if a buyer could customise their aluminium range to get the same result.
-
Sprayfoam + Vapor Barrier on newbuild WB
Batainte replied to Batainte's topic in Boat Building & Maintenance
Have read the horrors of other boaters on this forum talking about this exact matter. It appears that "cowboy" contractors try to get away or cut corners with the fact that if a person doesnt know or ask for details about the required job. For this reason its just done as quick as possible with any potential future failures inherited by whoever owns the boat. Its all about collecting the cash and hopping back into that white van and heading off to next job. Will check some of his episodes out. Would there be a way to know whether the foam has been applied as necessary before covering the sides with lining? Assuming if the job is overlooked by someone and not sprayed dense enough over the awkward bits as it was meant to. It being a foam, there is a potential in having some "blind spots" on the bottom layer and not having them covered on second layer? Isnt this where the science gets tested "Boat Building & Maintenance" Was quoted 4k+ for the whole of inside cabin of 70x12 sprayed to 50mm (supposedly for a top job), however unsure of whether this an adequate price. Marine ply was used for battens, but one idea was to apply a coat of bitumen to battens once the job has been done to increase their length of service- should work. For lining to metal contact, perhaps to mitigate any impact due to condensation, another idea would be to use some galvanized brackets (or similar depending on the application) screwed onto the lining itself. Would you have any suggestions or advice about how you would have done otherwise (if at all)? Kinda makes sense- as in the scenario of having vapor barrier throughout the interior of cabin it would only "protect" the sprayfoam itself which doesnt really need this at all. Presuming there are air gaps/ voids between shell and sprayfoam layers or sprayfoam and cabin interior, then the biggest question perhaps is how to make sure whether the sprayfoam has been applied evenly and correctly to create solid bond with steel shell? Is there a method of testing this? Neat trick, would it mean youd repeat this action throughout the cabin to inspect this? What was the thickness you had it sprayed to? Exactly, was reading about other boater experiences with having uneven, thin layers of sprayfoam. These "voids" had been created by irresponsible contractors towards the cabin as well as between the steel and the foam, which were getting filled with warm cabin air and for this matter thought to entertain with this idea to at least be able to protect the gaps facing the cabin. -
Timber frame windows on a 70x12 good idea?
Batainte replied to Batainte's topic in Boat Building & Maintenance
Would definitely have to agree with this as there is always something mesmerizing about seeing someone doing their work. Cheerio -
Timber frame windows on a 70x12 good idea?
Batainte replied to Batainte's topic in Boat Building & Maintenance
Although its 21st century and having gazillions of products available, it seems that its no matter which product one would use on external timber, there will always be a need for a recoat every now and then. Nevertheless, seeing it as a short days work with a glass of red somewhere on the side whilst brushing up on DIY skills is always enjoyable. -
The newbuild 70x12 will be ready in a few weeks time and after going through the forum, been concerned about taking extra steps to minimise condensation buildup as well as loss of heat. The shell will come sprayfoamed throughout and as per the concerns of humidity and heat-loss had started to investigate about various options in order to improve on future repair headaches and "potential" issues with insulation that other boaters have described on this forum (this includes sprayfoam insulation on its own as well). So as per the title of this thread... In order to avoid any costly repairs in future why not add a separate layer of vapor barrier between sprayfoam and wall/ ceiling linings? Has anyone had any experience or troubles fitting this? Any known products? Or perhaps for some reason would suggest to steer away from such a thought? The idea comes from reading about other boater experiences on using kingspan and/or celotext as their insulation on boat refits, where they explicitly explained the benefits of vapor barrier. Both insulation products have their foily barrier already embedded onto them as per manufacturing standard, but it would be interesting to know about anyone's opinion on sticking another layer on top of the sprayfoam itself. Although its half a decade old, but so far managed to find only one user posting about this method (albeit its slab insulation + vapor barrier) on the post linked below, nevertheless looks neat and definitely must have worked its magic in the long run. @koukouvagia if you are reading this, would you care to share how its served you so far?
-
Timber frame windows on a 70x12 good idea?
Batainte replied to Batainte's topic in Boat Building & Maintenance
The people who suggested Sikkens are boat builders and i had contracted my wheelhouse (mahogany sappele) to be built by them and that was the only product suggested by them. Will send the builder a message to enquire whats their opinion about LeTonk.. good idea for suggesting to email the company and enquire about their differences from other competitors. Thanks again -
Timber frame windows on a 70x12 good idea?
Batainte replied to Batainte's topic in Boat Building & Maintenance
Thanks for advice. Would you know the difference between Sikkens (as advised to use on my wheelhouse) and Le Tonk? Awesome, will read on this more around the forum as its been mentioned on a couple of threads. Thank you all. -
Purpose of triangular wood bits in the corners of windows?
Batainte replied to Batainte's topic in Build Blogs
Sounds like a boat party- anyone up for a boat-brewed beer? -
Timber frame windows on a 70x12 good idea?
Batainte replied to Batainte's topic in Boat Building & Maintenance
Thanks, read some positive "LeTonkenois" comments mentioned in a couple of threads- will check it out. Although not too keen on high gloss as "earthy" matt seems more appealing to an eye- besides any little chips or bump cracks would be more visible with this type of finish. Thanks for advice @cuthound, this comes in handy. Any experience with that? How did it look with time? Thanks for the insight and words of wisdom. An acquaintance of mine is a joiner (produces bespoke timber windows and high end furniture for a living) so we came up with the challenge of fabricating timber frame windows for the boat some time ago. At start this idea seemed perfect due to timber frame insulation properties (aside fo inter-yearly frame maintenance) and actually adding value to the boat in the long run as we would fabricate everything ourselves. After doing some research stumbled upon thermal break option by already-mentioned Caldwells so we thought to use the same profile for timber frame structure, however didn't manage to figure out whether this would actually work as none of us have ever fitted such windows on a vessel- as the microclimate/ environment around the boat is way different than onshore houses. There are many factors which we didn't anticipate or cover- as mentioned about summer/ winter impact resulting in frame contraction and expanding affecting the sealant (although for onshore frames this ratio is about 1-4mm). Also, didn't account for the sloping sides as @Bee had mentioned on the first post- a fact which we didnt account for entirely. Got in touch with Caldwells, their wait times are about 8-10 weeks and the wide beam (with holes cut out for windows) is coming out in about 4... guess its going to be lots and lots of OSB boards to cover everything up, ck ck ck! Nevertheless, would still be curious to acquire more information from anyone with these. -
Timber frame windows on a 70x12 good idea?
Batainte replied to Batainte's topic in Boat Building & Maintenance
So technically, would you say- it could be proven that timber frame windows serve well (apart from yearly maintenance of re-oiling/varnishing) in comparison to aliminum ones? Are these original or did you change the windows during the 12 year ownership of the vessel, was there any thermal break system on the profile that you applied for these or went with no science behind and just used the same system as found on regular onshore houses? Had a wheelhouse built in mahogany sapele already and was advised by the builder that Sikkens (Teak 085) apparently does a good job with two or three coats and lasts a couple of years. Am surprised that your need to reapply ever so often. Thanks for the info, am rather uneducated about Utile as was under the impression that Sapele is the one to go with particularly when considering living along the canal (higher moisture and humidity levels were the main factors for this). Thanks for insight about these- perhaps id require more than one to cover an area. Any good brands to check out? The boat will come with a generator so in theory getting rid of condensation will come at a cost.... of diesel. Bee's boat above looks quite appealing with its wood frame windows and adds more organic look to it in comparison to aluminium ones. Although as someone mentioned above about having just portholes (had to google for images), they do have a nice look although a bit "submariney". I wonder what type of window frames they used back in the days before all this hi-tech wizardry This was the main reason for this post- to find out whether anyone has some experience with timber frame windows and see how they perform in comparison to aluminium ones. It appears to be that its leaning very much towards aluminum ones. Actually went down to a solar supplier the other day to consult about the panels and their average daily output. Ofcourse his answer was "Depending on the season." and explained the fact that during winter period (which is about 3+ months a year) in the UK there is an average 1h of possible daylight to generate any solar energy. It does get better during the summer... which raises another question- In practical terms, can solar system on a boat actually be able to generate an output higher than whats required for charging a mobile phone (during the cold/ dark periods)? -
Purpose of triangular wood bits in the corners of windows?
Batainte replied to Batainte's topic in Build Blogs
Thank you all for comments about these. So my understanding is that "gussets" primarily are used for decorative purposes. Id agree a little with @Flyboy about floppiness of such a curved piece which was used as a holding frame. Actually when the window was screwed onto it, it did feel that corners may just come apart if the screw would get forced even further- however nothing bad happened with any of them. Technically "gussets" also come in handy by making the window holding frame more sturdy if just a few pieces of straight timber have been used for this purpose- effectively camouflaging the angular edges and making them appear curvy. Probably did a went the extra mile by fabricating mine, but quite happy with the result.