Lee Crook
-
Posts
43 -
Joined
-
Last visited
Content Type
Profiles
Forums
Events
Gallery
Blogs
Store
Everything posted by Lee Crook
-
Hi, thanks for the information. I've spoken to a parts supplier in Australia who ship to the UK. Here is a link to the item I was looking to order to replace the air sensor. https://www.oldtimerengines.com.au/genuine-lister-temperature-gauge-with-capillary-370-12990 Do you think this a suitable solution? Thanks in advance.
-
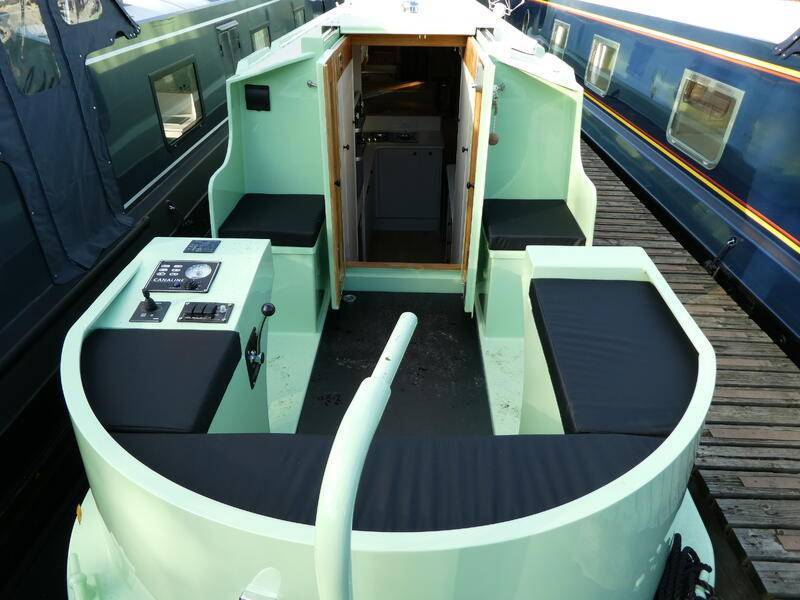
Hi All, I've purchased a Lister TS2 engine to replace the original ST2 engine which was seized. I've located two sensors on the engine. One is the air temperature sensor and the other is for the oil but could please advise if it is for oil pressure or oil temperature? I also require a control panel and was wondering if these sensors can be wired to gauges rather than just warning lamps? Also, could anybody recommend a supplier for a control panel? Ideally, I'd like the following: Keyed Ignition Switch Tachometer (engine revs and hours run) Battery Voltage Gauge Oil Pressure Gauge Air Temperature Gauge Thanks in advance.

-
Really don't know. All a bit of a minefield. I'll call my local BSS inspector tomorrow and post an update. Body is aching and brain is hurting! Must be beer o'clock! 😀
-
Thanks for the clarification. Just realised I way looking at the non-private regs. However, most double stern doors are 610mm wide. Less a 13kg gas bottle either side of the doors at 310mm diameter. Split the difference and the bottles will still be less than 500mm from the doors. E.g. as is common in many narrowboats the square seats either side of the doors are both typically used to store gas bottles yet both bottles would definitely be less than 500mm away from the doors.
-
Thanks, Tracy, Plan b it is then. Build a double locker on the rear deck and use the front for storage. How does the 1m rule work i.e. the locker can't be within 1m of a hatch yet boats always have gas lockers either side of the stern doors?
-
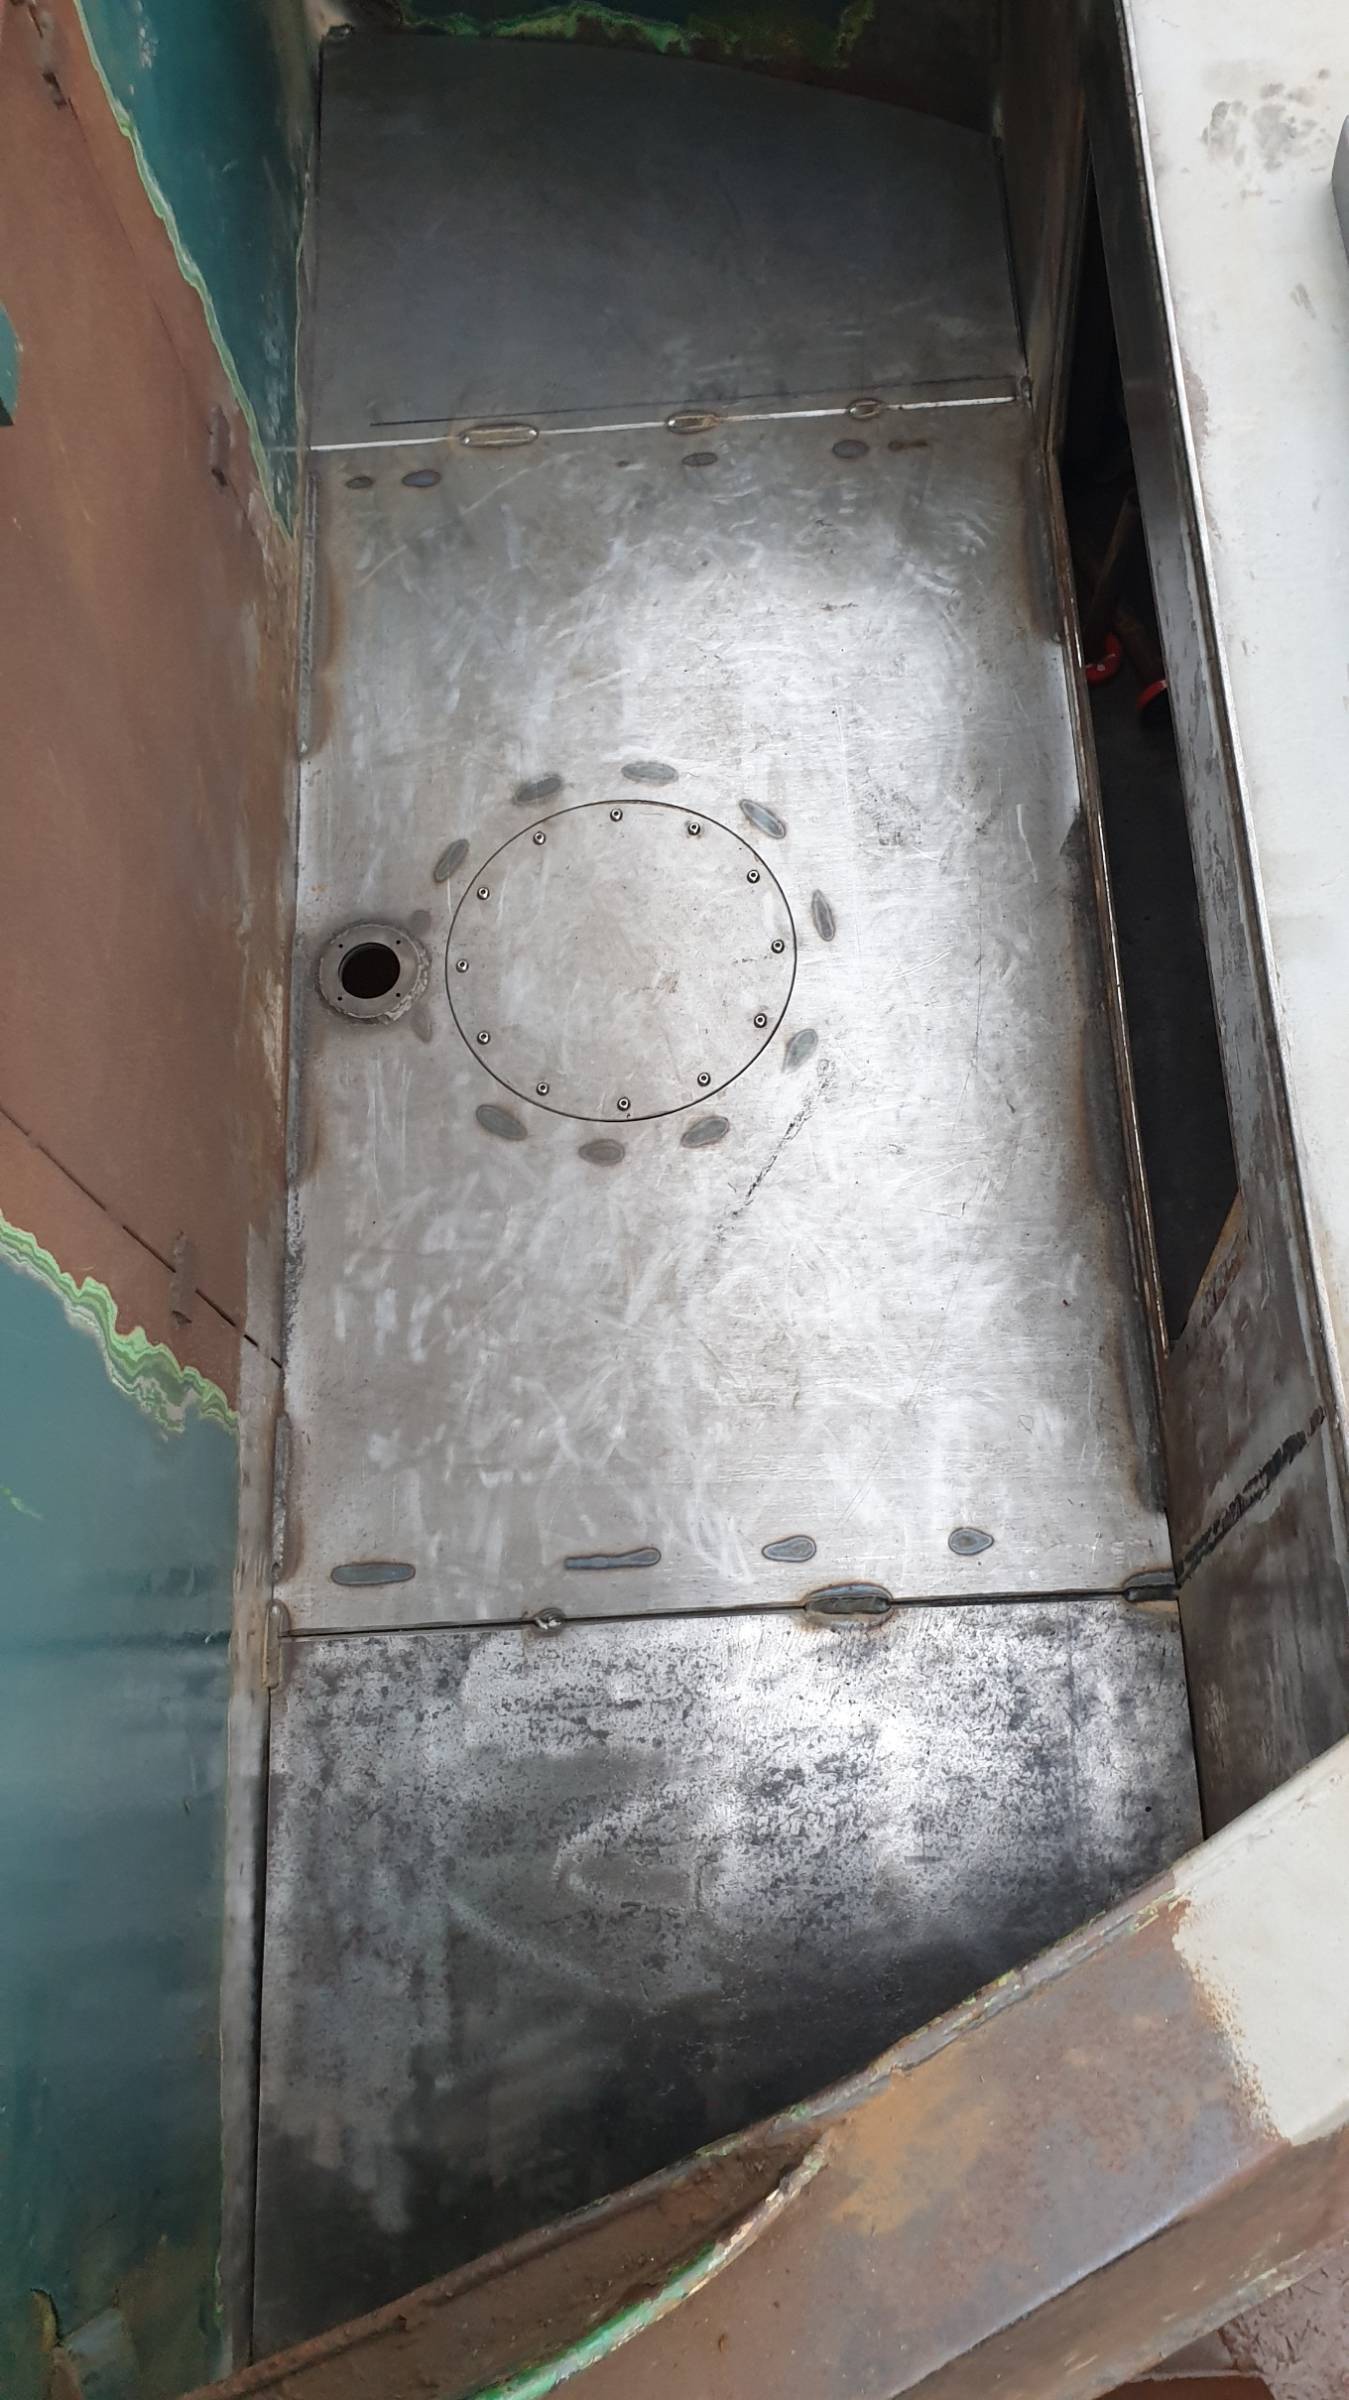
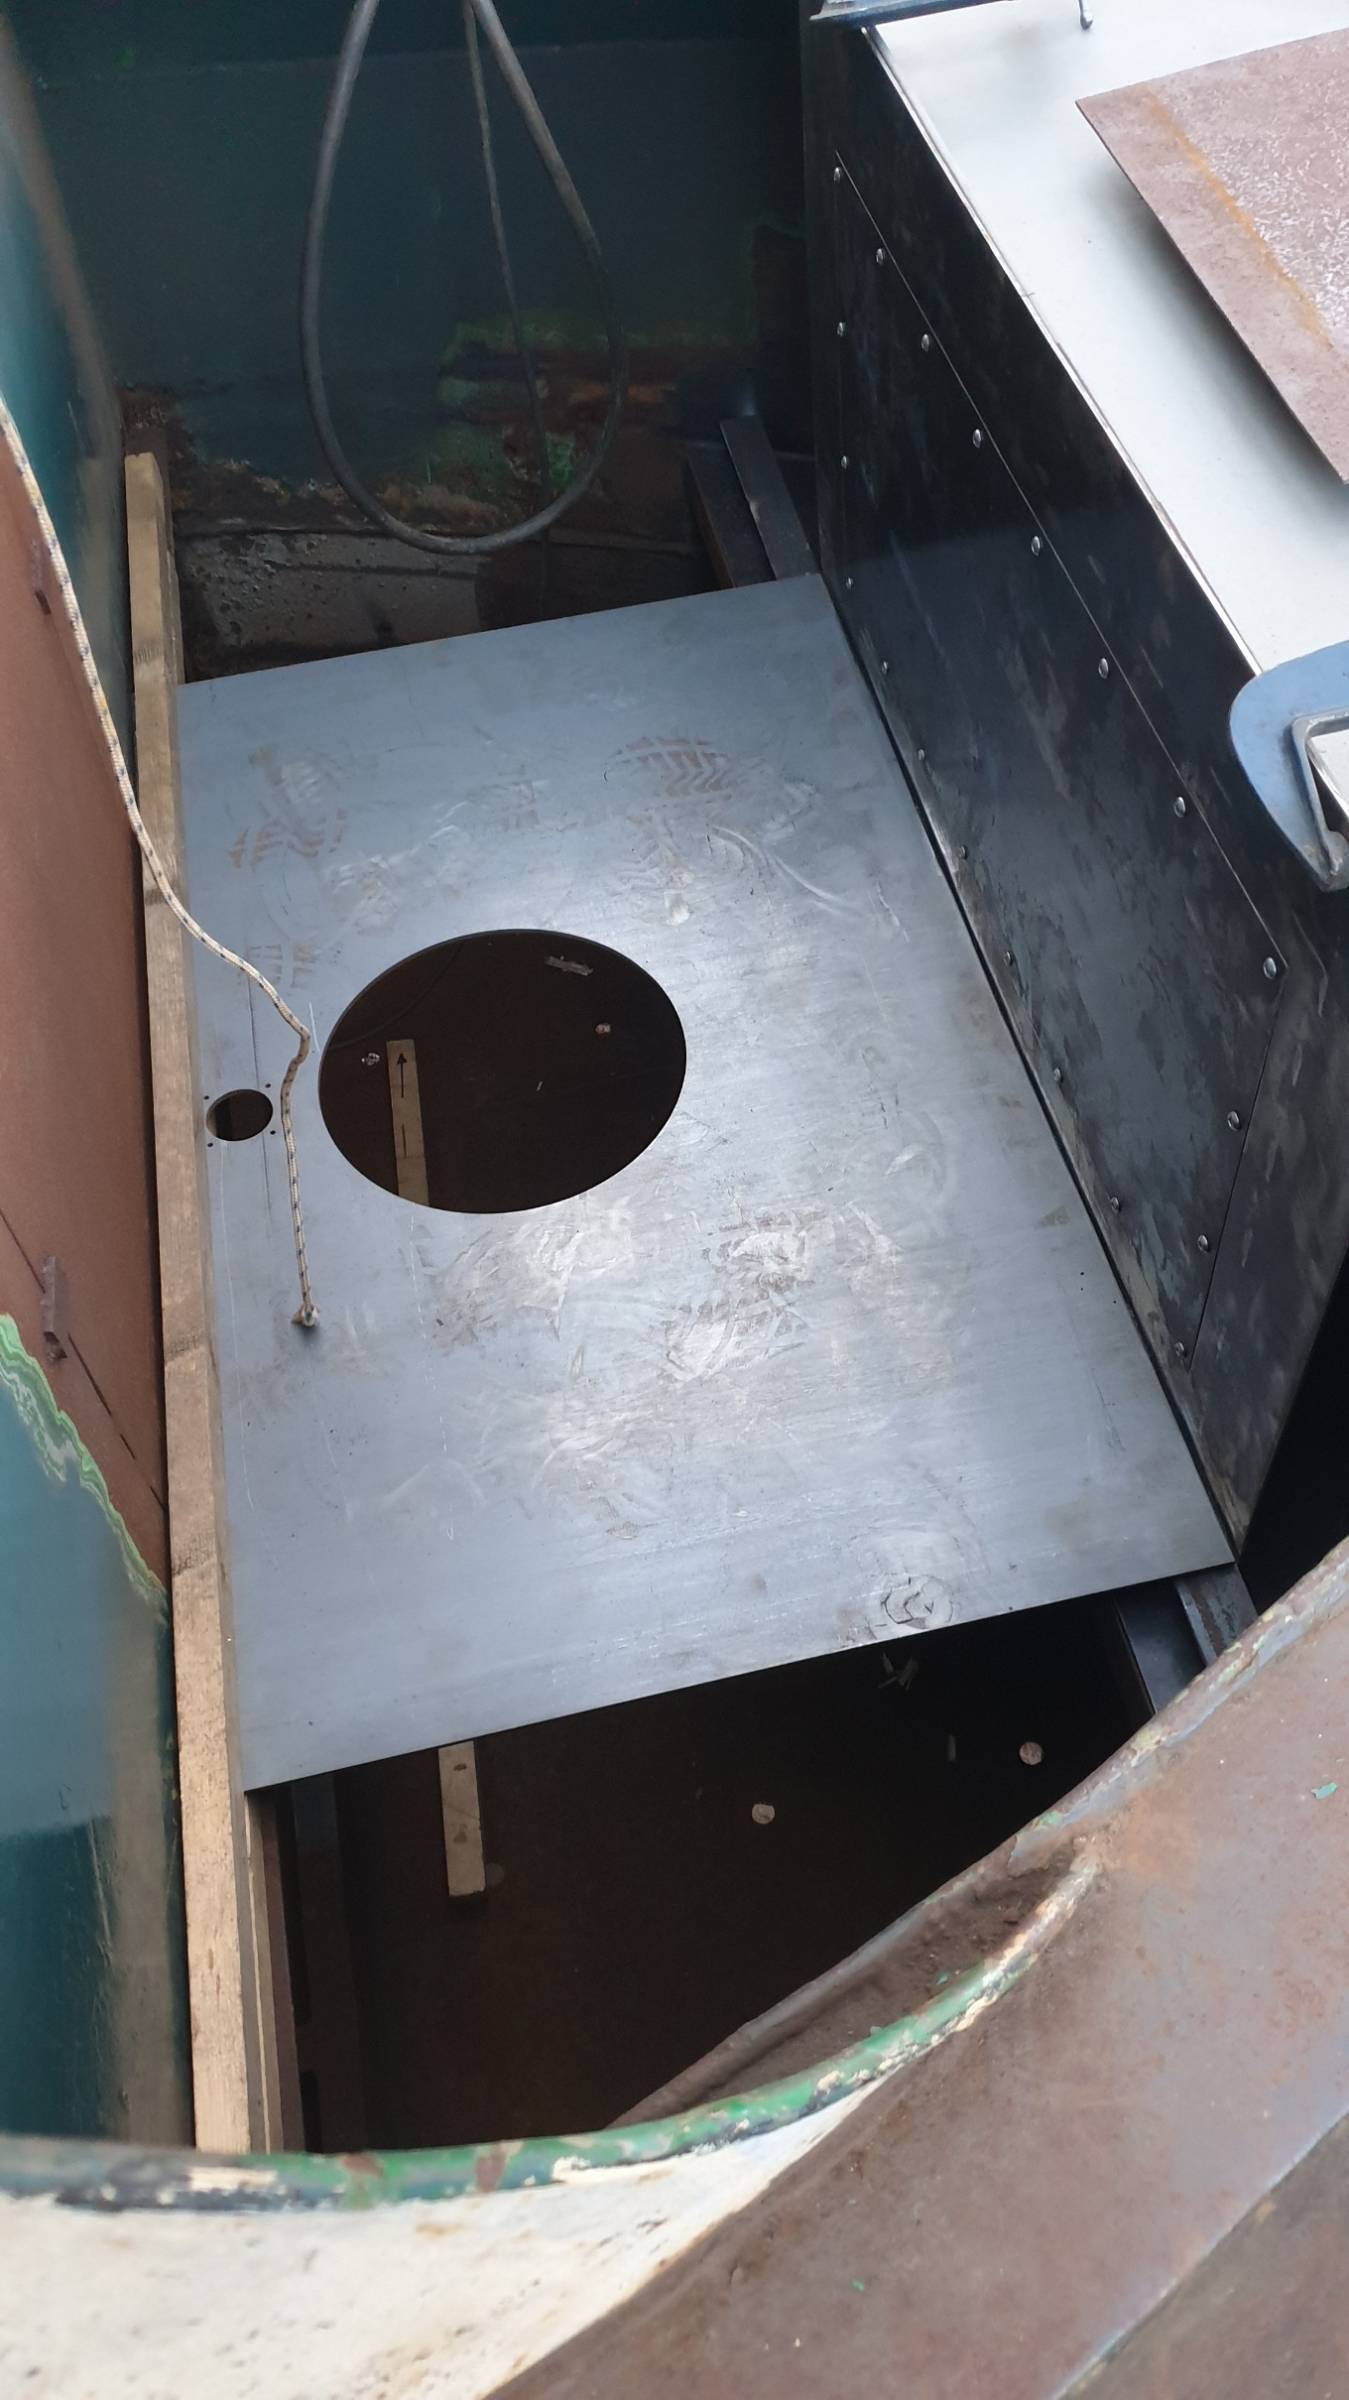
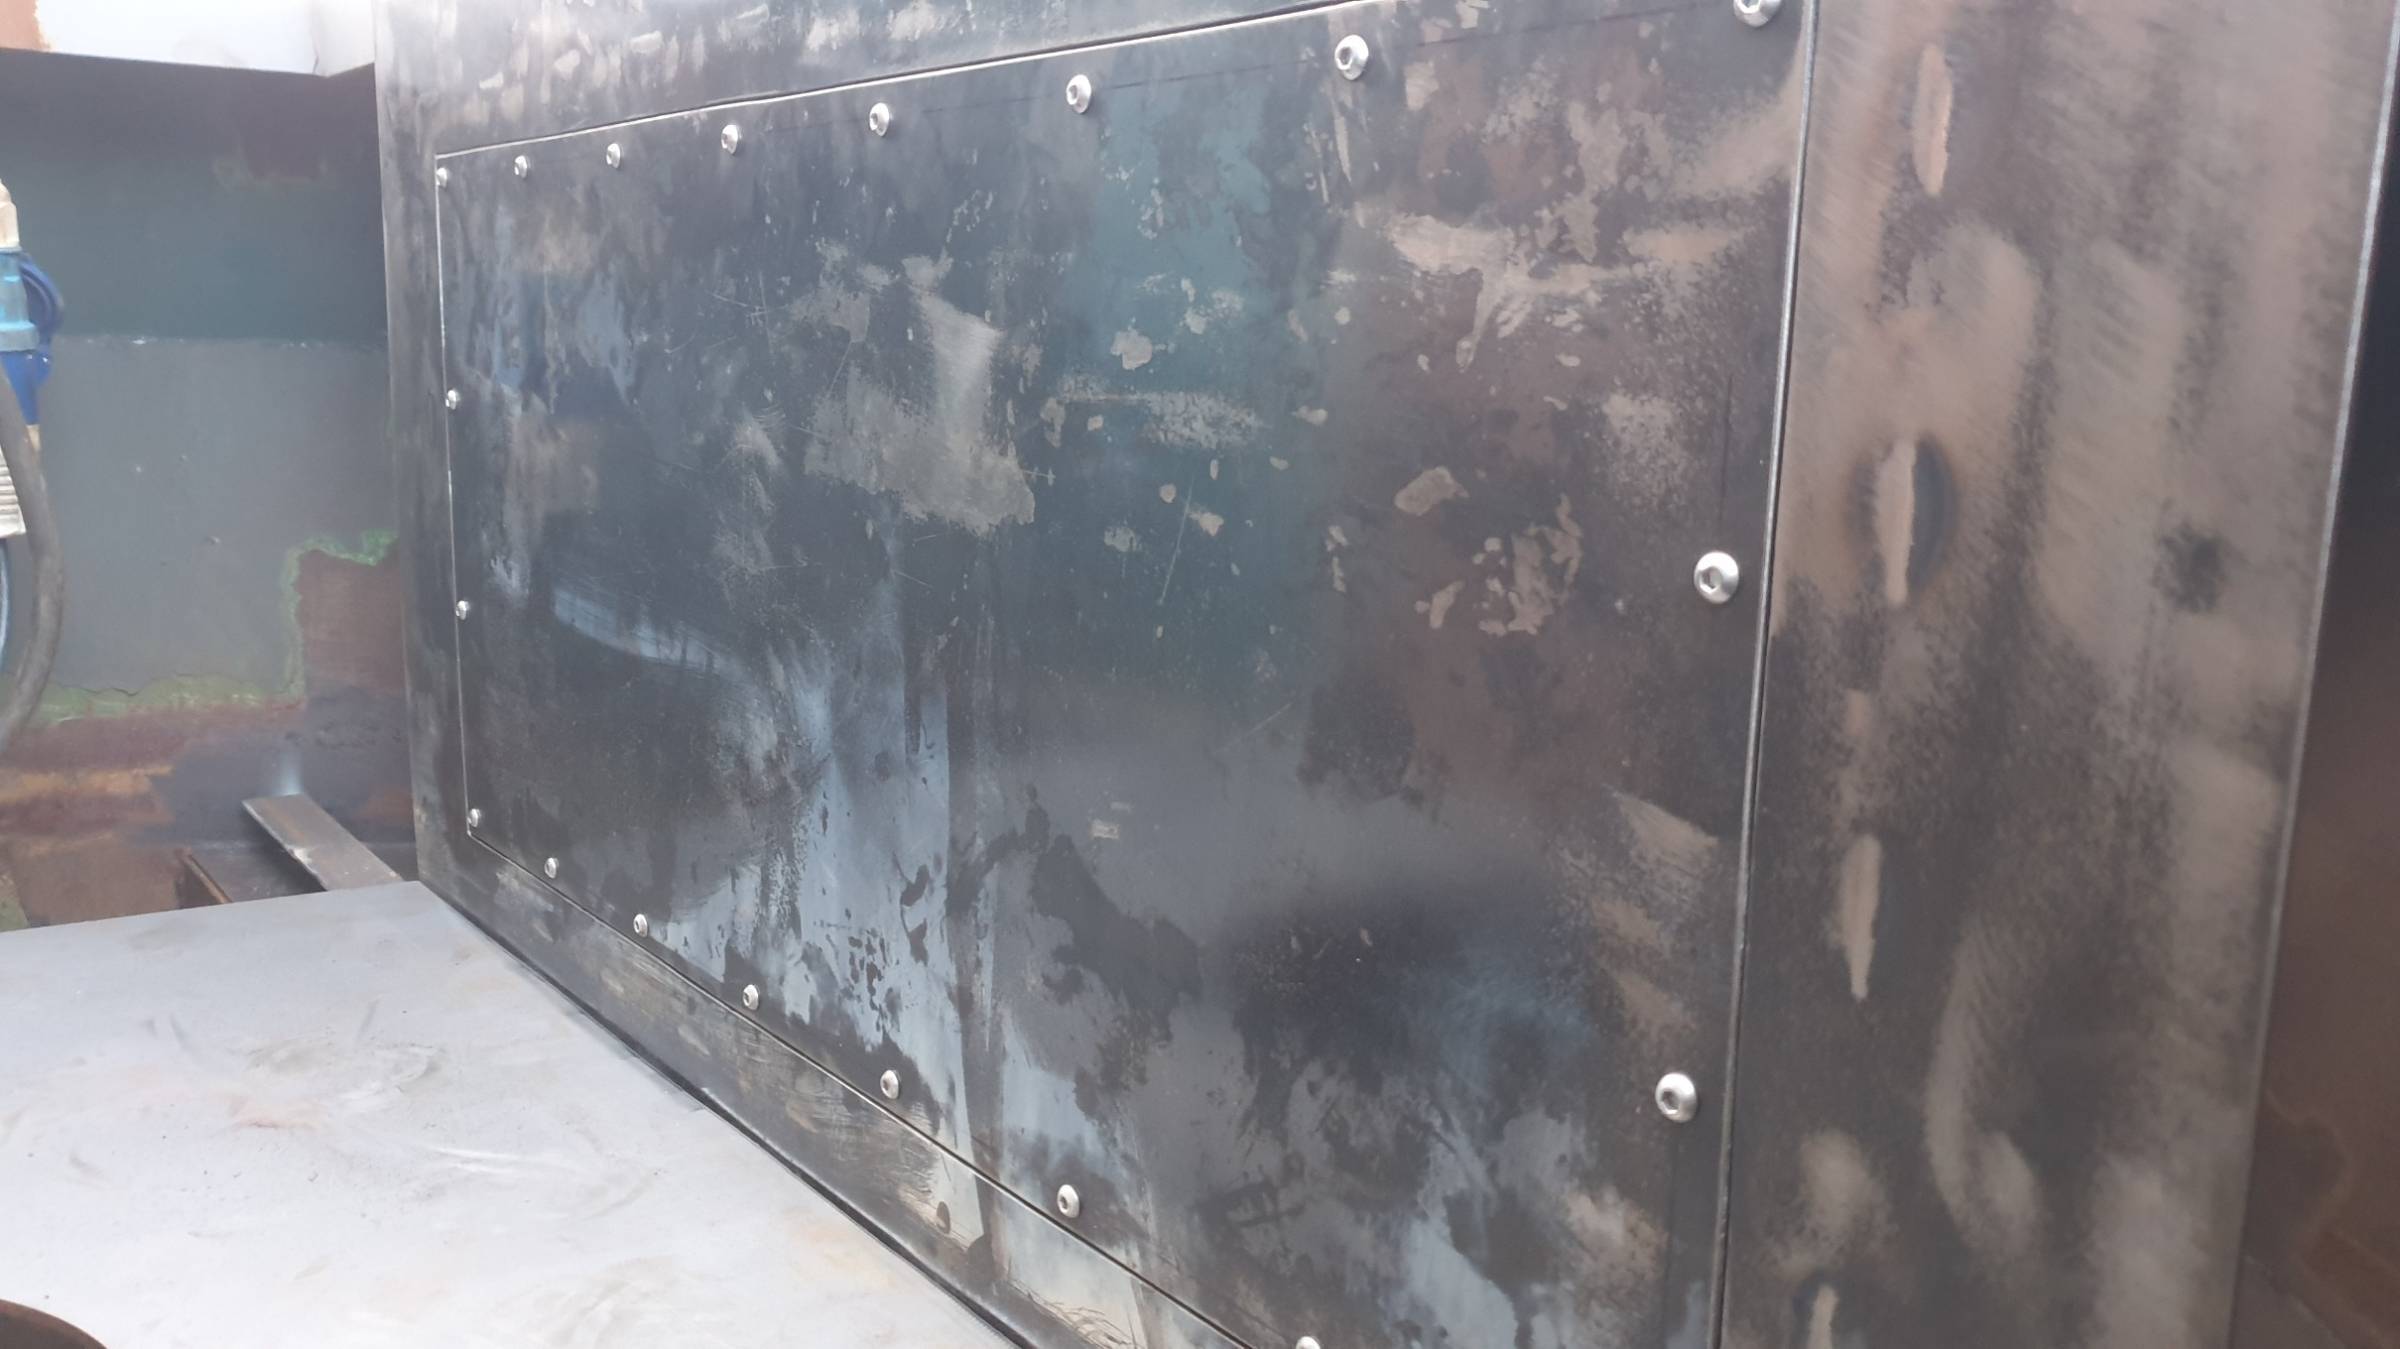
After reading the regs I thought that, too! Worst case scenario, I'll paint the majority of it and weld it up. Having looked at the photos and just to clarify, the access panel is the rectangular panel. The round access panel is to inspect/access the water tank access panels.
-
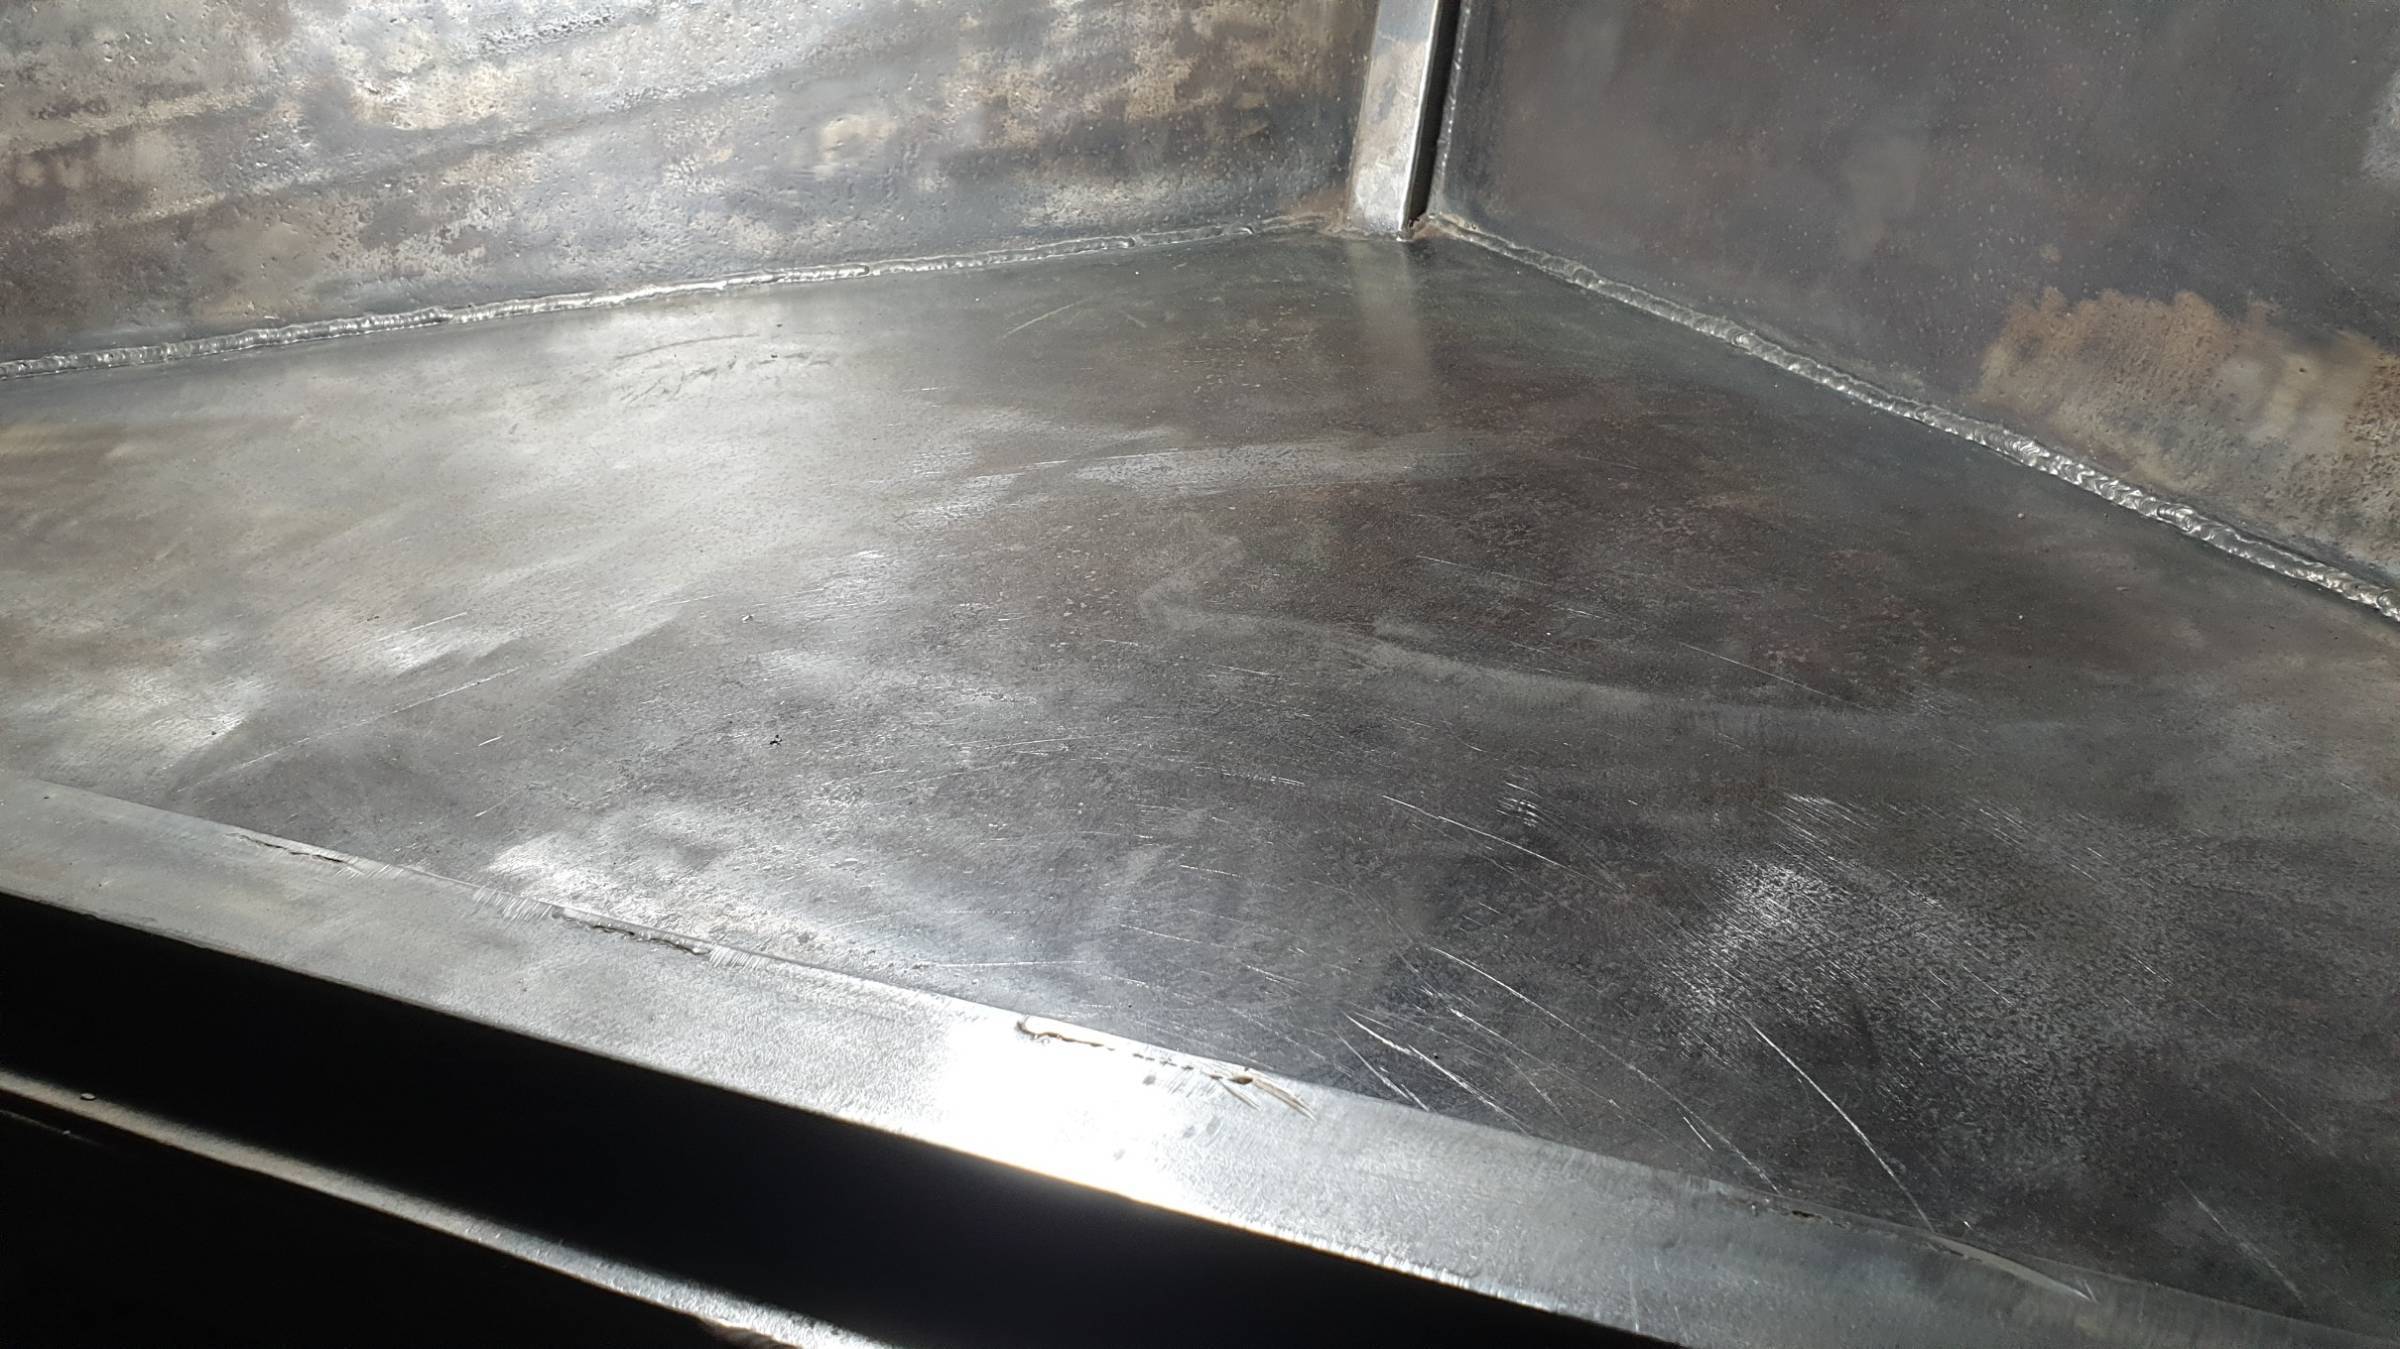
Hi All, I've remodelled the old gas locker making it larger and replaced the base of the locker, etc. Top access to the locker is tight i.e. just slightly larger than the bottle diameter. As such, I decided to create an access panel as part of the rear wall of the locker but having just read up on the BSS regs I'm now doubtful that this will pass. The panel is only there for future maintenance of the locker and to make a much easier job of painting, etc as opposed to the usual standing on your head rigmarole. The welldeck is between the cabin and gas locker. Any advice would be greatly appreciated. Thanks in advance.
-
Curving Steel Rubbing Strake Around Stern
Lee Crook replied to Lee Crook's topic in Boat Building & Maintenance
Yes, already drilled - mag drill 22mm diameter holes. -
Curving Steel Rubbing Strake Around Stern
Lee Crook replied to Lee Crook's topic in Boat Building & Maintenance
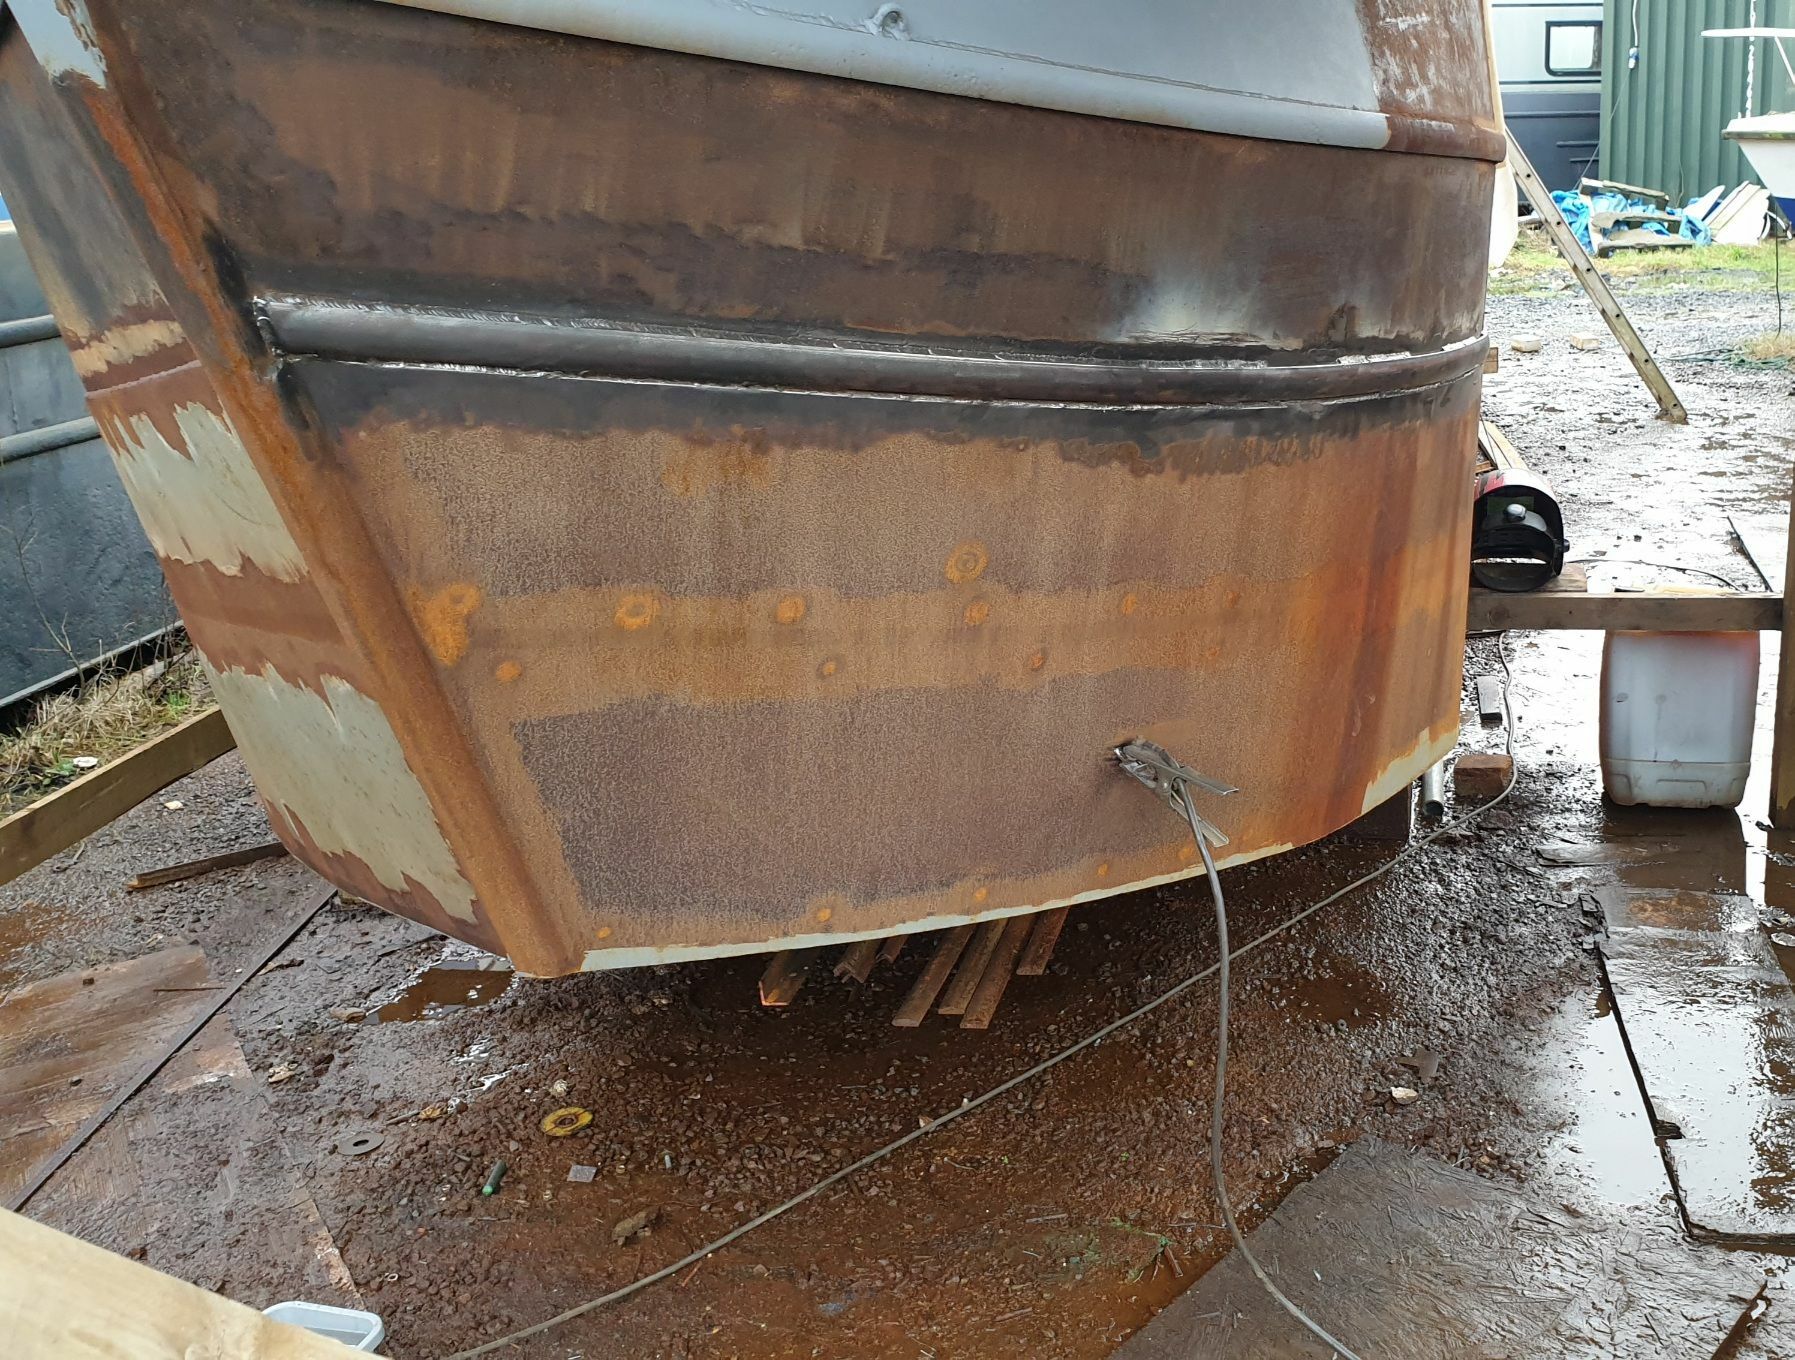
Thanks Tracy. I have a new baseplate coming in a few weeks. I've managed to get it as a single sheet 10 metres long. The original baseplate is badly pitted in areas and the chine was virtually non-existent, so I welded it up completely and ground it back flush ready for the new plate.
-
Curving Steel Rubbing Strake Around Stern
Lee Crook replied to Lee Crook's topic in Boat Building & Maintenance
Thanks for the top tip Tracy! Not started on the stern yet but I'm now extremely confident I'll be able to do a pretty decent job. As suggested I used stirrups and wedges (log splitters) to manipulate the strake to the curve. In many respects I think the stern will be easier than the bow as you are fighting two curves at the bow i.e. horizontal and vertical. I still need to fully weld the underside of the top strake which is original but just thought I'd slap some primer on the clean bits before it's grit blasted in a few weeks.
-
Narrowboat Horizontal Sringers
Lee Crook replied to Lee Crook's topic in Boat Building & Maintenance
Yes, just need a big trailer! 🤣 Am part way through building a SUPER STRENGTH pallet. Will have the pallet lifted onto stands and then the boat on skids on the pallet/steel. Will then lift the bow and counter, accordingly to remove the skids. Will then use sleepers to jack up the plate, starting in the centre and working outwards. Half a day should do it! 🤣 -
Narrowboat Horizontal Sringers
Lee Crook replied to Lee Crook's topic in Boat Building & Maintenance
Hi, I bought from P & D Northern in Oldham. https://pdnorthern.com/ Dealt with Warren who was very helpful! -
Narrowboat Horizontal Sringers
Lee Crook replied to Lee Crook's topic in Boat Building & Maintenance
Thank you 😊 -
Narrowboat Horizontal Sringers
Lee Crook replied to Lee Crook's topic in Boat Building & Maintenance
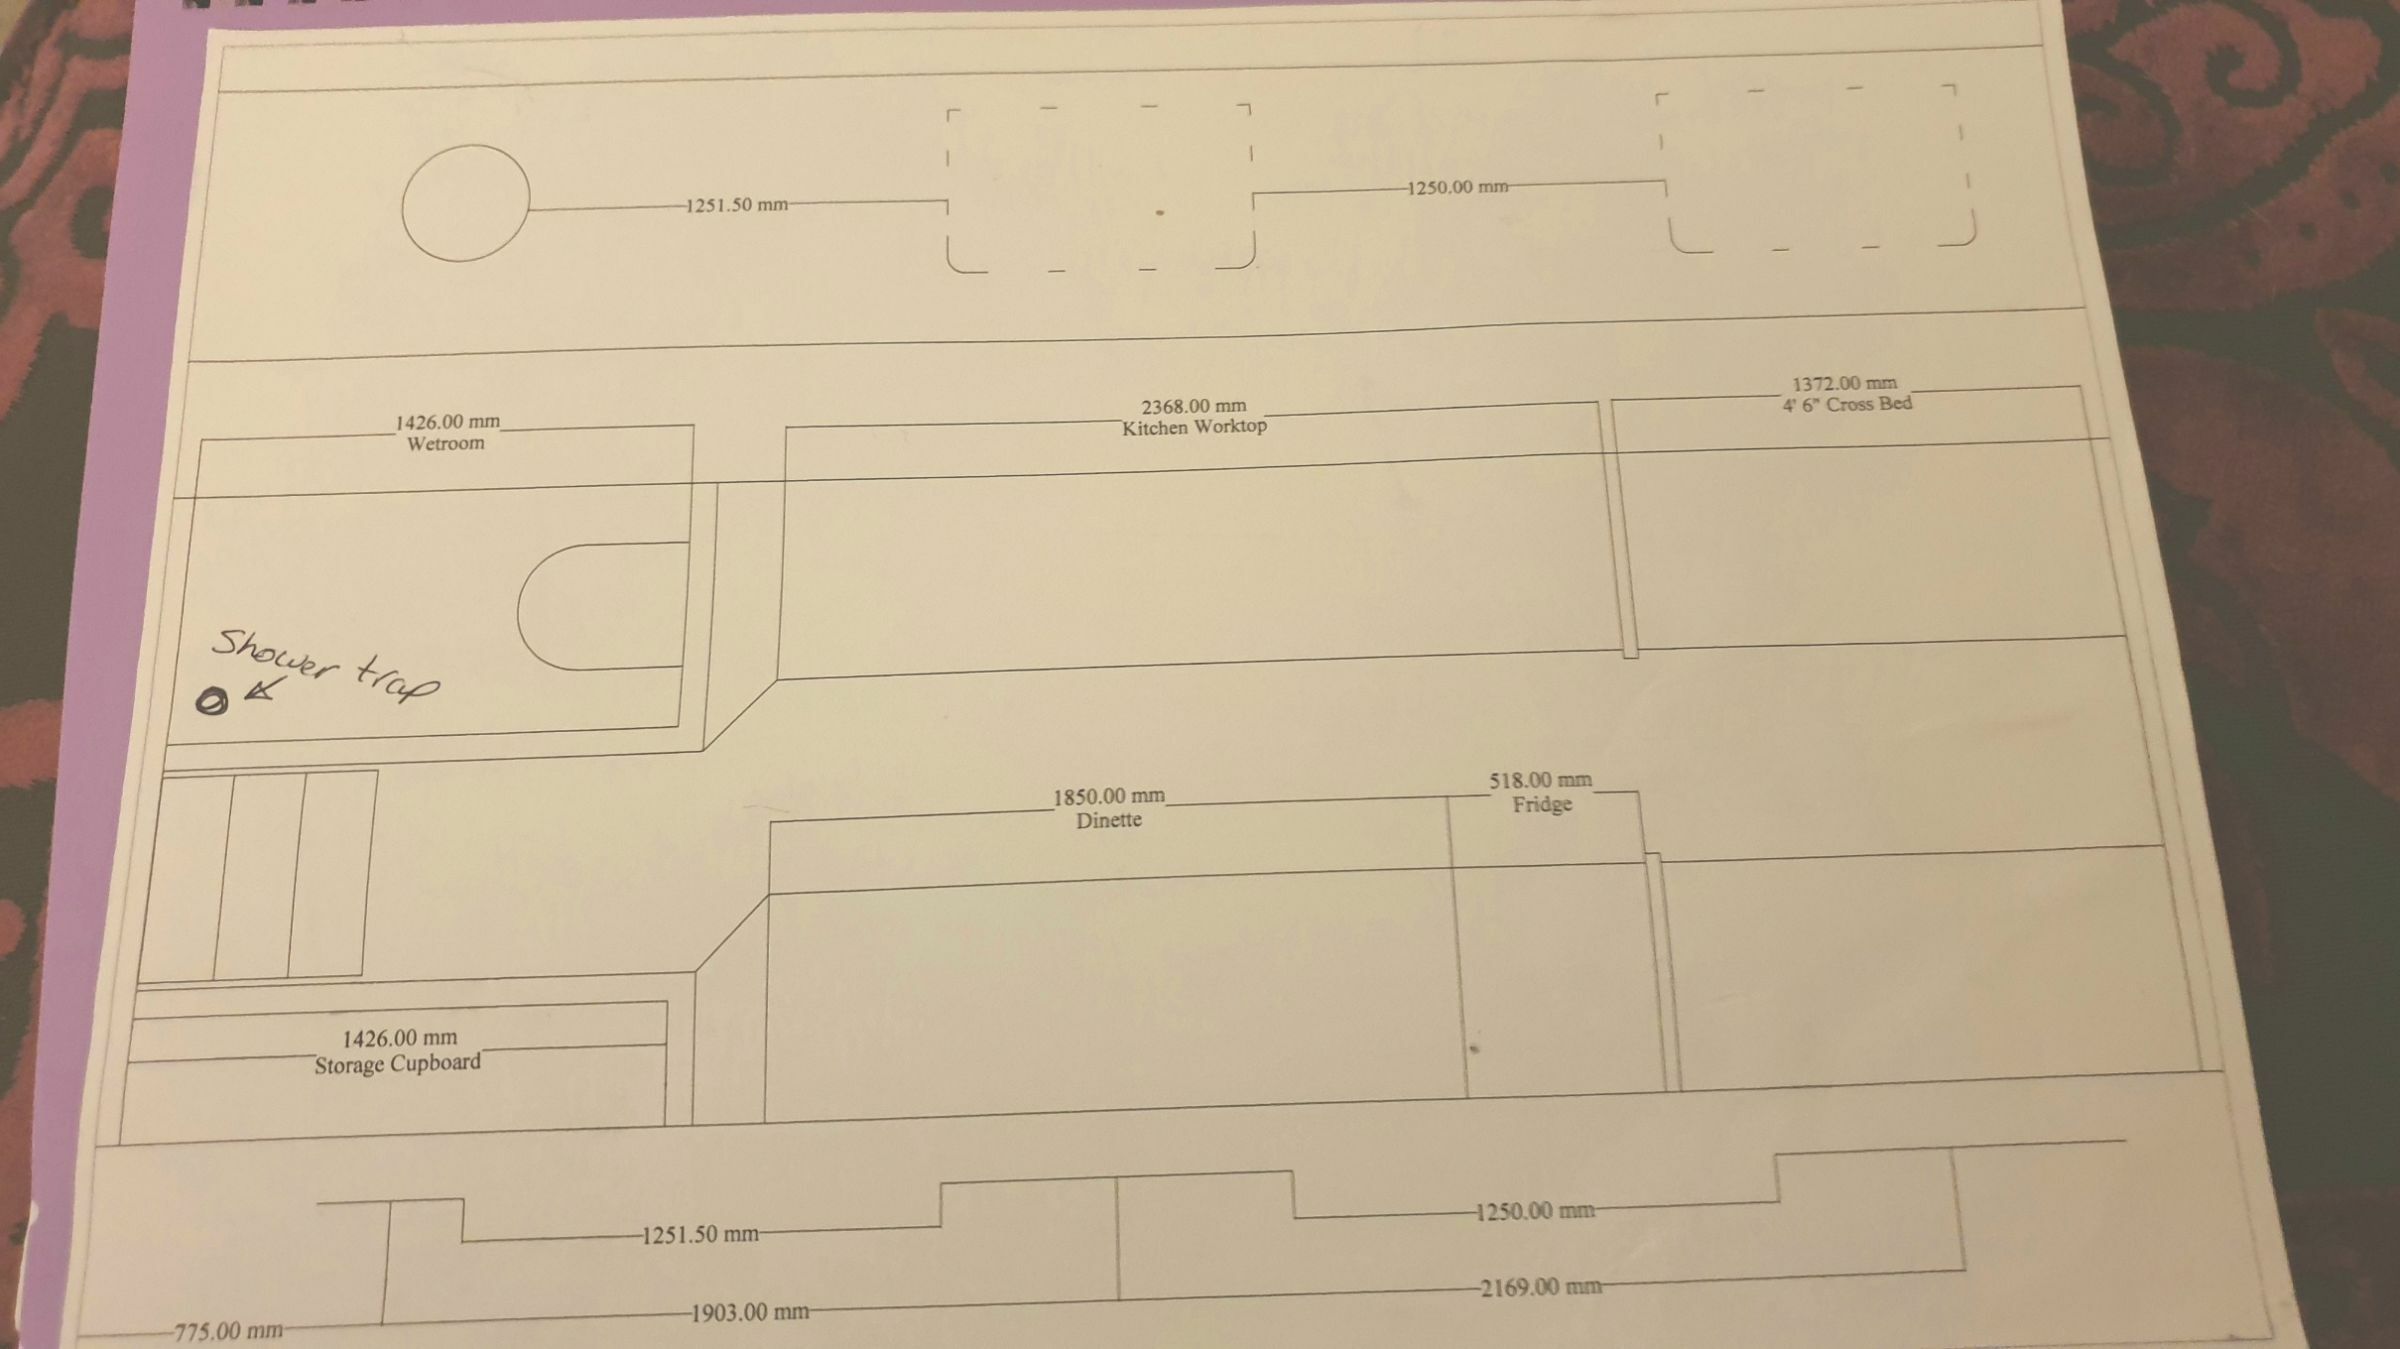
Hi MtB and thanks for your comments. Luckily, being a small boat (32ft) the wetroom is going to be on the port side and start at the engine bay bulkhead. The shower trap should only be around 6" from the bulkhead and I'm hoping to be to access this via an access panel under the steps. I think I'll drill a series of holes with the mag drill between all the sections. Like a girder that's has holes to reduce weight without compromising on strength. It will also reduce the extra weight of the overplating. 🤣
-
Narrowboat Horizontal Sringers
Lee Crook replied to Lee Crook's topic in Boat Building & Maintenance
Hi BEngo and thanks for your comments. I had considered the points in the comments but that raises more questions than answers 😀 I have left gaps and cut the bearers back at an angle along the sides of the hull to allow for water (hopefully just condensation) to move aftwards but this just end up pooling at the engine bay bulkhead which has always been fully welded so would need a bilge pump under the floor to clear. The main questions I have now are... 1. I'm planning to heavily insulate the boat with using a combination of pir boards fixed with spray contact adhesive and seal any gaps with closed cell spray foam. 65mm insulation under gunwales, 50mm cabin sides, 40mm roof and a minimum of 30mm under the floor. Windows are brand new Caldwells double glazed/ thermal break. Realistically, how much condensation such i expect? 2. I've seen lots of other boats with a complete subframe but no limber holes and do they encounter problems? 3. If water (condensation) does fun down hull sides and gets to the more central compartments, then surely it can get out, too via the same route? 4. Many boat have poured concrete ballast up to the top of the bearers. How do they combat this issue? I know, another can of worms well and truly opened but we're here to share and learn so I welcome any and all advice/comments. Thanks in advance.
-
Narrowboat Horizontal Sringers
Lee Crook replied to Lee Crook's topic in Boat Building & Maintenance
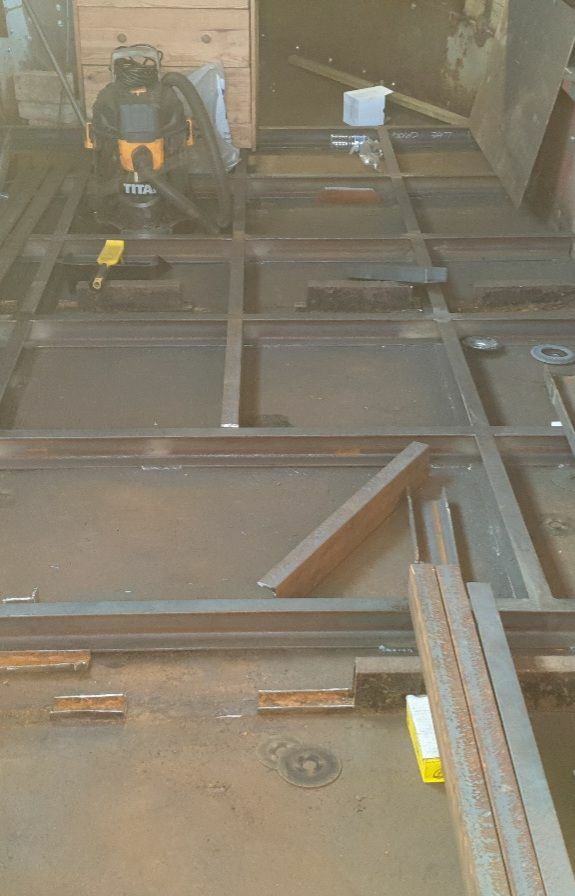
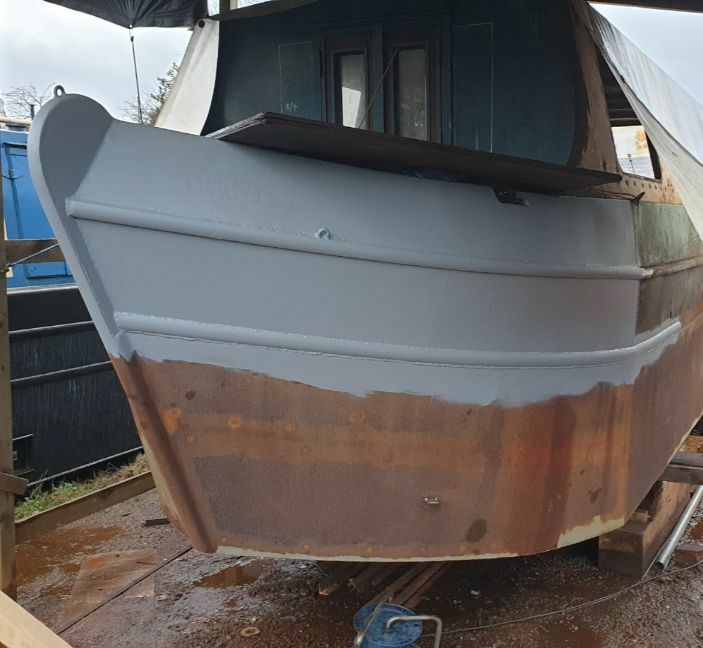
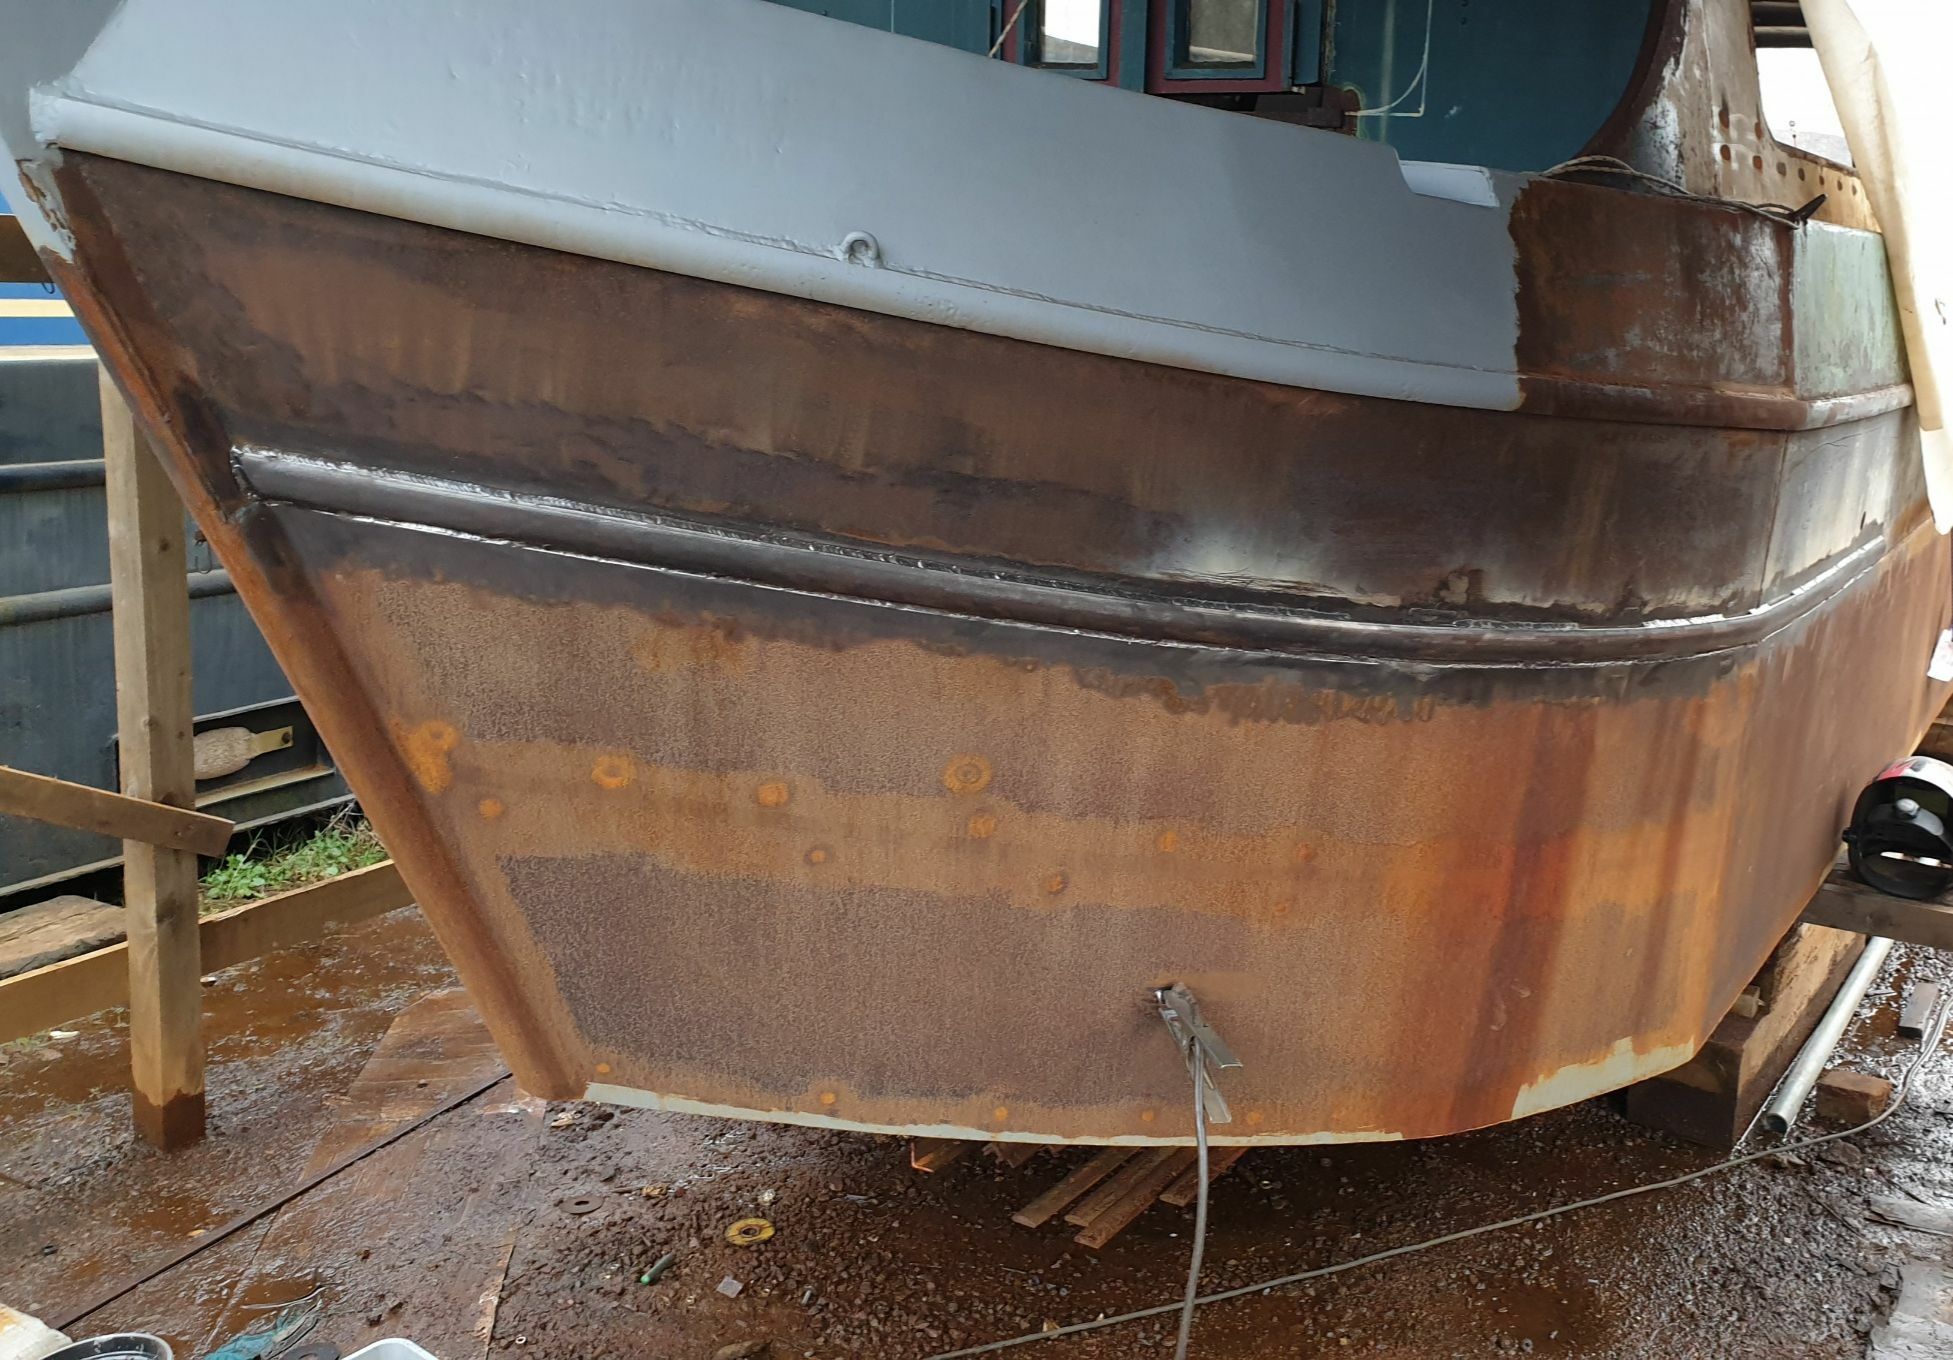
Hi Alan, I've removed over 330 engineering bricks (3.4kg each) plus the replacement engine/gearbox is around 200kg lighter i.e. Lister TS2/PRM vs ST2/LH150. The original water tank was integral and probably held around 600 litres. The replacement tank holds 380 litres. Additionally, I have raised the gas locker floor (in the bow) by 5" along with the welldeck floor and drains. All other skin fittings (close to the original waterline) will be welded up and an assessment will be made once we test float. Hopefully, all things considered and the weight saved vs extra weight from overplating I don't think there will be much difference but I'll report back after the test float. The plan is to leave it with the crane slings around the boat for 24hrs to ensure we have no leaks. 🤞
-
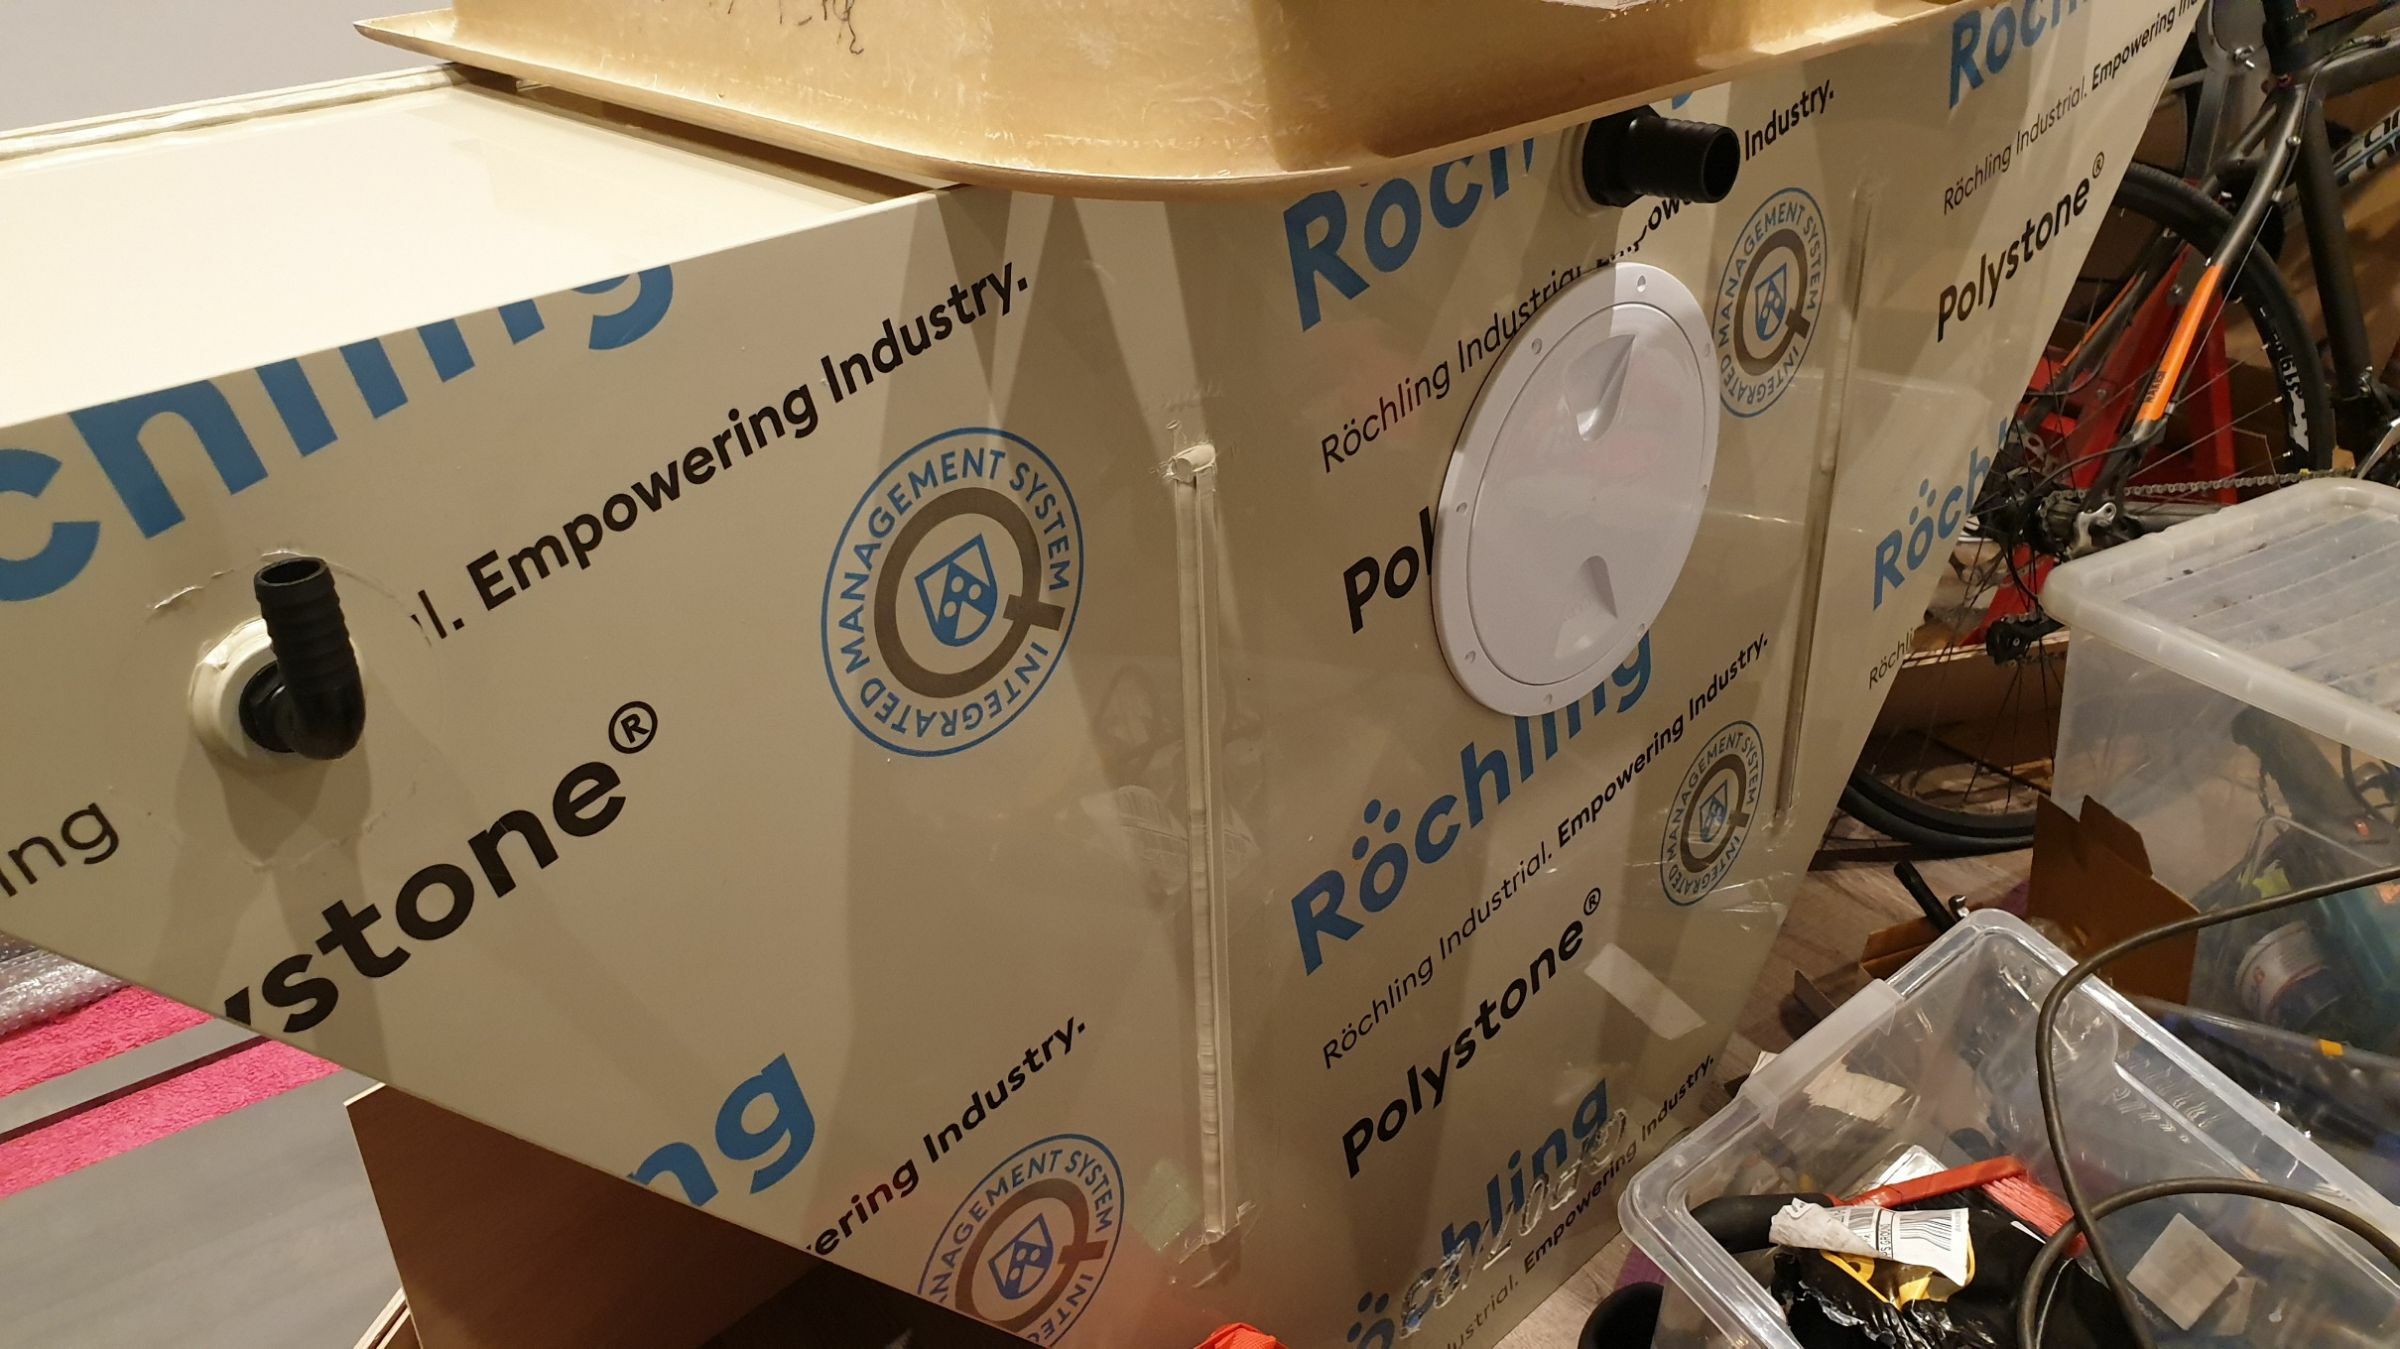
I used Goodwin Plastics, too. They are on Facebook and have hundreds of photos on their page. Got mine with filler inlet, main outlet, breather and inspection hatch. Also has baffles fitted.
-
Narrowboat Horizontal Sringers
Lee Crook replied to Lee Crook's topic in Boat Building & Maintenance
Hi Jonathan Thanks for your comments. The holes are to secure a new baseplate to the existing. The original plate was 6mm but had some deep pits in areas. I've managed to get a single sheet of 7mm steel as the boat is only 32ft long. I also fitted new bearers/subframe to support the new baseplate. They help to reduce condensation, too. That and the lack of windows 🤣🤣
-
Narrowboat Horizontal Sringers
Lee Crook replied to Lee Crook's topic in Boat Building & Maintenance
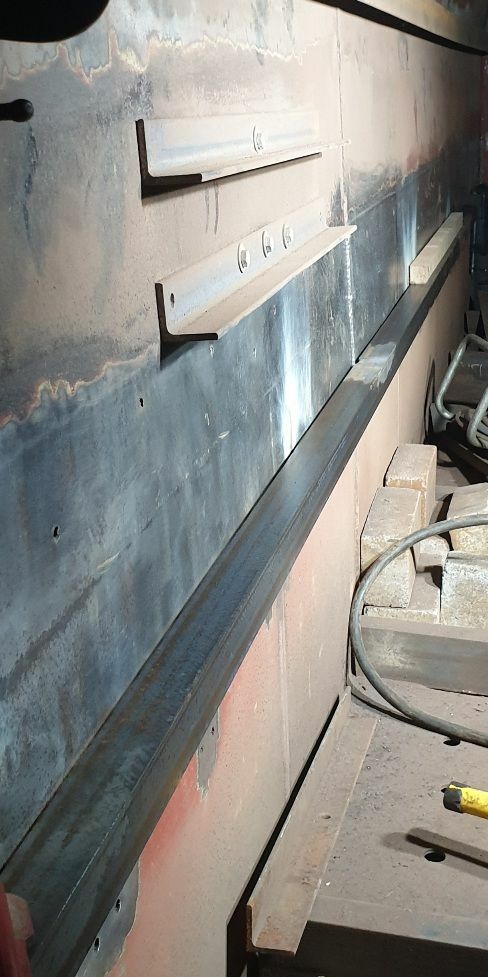
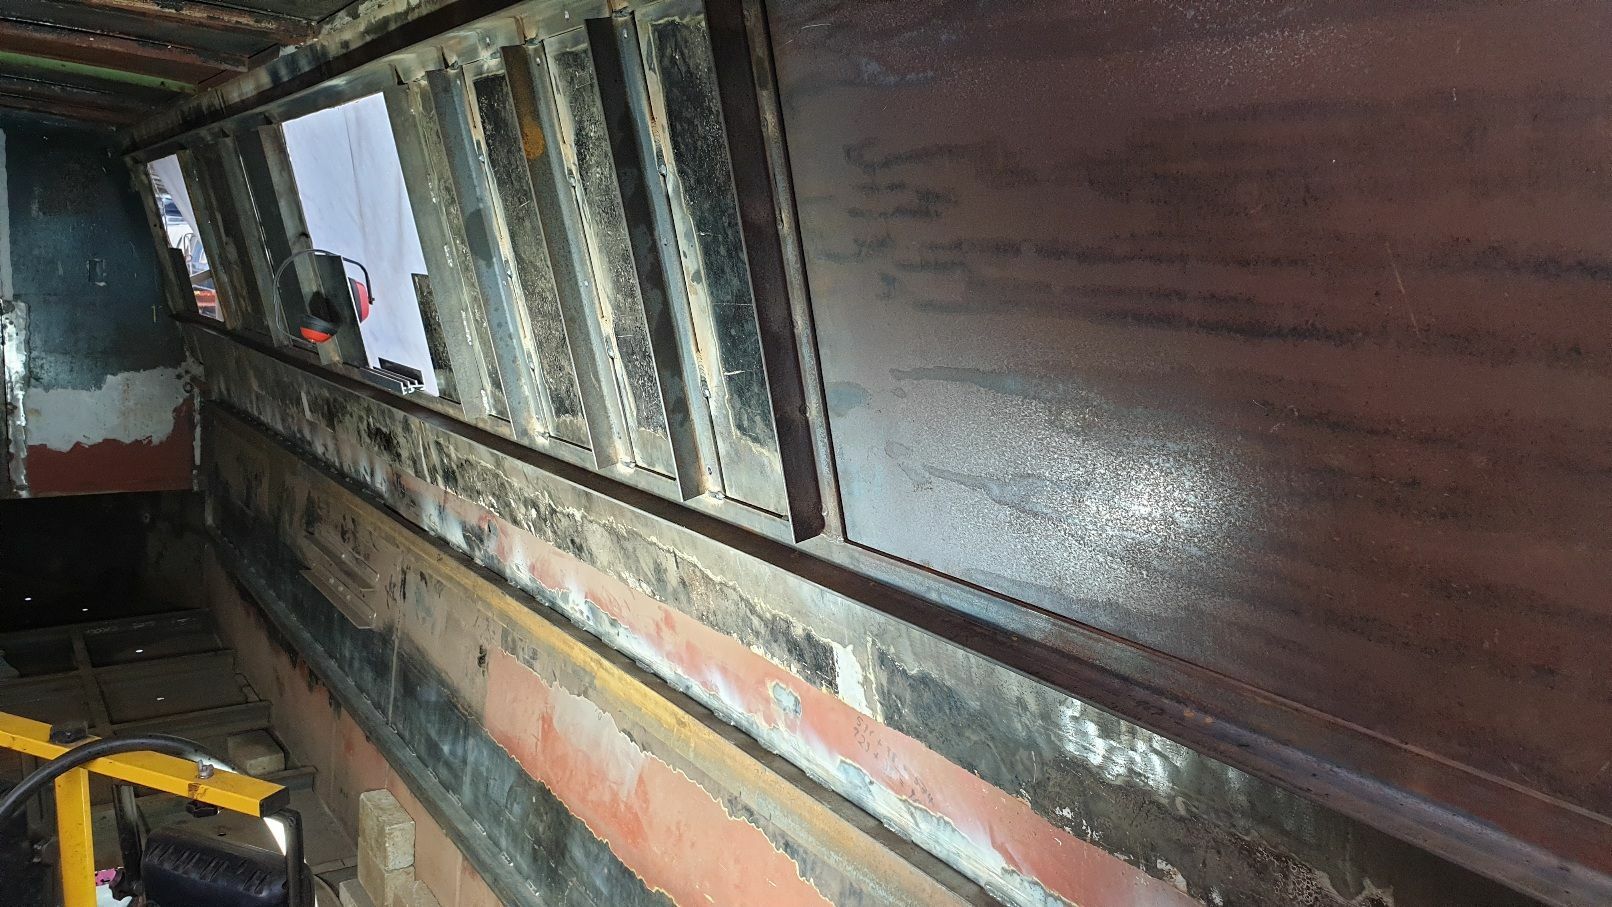
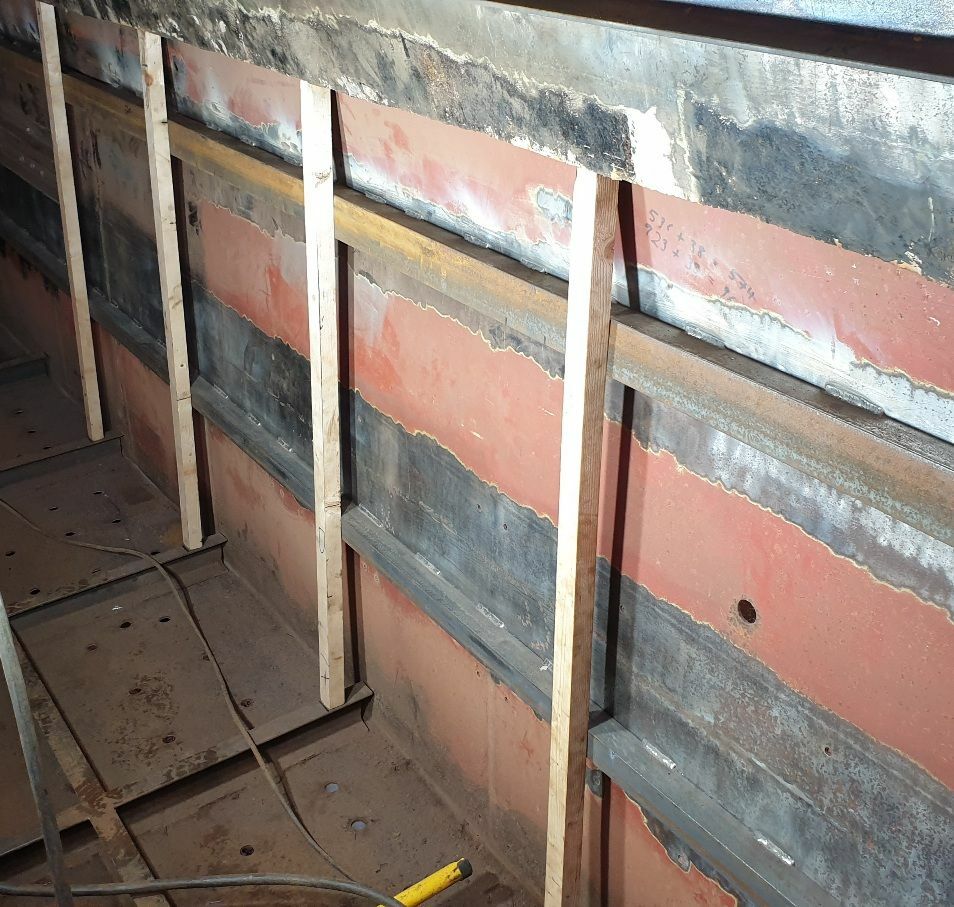
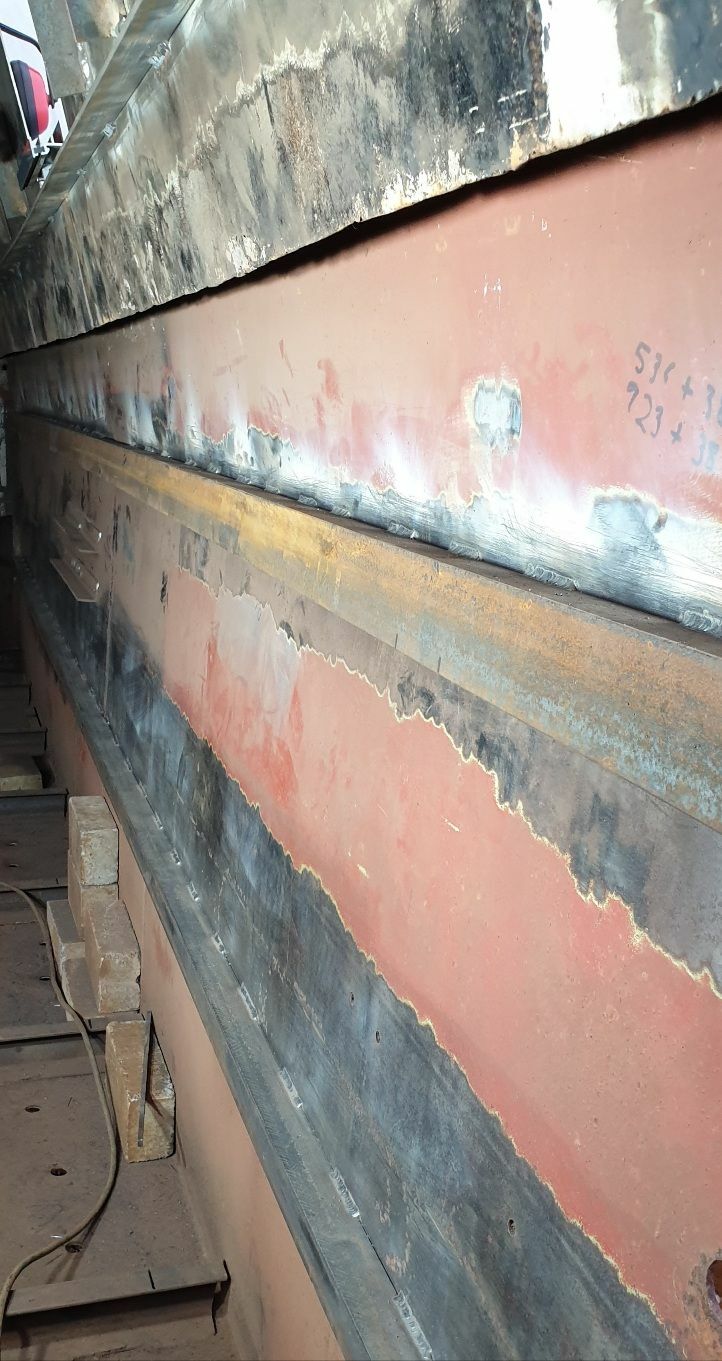
Hi All, Thanks for your advice. Here are some picks of the progress. I had some 60x60mm angle which I ripped down to 60x40mm and this was used on the top with 40x40mm angle on the lower horizontal. Also moved the window openings and installed a 40x40mm angle framework having removed the previous angle from the cabin side as the new windows will be clip in.
-
Narrowboat Horizontal Sringers
Lee Crook replied to Lee Crook's topic in Boat Building & Maintenance
Thanks 👍 -
Narrowboat Horizontal Sringers
Lee Crook replied to Lee Crook's topic in Boat Building & Maintenance
Thanks Tracy. What spec of angle would you go for? I was thinking 40x40x6mm. -
Hi All, What dimension/thickness of angle iron is generally used for the horizontal stringers used to to strengthen narrowboat shells? Also, there seems to be a few different configurations... 1. Two full length stringers on each hull side. 2. One stringer around half way up the hull. 3. One stringers just before the fold to the gunwales with vertical angle iron lengths running down to each floor bearer. Which of these would be the best/strongest option? Thanks in advance.
-
Curving Steel Rubbing Strake Around Stern
Lee Crook replied to Lee Crook's topic in Boat Building & Maintenance
Ok, many thanks. I'll get some photos taken and upload them when I do the work. -
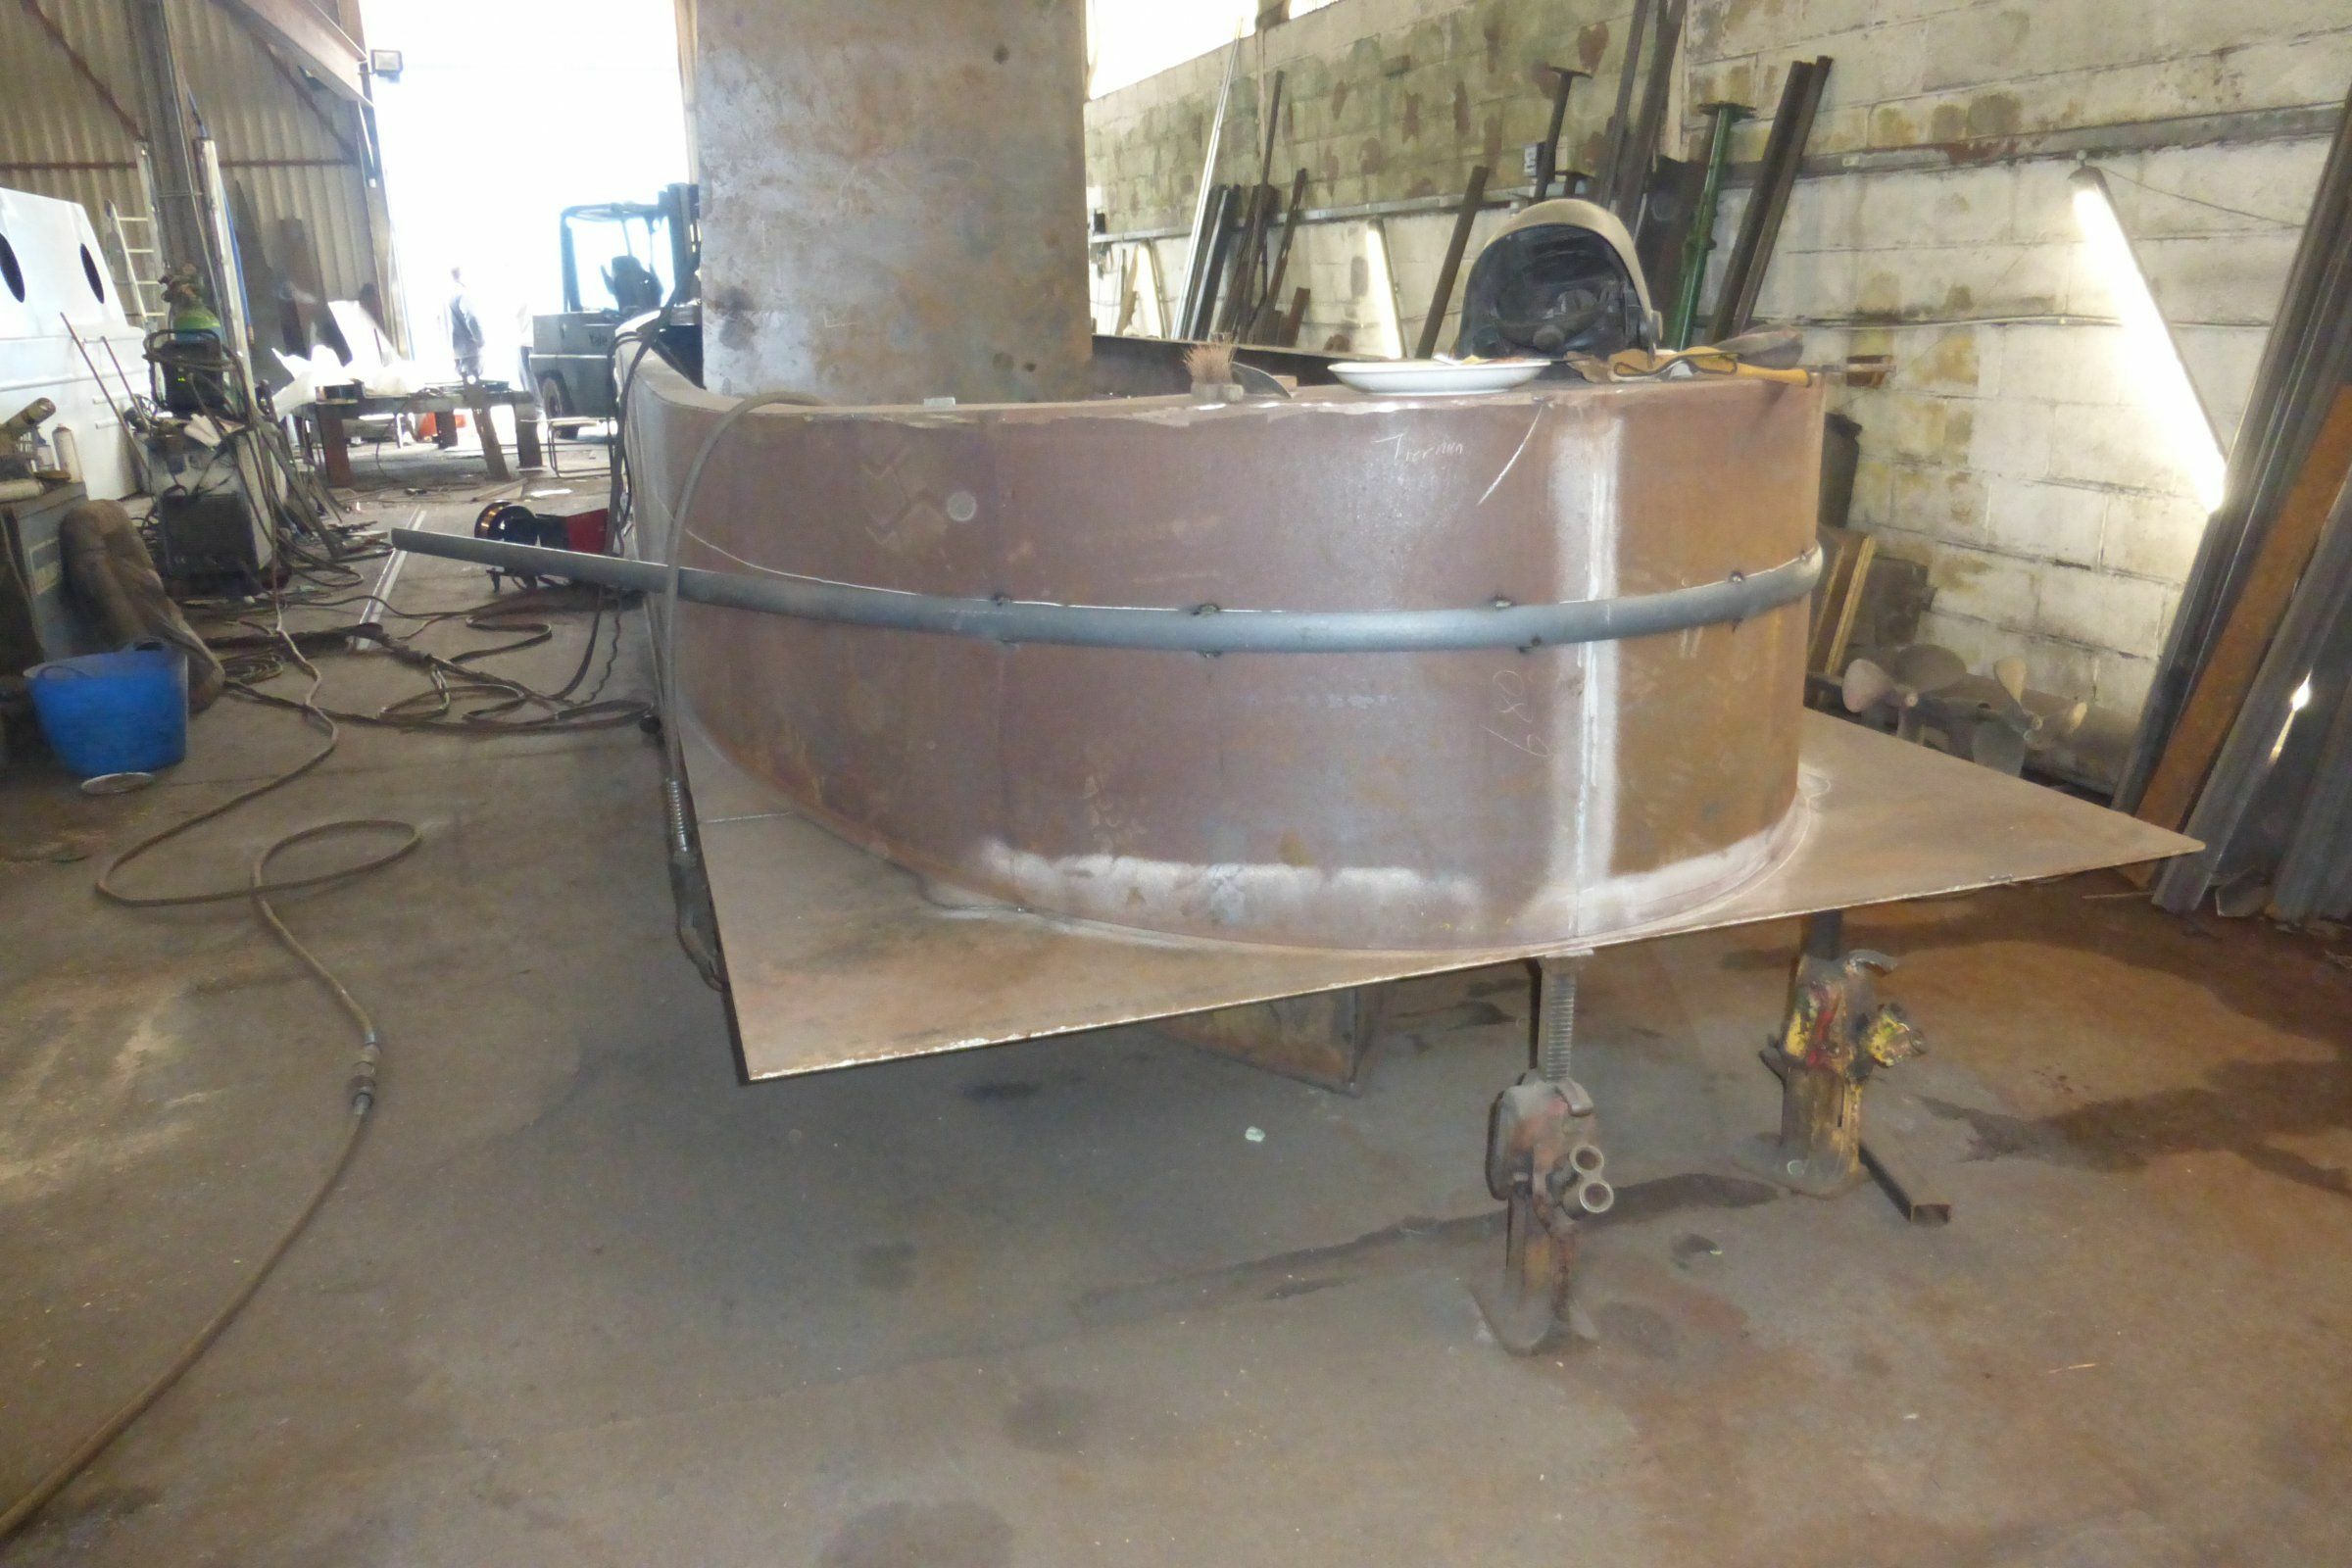
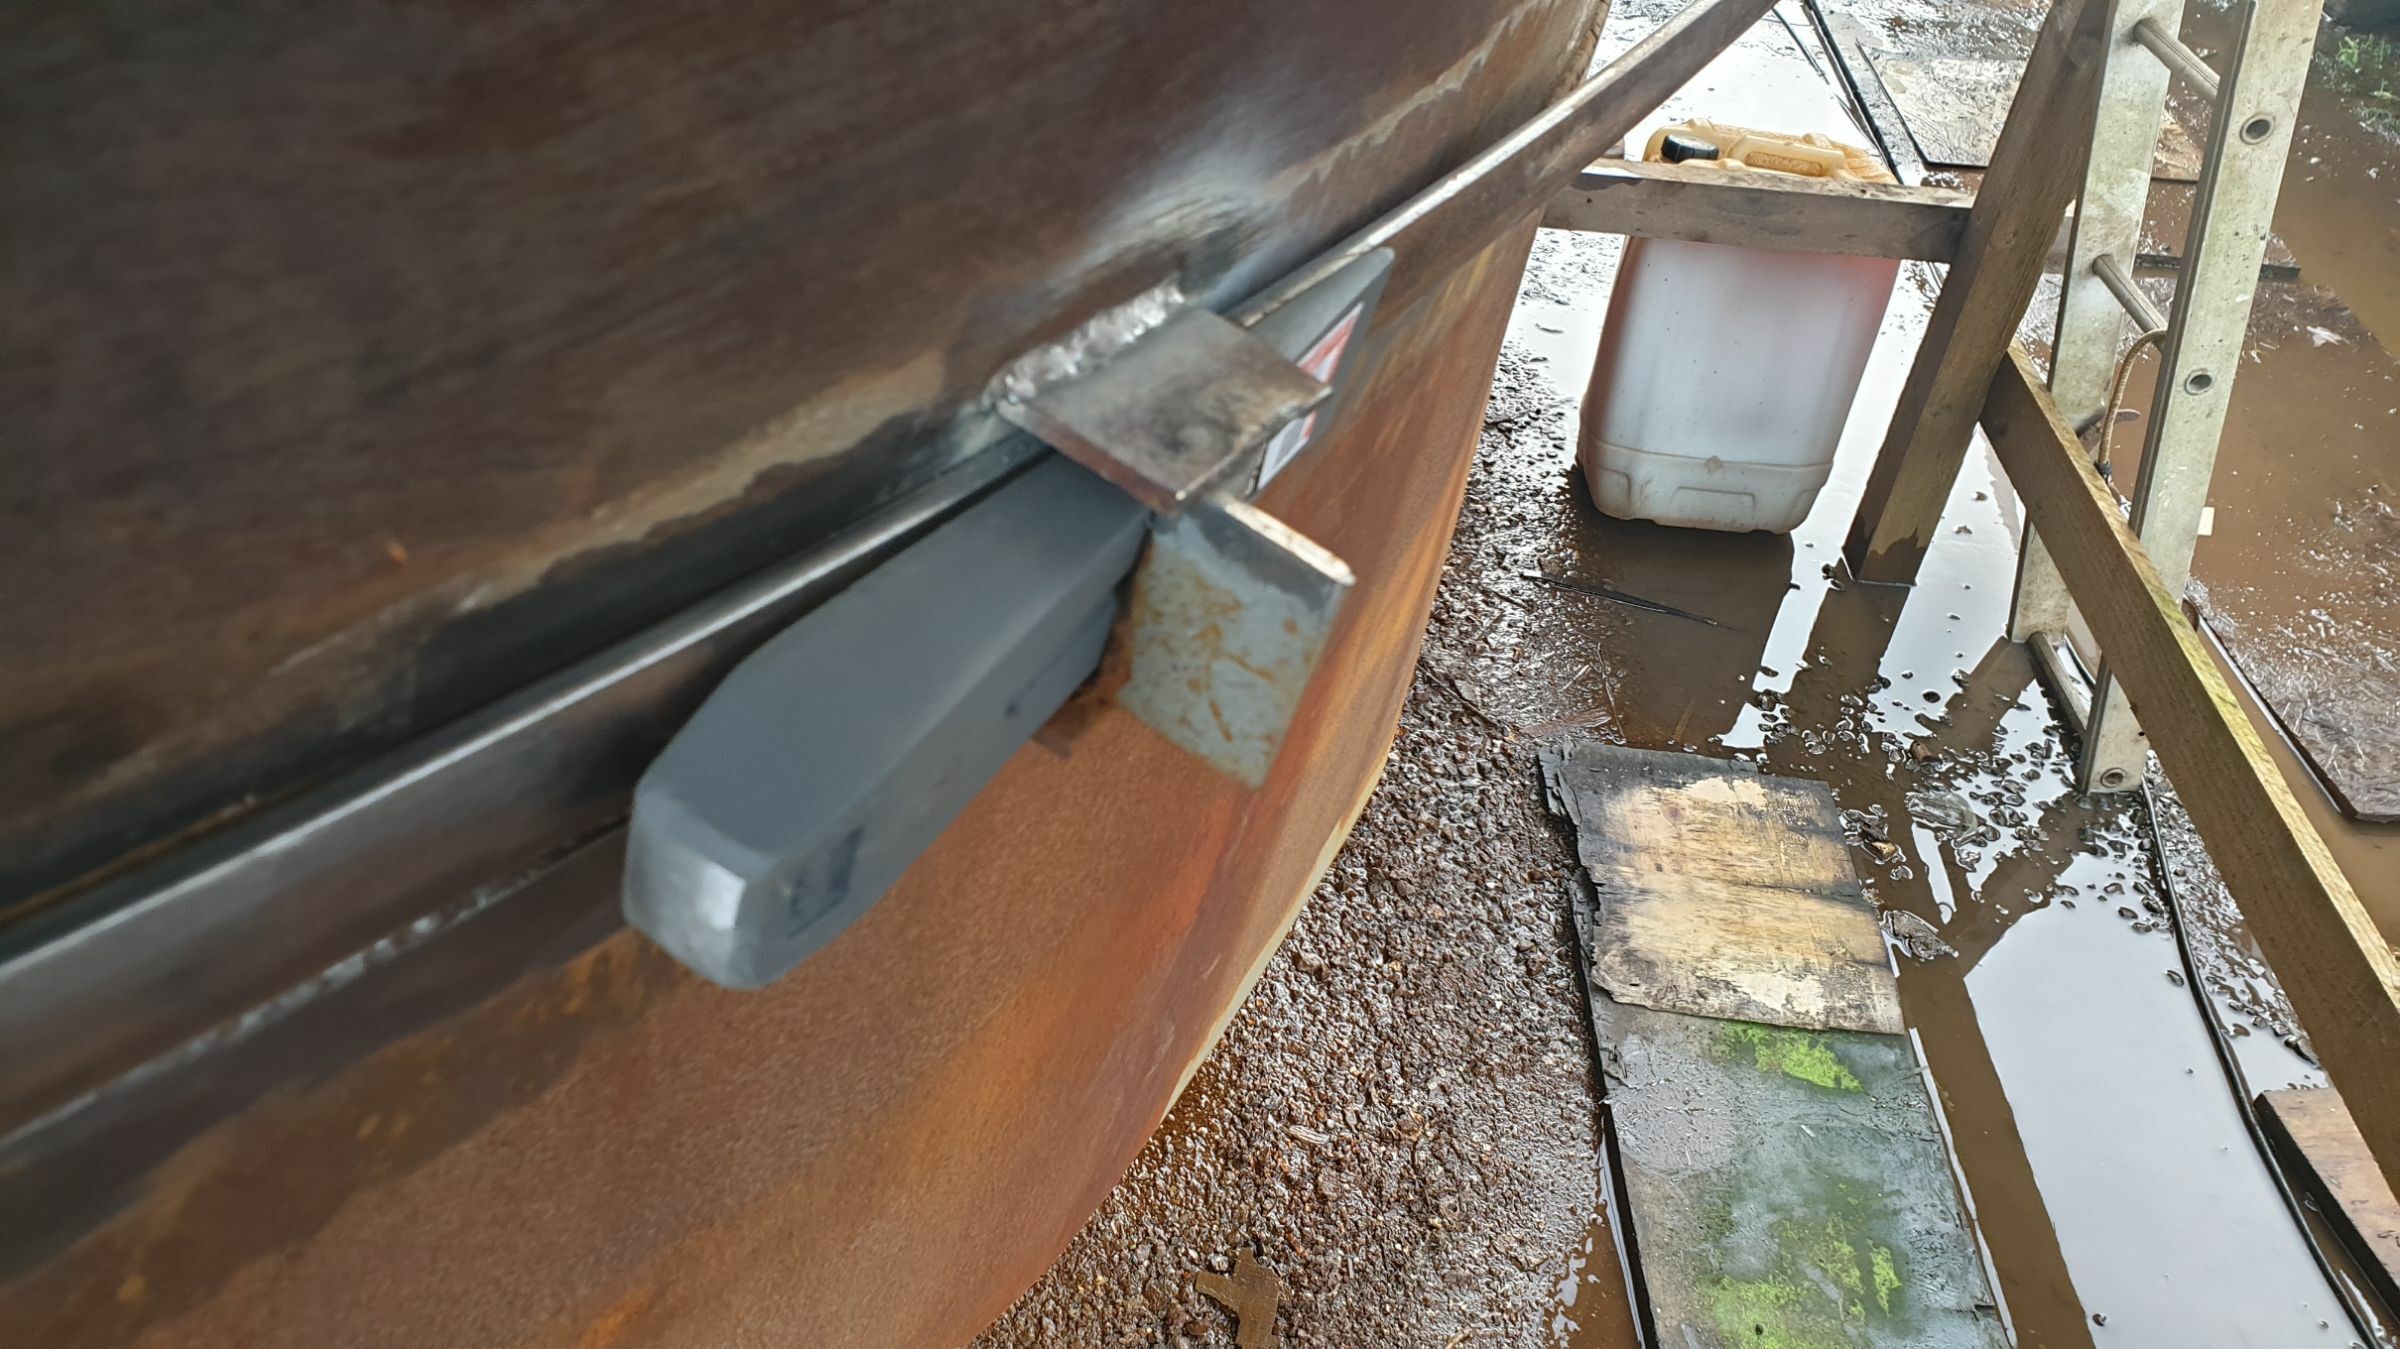
Hi All, I will soon be replacing the rubbing strake around my narrowboat stern (at the waterline) and will also adding another strake between this and the upper strake. The strake is 40x12mm square edge convex bar. What is the best process for curving the strake? It is in 6.1m lengths and already very bendy/flexible. I am hoping with the help of an extra pair of hands or two, it's just going to be a case of tacking and physically curving it to follow the curvature of the stern. If anybody has prior experience of this, your advice would be greatly appreciated. I've searched far and wide for a video of this for weeks but haven't found anything. I did find this image (on this forum) which seems to suggest this is how it was done but am seeking advice/confirmation before I proceed. Thanks in advance.
-
Stuffing Box Manufacturer/Brand
Lee Crook replied to Lee Crook's topic in Boat Building & Maintenance
Hi Tony I think I've found the correct part! It even has the notch cut out to fit the lug.


.jpg.867e6935de6a9065690219cdf575b5bb.jpg)