

8-10 January 2011
Entry posted by Tom and Bex
894 views
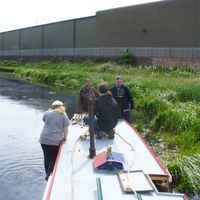
Back to work on the boat again so soon which is nice. Just wish I could have every weekend off but don't think work would allow it! Glad to see work Debdale are progressing well with the work they are doing for us.
Started on Friday evening by painting a first coat of blacking in water tank space under front deck. It's a very tight space to be working in with all the fumes from blacking!
Saturday and its time to put some insulation up. After thinking about the various options I decided to use laminate floor 3mm foam insulation from B&Q cut into strips to cover the steel roof stiffeners and glued on using spray glue, then filling the gaps with 25mm Celotex glued up with a bead of general grab adhesive around the edge and cut to be a tight fit in the gap.

As can be seen this leaves no exposed steelwork to gather condensation and the joints can be sealed with foil tape to complete a moisture barrier. The timber battens for the roof lining will then be screwed to the steel leaving the foam sandwiched in the middle.

Insulation being cut to size. After trial and error I realised that each section was a slightly different size and not even square so had to be measured and cut individually taking much longer! A cheap disposable knife with snap off blades seems the quickest way of cutting the Celotex as you can extend the blade long enough to cut through in one. I discovered that I need more Celotex than I thought as they are only 2400mm x 1200mm not as I thought 8ft x 4ft (2440 x 1220). That 40mm x 20mm means 3 less sections per sheet  I'm sure I can use up the off-cuts somewhere though
 ![]()
Saturday evening and I took the floor up and gave the whole front section including water tank space a second coat of blacking:


Here you can see the insulation progressing slowly as well. It didn't help that I had to dry off each section as I went due to condensation - time for a dehumidifier!
The rest of the weekend was spent with a trip to B&Q for some more glue and a bargain dehumidifier (also very useful at home to stop the bedding getting damp in the caravan); and continuing with insulation; and a third coat of blacking on the front floor and water tank area on Monday.
The boatyard were working hard on Monday and have nearly finished. Only have the propeller to put back on, rudder to weld back onto the new rudder shaft and some extra welding I found for them in the front lockers! They promise to be finished and have Diesel & Dust back on the hard standing by mid week!
Here are some photos of work done so far bay Debdale:

New rear doors and hatch

Repair of hole in Boatman's cabin roof

New chimney collar and roof section welded in (old roof was too rusty under old chimney collar to weld to). New collars have been fitted front and back as recommended as they will never leak!

Box of new bits waiting to be fitted on Monday

Prop shaft and new stern gland all fitted and accurately aligned - just one bearing left to make support for.

New weed hatch funnel up to back deck and drain pipes (old weed hatch was very close to water line - this will prevent any water getting into boat even if weed hatch leaks or is not secured properly.

Weed hatch viewed from above complete with drain channels and hatch in back deck.

New top bearing for rudder shaft

New rudder shaft and bottom bearing. Also new stern gland welded in and new rear prop shaft - just waiting for prop and rudder to be fitted. You just see in the photo that I was able to black the tube the rudder shaft passes through before they fitted it but only had time to put 1 coat on.

View of Boatman's cabin showing complete prop-shaft, rear doors and weed hatch complete with dust and dirt! Grinding dust gets everywhere and will take a while to clean up.

Old wooden doors thick with dust, steerer's step waiting to be welded back on, and closing plate and bolts for new sliding hatch that bolts on the front and stops it being removed.
Next weekend Diesel & Dust will hopefully be back on the hard standing and can be cleaned throughout and all that grinding dust got rid of! Then its time to tidy up and do some more painting! All being well I can give a complete list of work done by Debdale next weekend.
0 Comments
Featured Comments
There are no comments to display.