SweetPromise
-
Posts
29 -
Joined
-
Last visited
Content Type
Profiles
Forums
Events
Gallery
Blogs
Store
Everything posted by SweetPromise
-
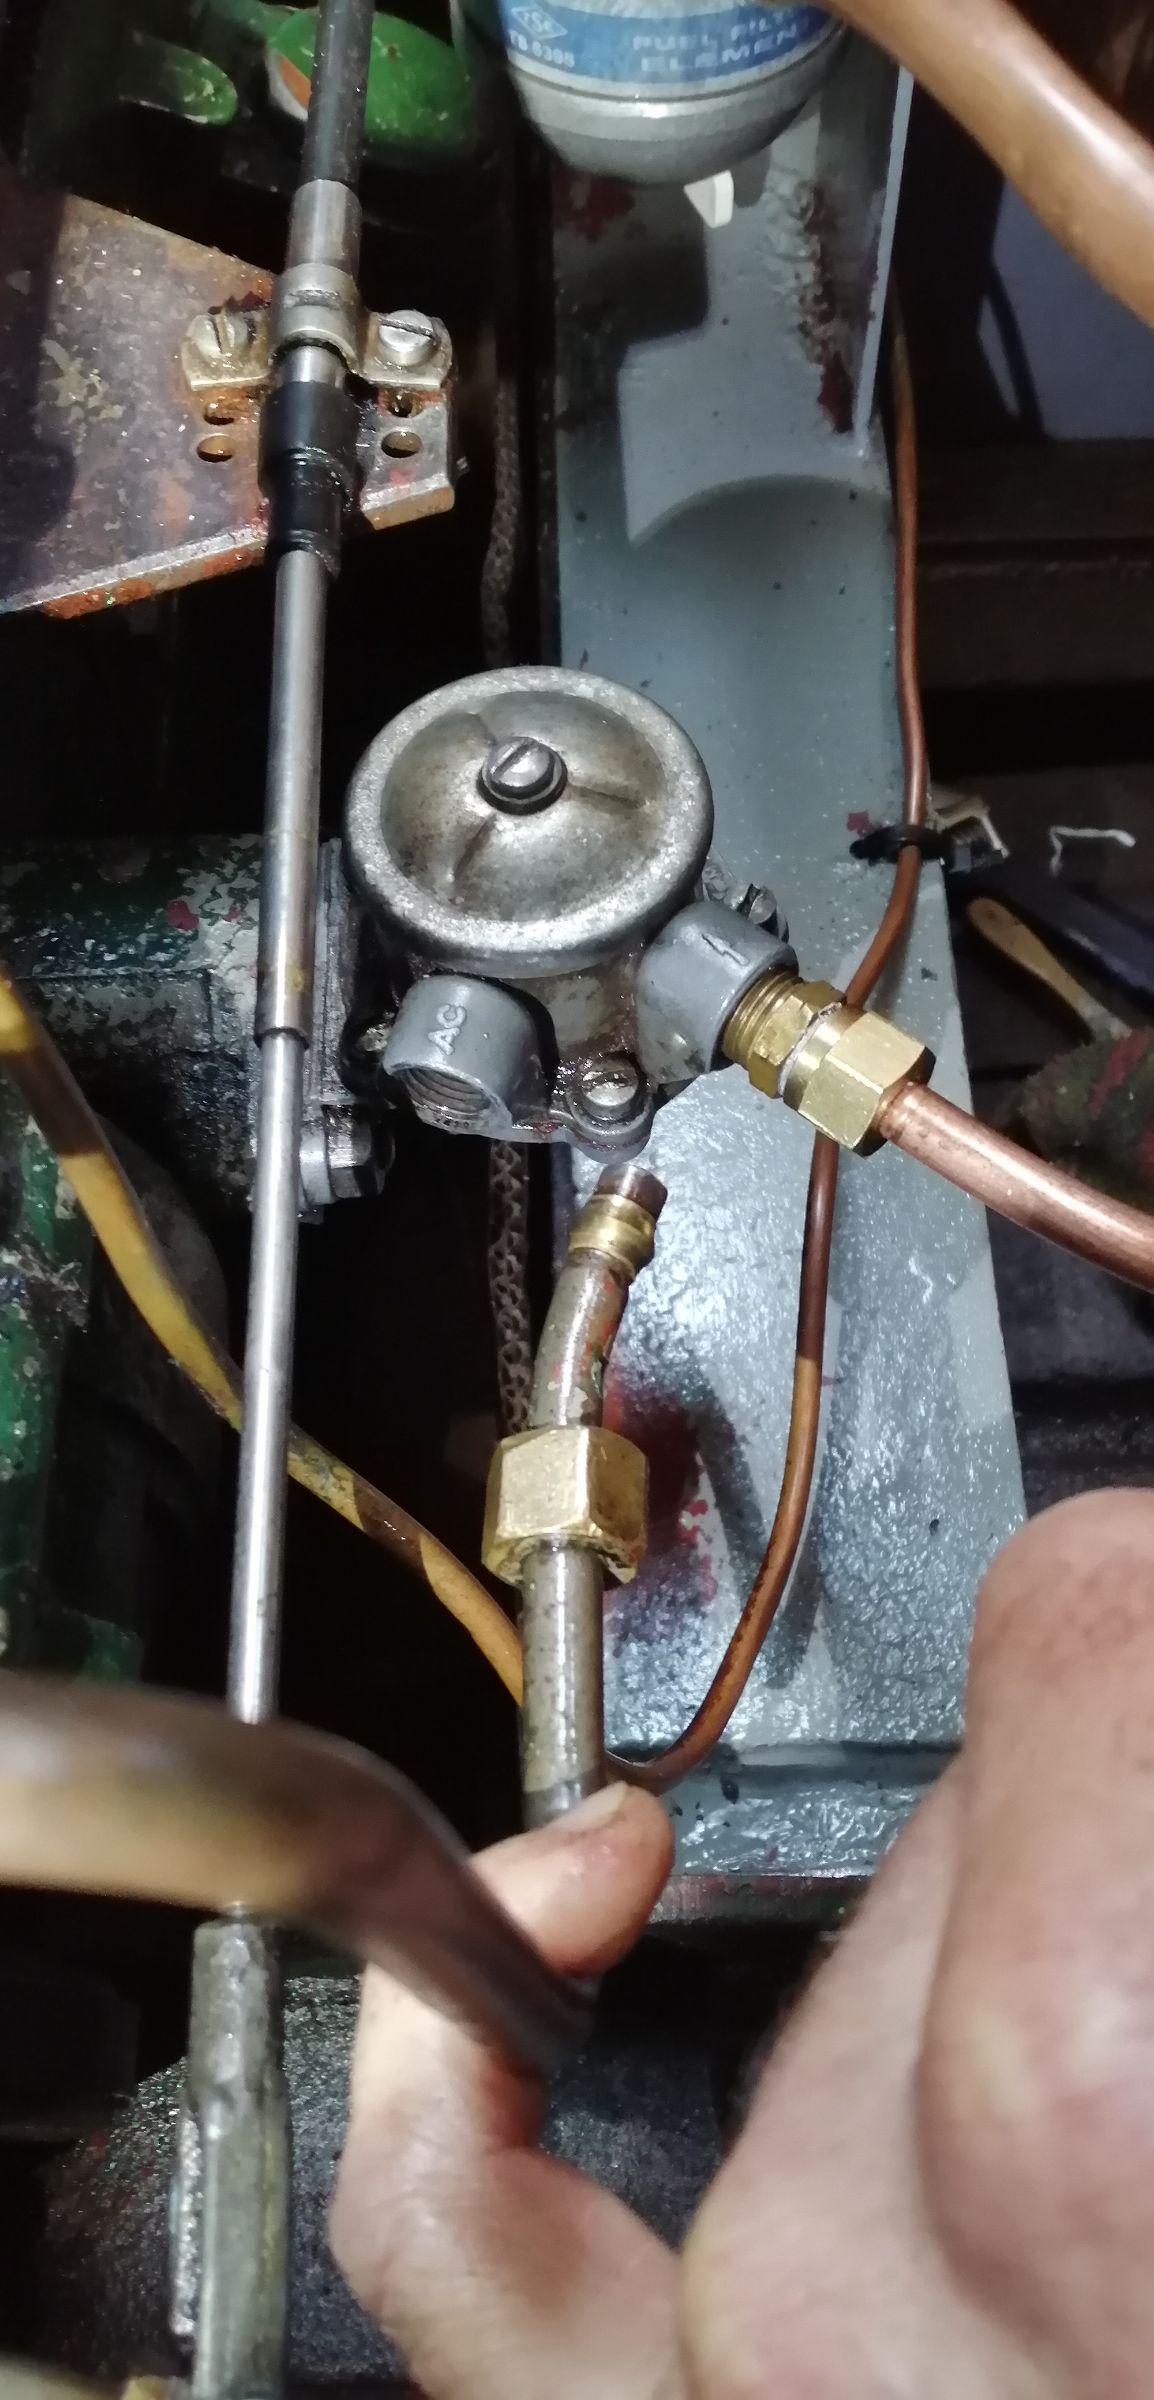
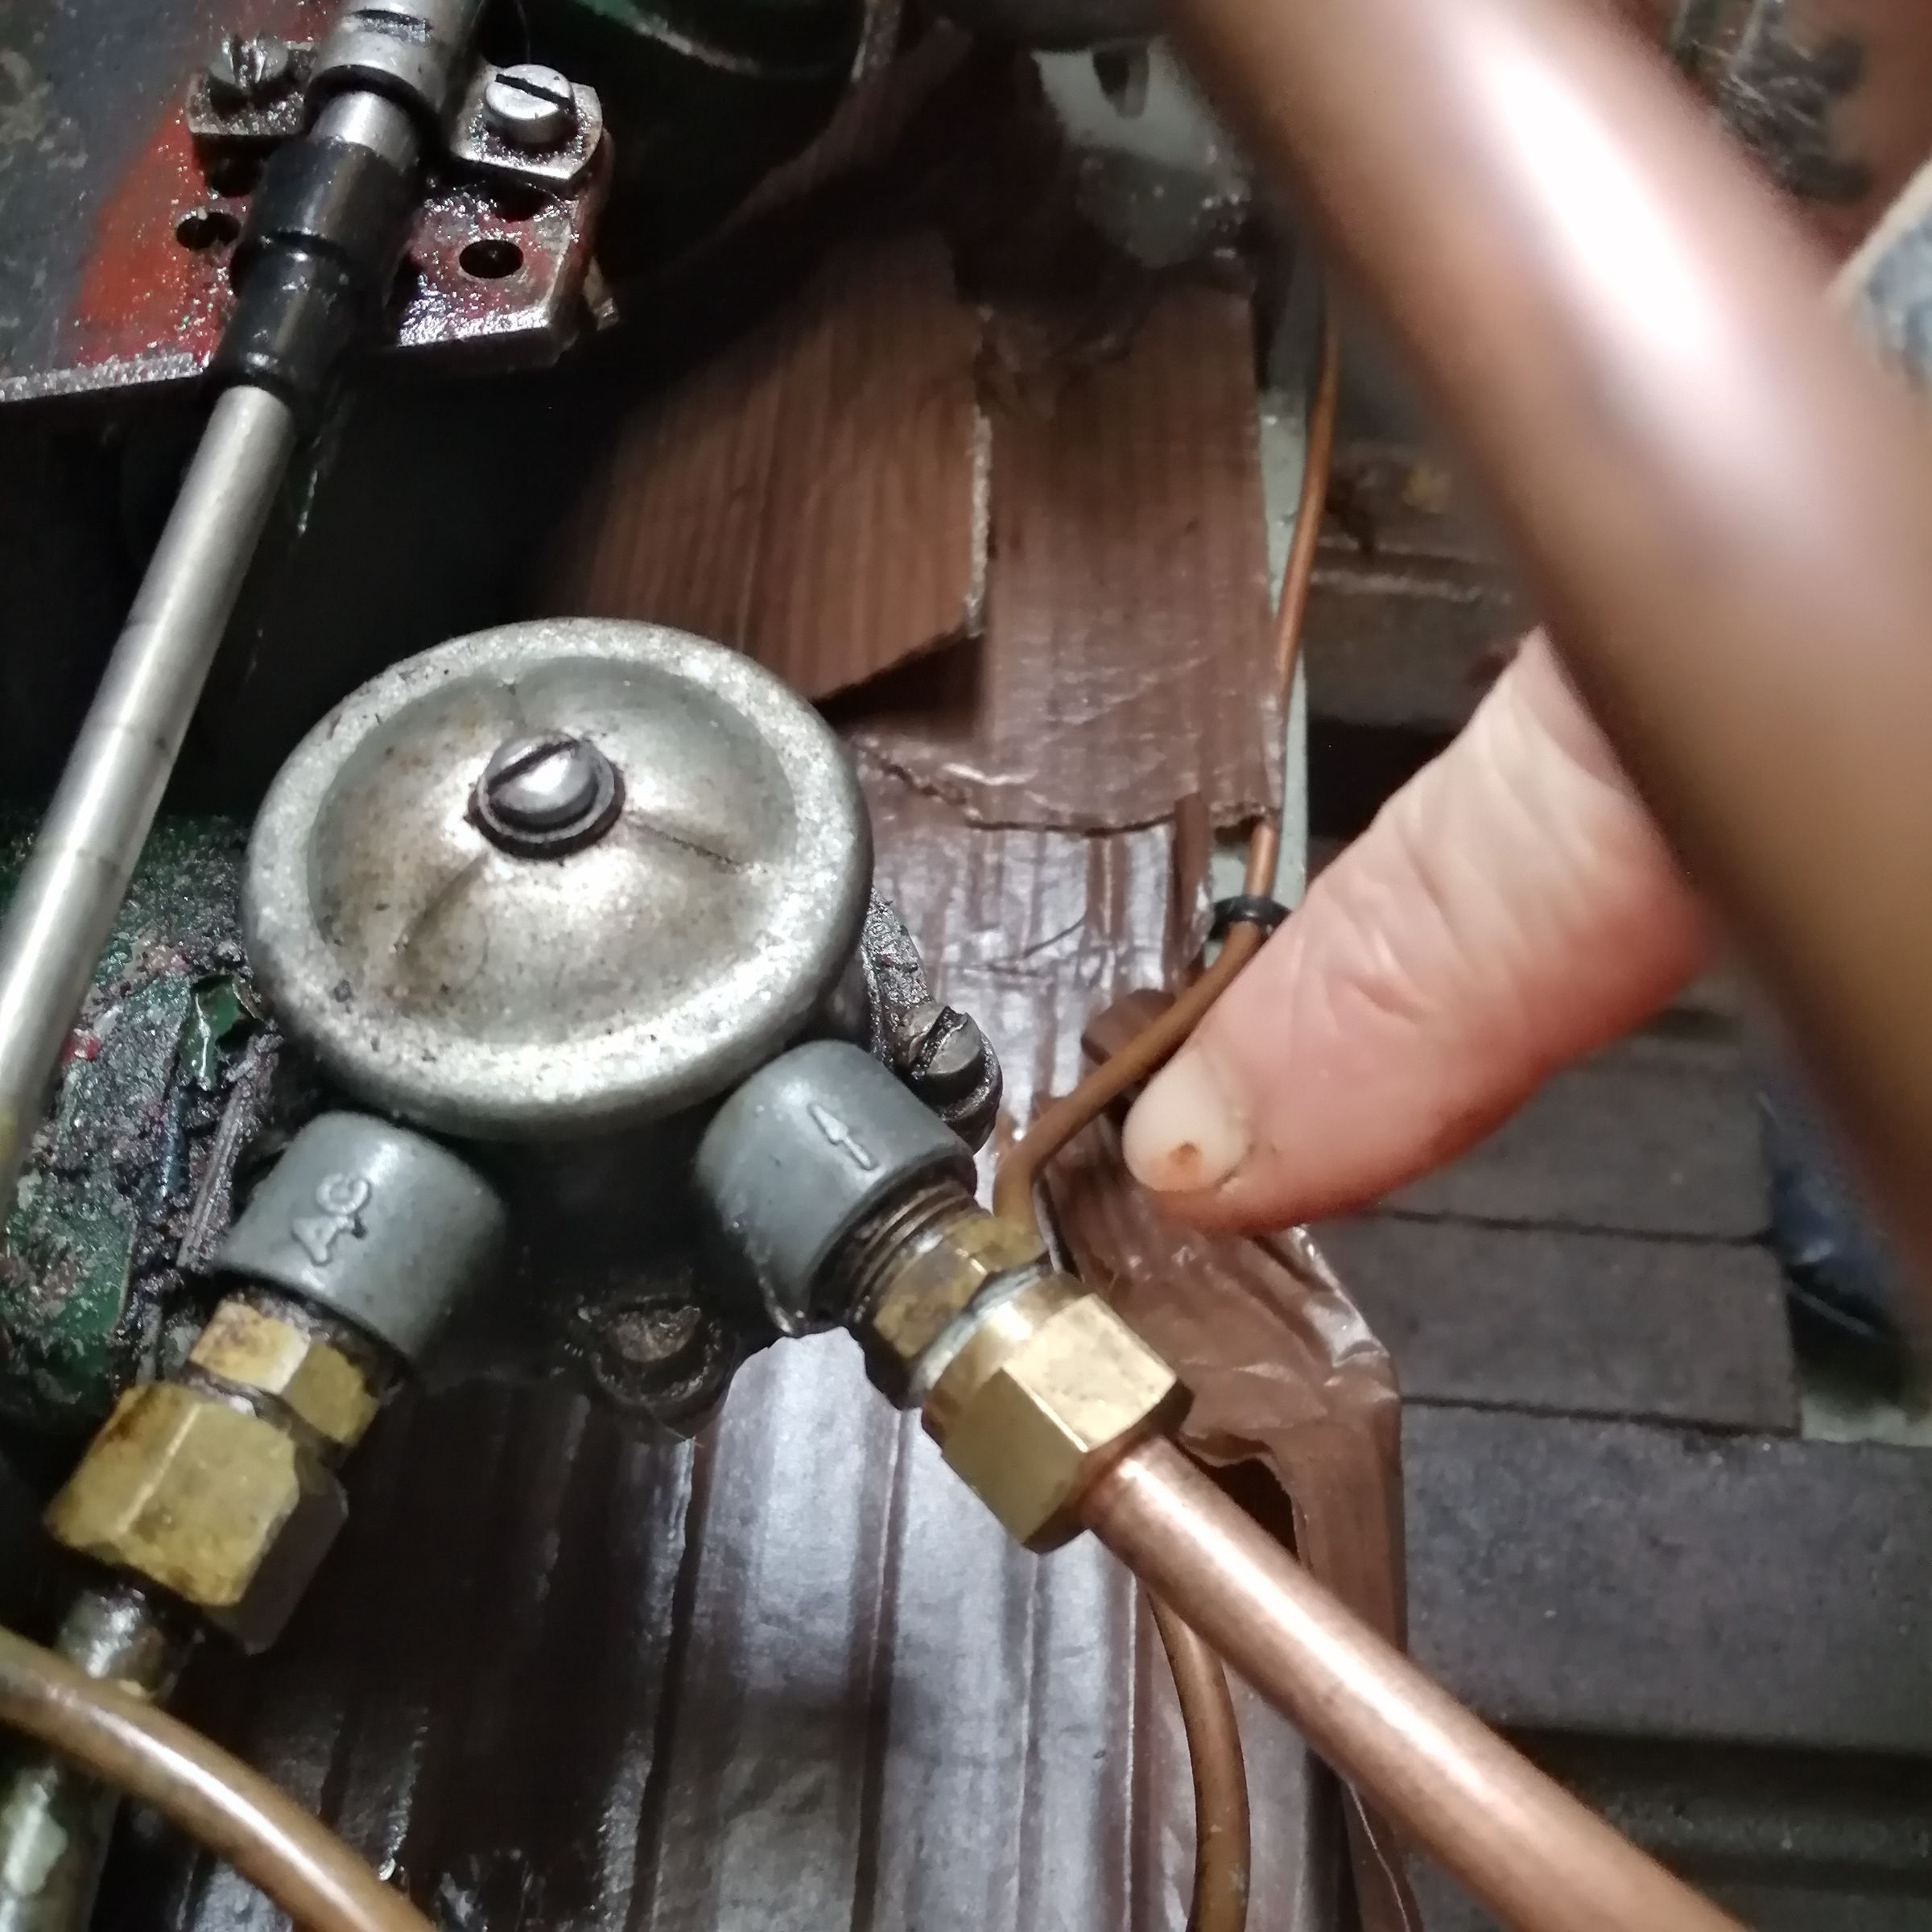
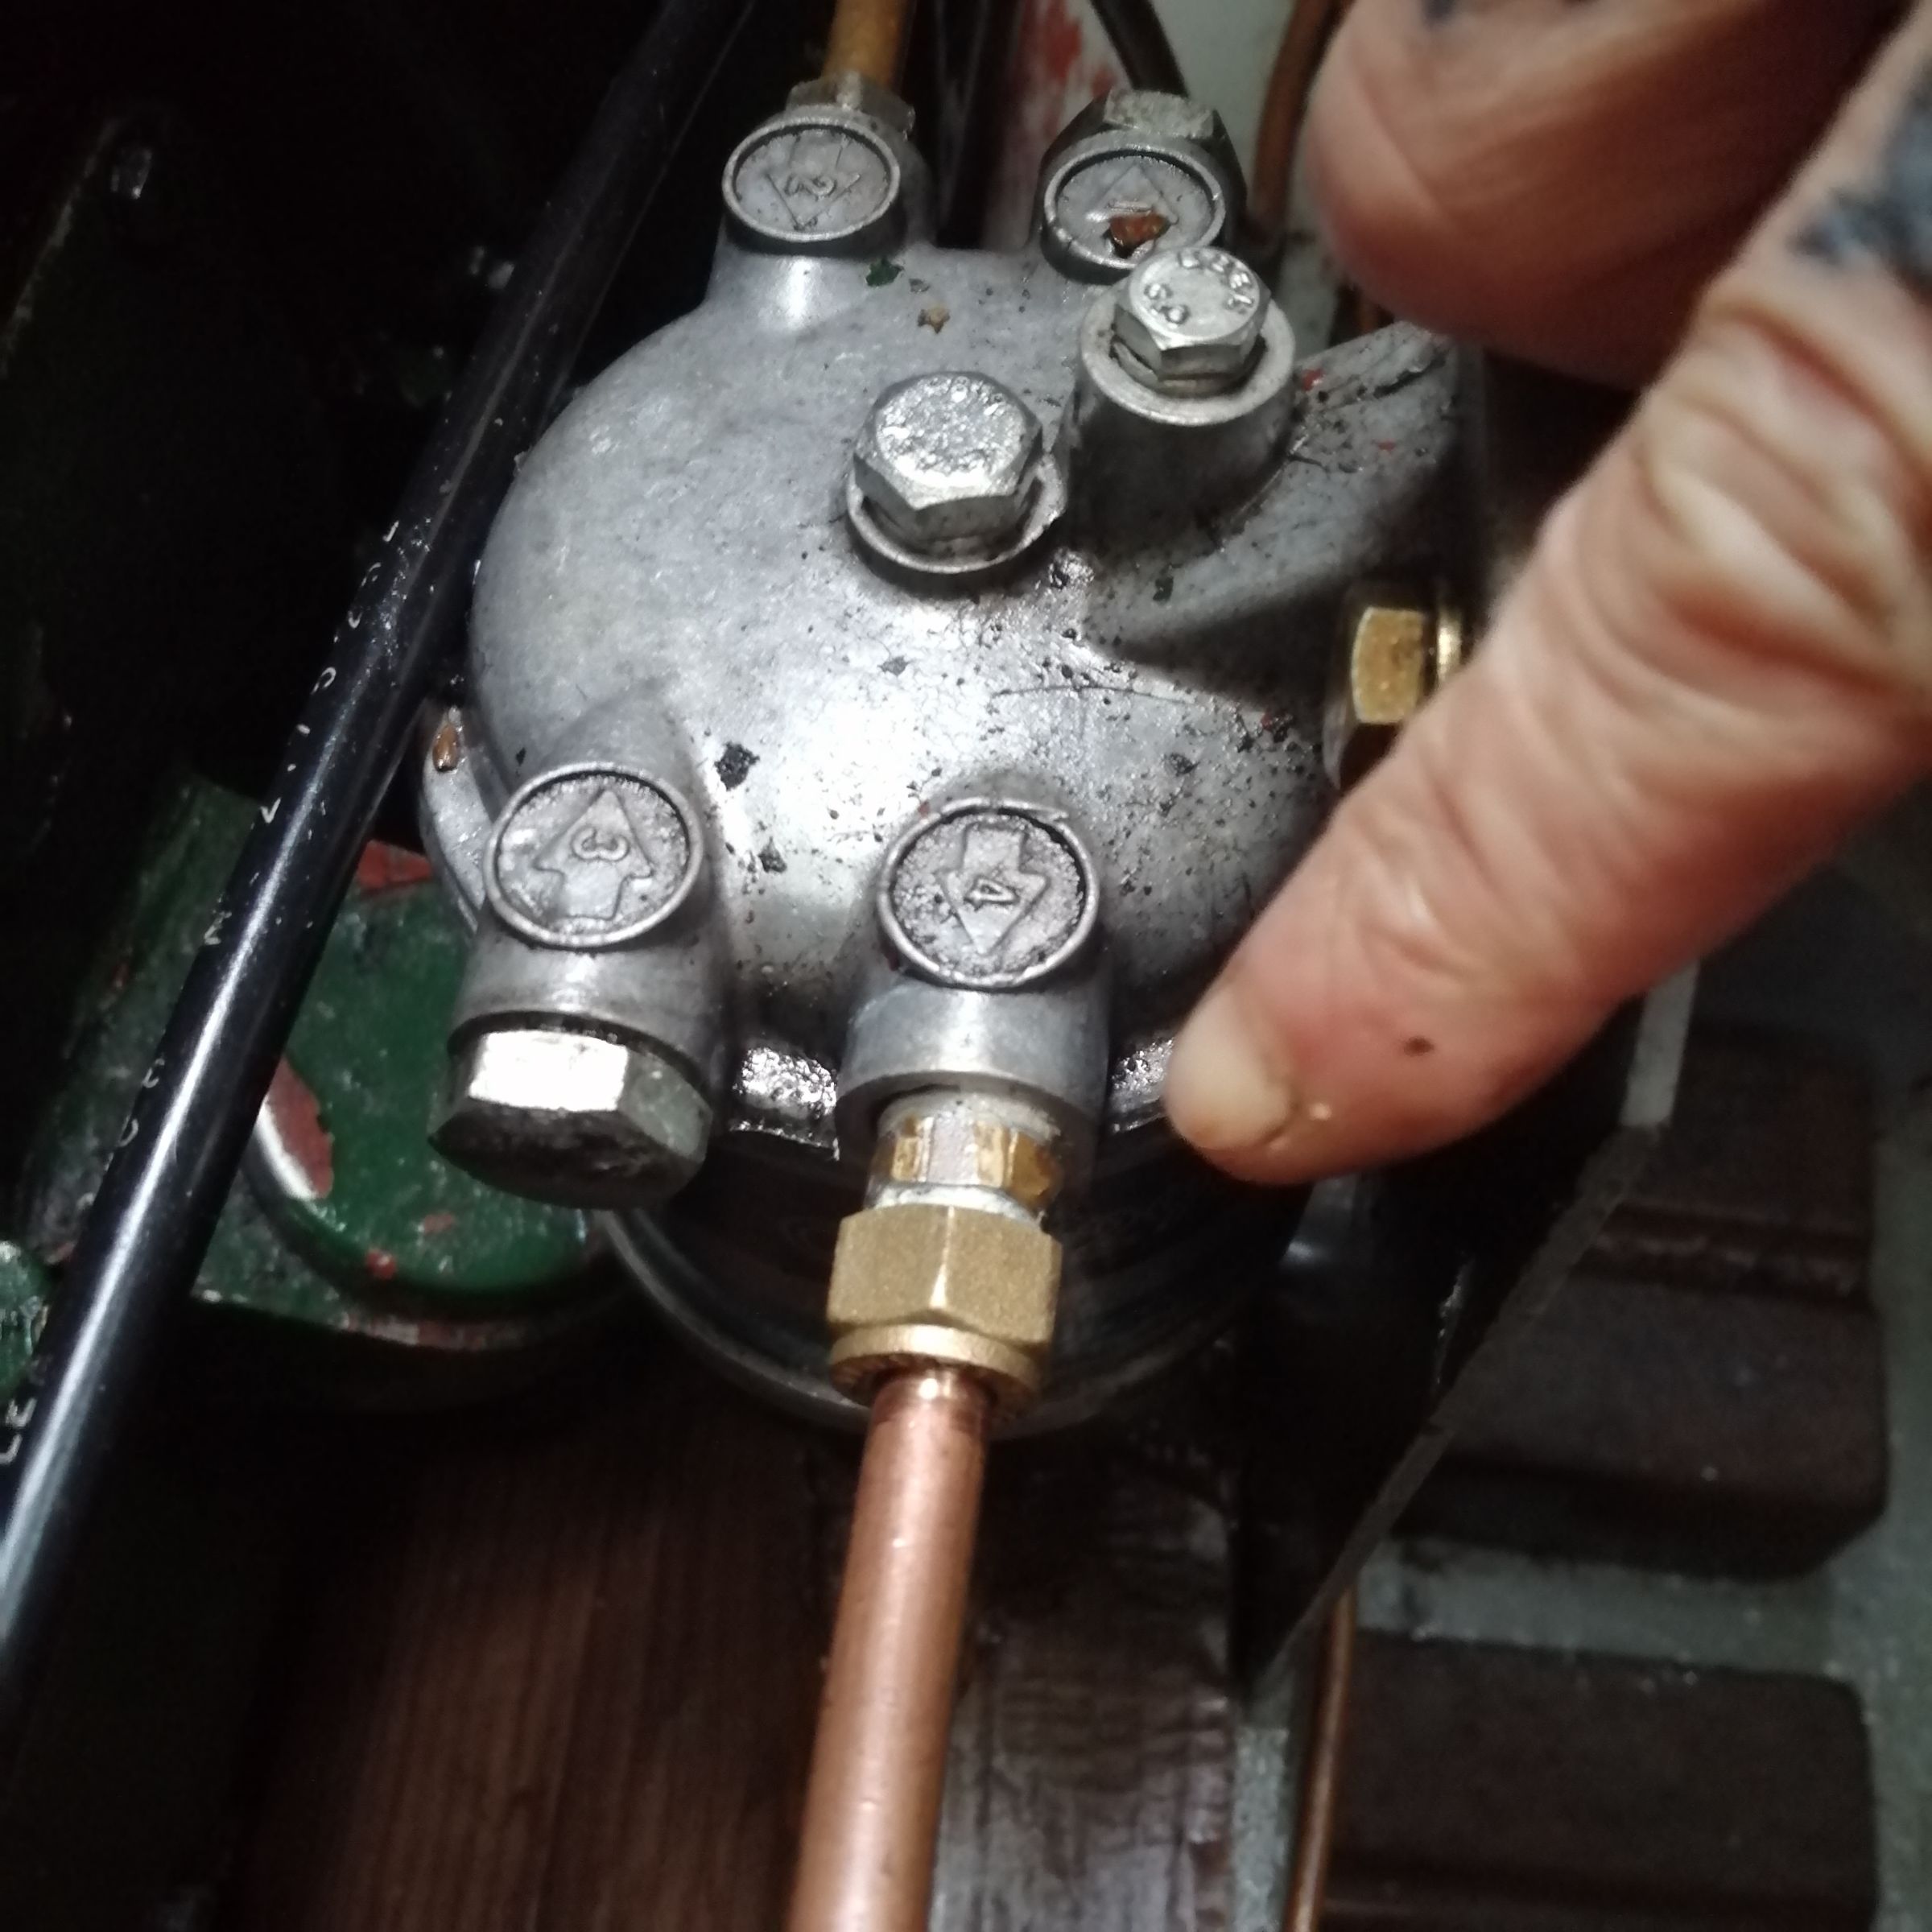
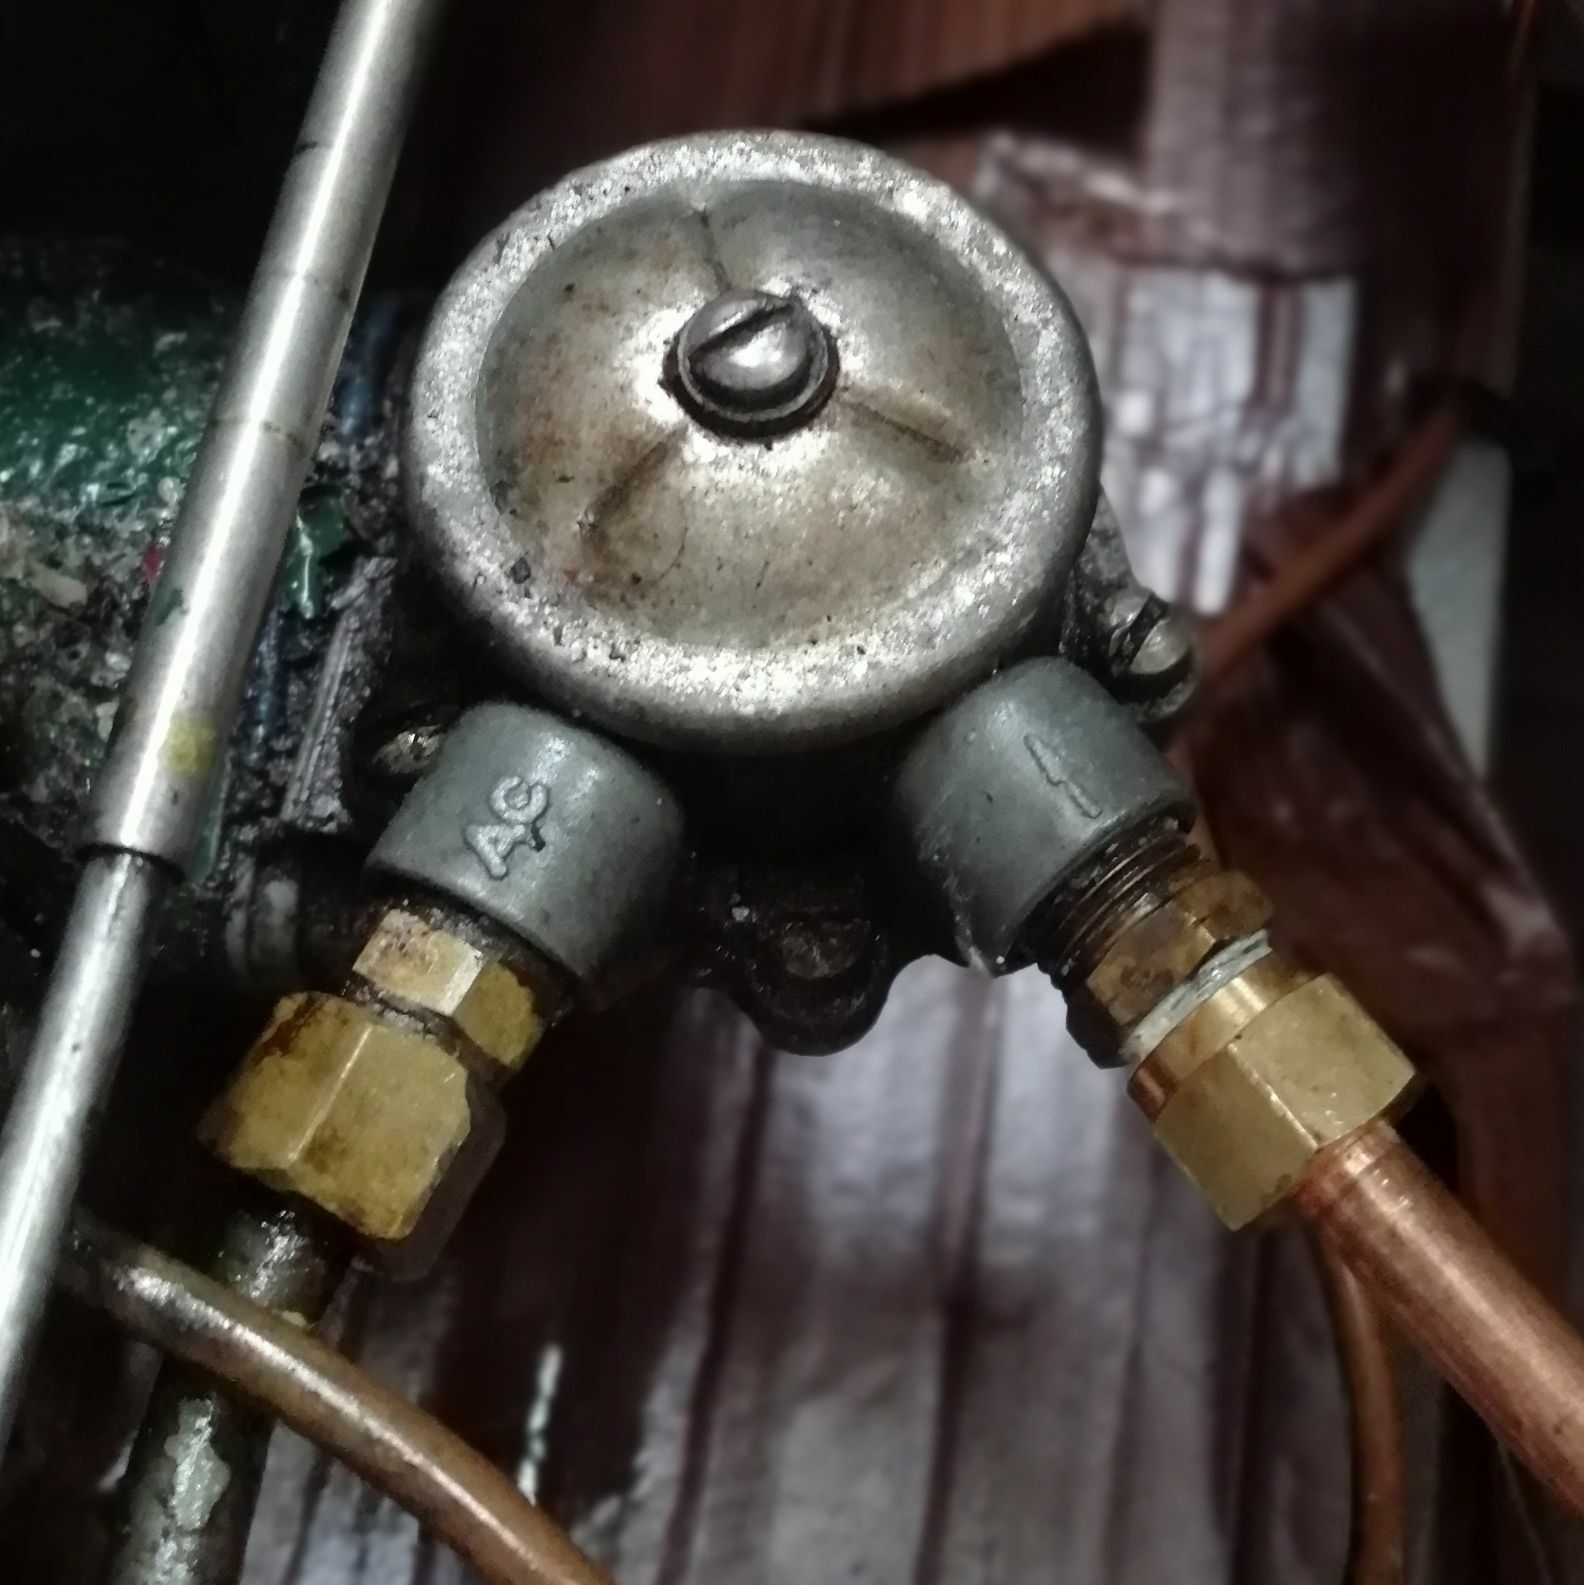
Fantastic instructions! Thank you. I feel much more confident in having a go myself. The diagram is very helpful too. Thank you. I've been having a look today and pulled it apart a bit to get a good look. As far as I can tell, there is no cracking on the housing units of either the pump or filter. The olives on the two new parts do not seem crushed or the pipe crushed either. Before buying new parts, I have borrowed some sealant as has been mentioned and done everything up again just to see if that helps before I go further. The drips seem to have stopped when I last checked... but I'll check again in the morning. What I did find on the third leak from the pump was interesting. This part was not replaced and appears to be the original fitting as I'm comparing it to the handy diagram posted above. However, I believe the olive and the pipe have been crushed and I suspect this might have been done when the mechanic couldn't stop the leaks and so overtightened all the fittings as it wasn't leaking before he worked in that area. So I think I'll definitely need to replace the pipe, which is 8mm, and the olive here. I watched the drip in this area and it definitely seems to be coming from under the nut where the crushed pipe is. I'm attaching the photo just in case what I think I'm seeing is not what I'm seeing!!

-
Thank you very much for this easy to follow info. I'm no mechanic but I'm fairly practical so I'll give it a go before paying someone! I'm going to take on board what everyone has said, really appreciate all the help.
-
I agree. I've since contacted someone who appears to specialise in listers which I think is a far better option!
-
Thanks for all the input. Sounds like I could try a few things out. Funny you mention this, the mechanic did say something about this and didn't have the right spanners for the job as a result. The whole engine seems to have been a bit of a bodge job here an there. The mechanic found a tin can being used between the exhaust pipe and silencer, and a hessian bag as lagging for the exhaust pipe. So I'm sure there's still lots of fun things to discover...
-
Thank you for this. We will try all this and hopefully that will do that job!
-
Ah my apologies. I meant the drip area under the engine! If the thread or casting has been damaged on either the pump or filter, I'm guessing that I'd have to replace them?
-
Great, thank you. That's a good start.
-
Hoping someone might be able to shed some light on a fuel leak we have. When we bought the boat, we didn't have any leaks at all. Then the mechanic came and replaced the diesel filter and the leaks began. It started with a leak from the filter to the pump, then he changed the brittle rubber hose that was connecting the filter to the pump with a copper pipe, and a new leak appeared from the pipe to the pump. Now there's three leaks, both the entry and exit points from the pump and the exit point from the filter. We had to leave the area where we were so the mechanic never came back to sort it out. We've tried tightening the nuts a bit but it hasn't helped. Does anyone have any ideas please? When we cruise, diesel spurts out all over the wall and it's leaking into the sump constantly. Someone has mentioned olives, could it be to do with them?
-
Best diesel heating system for 3 small radiators?
SweetPromise replied to SweetPromise's topic in Boat Equipment
I hadn't heard of the Refleks so thanks for this suggestion. I had a quick look - forgive me for a stupid question but is it a stove as well? Would you put it in the living space like a stove? Sorry to hear that someone nicked yours magnetman, sad times. And I had seen the Hurricanes but those prices are just too much for me. Maybe one day! Thinking more now about the back boiler and a refurb webasto set up. Been quoted 2 grand for the webasto parts and install, so might be a next winter thing now. I'll get by with the squirrel this year! -
Best diesel heating system for 3 small radiators?
SweetPromise replied to SweetPromise's topic in Boat Equipment
Thanks again for all replies. Lots of food for thought. I did think to get a diesel heater as well as the back boiler actually, it's a good point. Currently don't have a calorifier but it might be something to do in the future. We have an instantaneous water heater currently. Ah good point OK. Need to do this. All really useful info, thanks. It's funny how much curtains make a difference and are often overlooked actually. I've been living on a Scottish island so I'm used to wrapping up. The first thing I did was buy huge, thick curtains for the cottage up there! Funnily enough, I used to live on a narrowboat before moving to Scotland and I always said that the winters onboard were warmer than the winters I've just had up there in an old, poorly insulated and poorly heated cottage. Currently have flimsy scarf coverings on the windows as a quick fix when I got the boat in the summer but definitely need to get something decent. The spray foam on this boat is phenomenally thick. Whoever did it went to town and I've been having to shave it back to fit the walls on properly without them bulging out. Can feel the warmth just from that. Thought that might be the case! -
Best diesel heating system for 3 small radiators?
SweetPromise replied to SweetPromise's topic in Boat Equipment
Thank you for your replies. Currently have a squirrel which can be fitted with a back boiler so perhaps this is the best way to go. We live aboard a 70ft NB that we're fitting out. My partner found a MV Hydro diesel water heater but very little info or reviews seem available for it. I wonder if anyone on here has one? Also interested in the noise these heaters make. I watched some videos and they seem pretty noisy but I understand you can get silencers for them. I'll continue searching the forum as well for interesting threads, thank you. -
Hi all, Just wondering what the best diesel heating system would be to get. I'm hoping to just run a towel rail and 2 small radiators off it, so it won't be doing hot water as well. I've heard various things about Webasto but was keen to see if anyone else had other systems and what they thought. I don't have a massive budget either, so a decent, but cheaper system would be ideal (I guess that goes for everything in life). Thanks.
-
Morso flue - where to get pipe and what size ?
SweetPromise replied to jonathanA's topic in Boat Building & Maintenance
Hi all, Just had a good read through this thread as it's basically the same as the questions I had. So that was really useful, thanks. One more question to add, I've found a new 5ft chimney pipe for my morso squirrel 1410, and it's in 4.5" or 4". I believe I need 4.5" as I measured the rusty broken one that's here, but I also need to replace the chimney collar (also corroded and cracked, and finally accidentally cut with an angle grinder in trying to get the fused, corroded bits apart). On this website, it has a 5" and a 6" one, but both say they're suitable for a 4" diameter pipe... So does that mean I need to get the 4" pipe, and will that be ok with my morso, or will the 6" collar take the 4.5" pipe?! https://www.chandlerydirect.com/chandlery-store-uk/flues-cowls-boat-chandlery-store.html Thanks! -
Ah OK, thank you. It would be to weld new hinges onto hatch doors and hatch flap, and weld patch onto roof where the chimney was. Possibly some sort of set up for a security bar to go across the door too. A few smaller jobs I guess? Think a neighbour wants in on the action and needs some little lugs welded to attach a bow button to.
-
Hello, Could anyone recommend a welder around the Milton Keynes area please? Thanks.
-
How do I frame these windows
SweetPromise replied to SweetPromise's topic in Boat Building & Maintenance
Thanks for all the suggestions and advice! Think I know what to do now! -
How do I frame these windows
SweetPromise replied to SweetPromise's topic in Boat Building & Maintenance
Yes it's a good point. Heat treated, as I understand it, is the stuff you want, but of course trying to find enough of this, as well as the same sizes etc, may take some time. -
How do I frame these windows
SweetPromise replied to SweetPromise's topic in Boat Building & Maintenance
The glare on the window is making it difficult to get a decent photo but this is what we have. So bigger versions of this bathroom window, but all the same style. Ah yes, the rust is very present. Thank you. When I take off the ply I'll be sorting that out. I've been treating rust with Fertan but someone else suggested vactan too, so I'm hopefully doing the right rust treatments.
-
How do I frame these windows
SweetPromise replied to SweetPromise's topic in Boat Building & Maintenance
Our actual thought was to use pallet wood, cut into strips and attached vertically. So not really tongue and groove, I just lack the technical words I think! Sanded and painted. Not sure on colour. Yeah our old boat had a very bodge, old tongue and groove job, very dark. The boat was so dark inside. Didn't like it at all. Perhaps it had been getting darker and darker every year! Plastic as in laminate? -
How do I frame these windows
SweetPromise replied to SweetPromise's topic in Boat Building & Maintenance
Yep you are correct. We bought a stripped out 70ft. No rooms, just a big open space. Someone has previously done the expanding foam and then badly lined with ply, and also lined the floor with thicker ply, not marine, and put lino over that. Throughout the whole boat. We've also got dodgy electrical wiring that I think needs pulling out and starting again, a gas line that is too narrow for us, and some plumbing pipes have been put under the gunnels. And a morso that's rusted and falling apart. So it's like some things have been thought about and started, but the order in which it's been done is strange. We'll obviously be pulling up the floor to do a bathroom etc. We're also living in it, so trying to do section by section. I think I'll have many more questions... -
How do I frame these windows
SweetPromise replied to SweetPromise's topic in Boat Building & Maintenance
Thank you for this suggestion. Yeah I had the same thought about making an L section too. Seems sensible. I think we're pulling off all the ply anyway and going with tongue and groove so I can do some sort of attachment then I reckon, as, as you say, the gaps around the steel box section and the ply are huge, guess because there's no batons there. I wondered if the windows were a bodge job, they seem odd. They don't leak though so that is something!! The ply is a bodge job too, think the floor might be as well... Lots to do! -
Hi all, The boat came with these windows already in but nothing surrounding them. There's also no batons around the window. I'm wondering how to frame these windows. As you can see, there's a recess of about 30x30mm but that obviously is much shorter, maybe about 30x15mm when you factor in the brackets holding the window itself in. Initial thoughts are to create a wooden frame, say with 15 x 15mm square batons and sort of slot it in and glue it, pretty much to the brackets. Maybe fill the recess behind it with spray foam? I have a feeling it won't work out as neatly as that and in some places 15mm will fit and in others it won't... Any ideas welcome!!
-
New water tank placement
SweetPromise replied to SweetPromise's topic in Boat Building & Maintenance
Oh OK, cool, I'll look into finding something to sit it evenly on. Interesting about the lack of condensation on your plastic tank too. There will be a lot of space around it. Maybe I'll get away with it as is. -
New water tank placement
SweetPromise replied to SweetPromise's topic in Boat Building & Maintenance
Ah right OK. Thanks both. Yes I had a feeling that might be the case. I used to just have a huge old steel one inside the bow of my old boat, haven't had a plastic one before. Nice, I'll layer it up with Kingspan, cheers. -
Hello, I've just prepared the bow area for the new water tank to be placed in, but before I put it in, we were just wondering if it should sit on something. I'm thinking about air flow and condensation so I'm guessing it could sit on a couple of wooden beams maybe? Or would plastic be better? Thanks.