dor
-
Posts
7,723 -
Joined
-
Last visited
-
Days Won
5
Content Type
Profiles
Forums
Events
Gallery
Blogs
Store
Everything posted by dor
-

Wood burners are potential killers scientists report.
dor replied to Alan de Enfield's topic in General Boating
I wonder if they have done similar work on stoves burning coal or nuts. Probably no better. I have lived much of my life with open wood fires or stoves. Not the last thirty years in a house, but a lot of it on a boat. Most of the first thirty five years was with open fires and often smoky wood stoves ( in Wales the main source of heat). It would be interesting to know if my lung disease was influenced by that, compared to my modest smoking habit before I gave up thirty years ago. -
Until recently, all the motorcycle batteries I have bought have been dry-charged, sold sealed with foil as you say, with a separate container of acid that punctured the seals as you filled them. I believe the H&S means that they can no longer sell batteries like this, and they must be filled before sale.
-
Isn't "waterless coolant" what Lister owners call "air"?
-
Downsizing Temporarily to a Boat; where to store my stuff?
dor replied to kellyjllek's topic in New to Boating?
A few years ago a friend spent over £1000 a year to store mostly his lp collection when he move onto a boat. Several thousand of them, retired music journalist. He put it down to just another cost of boating. -
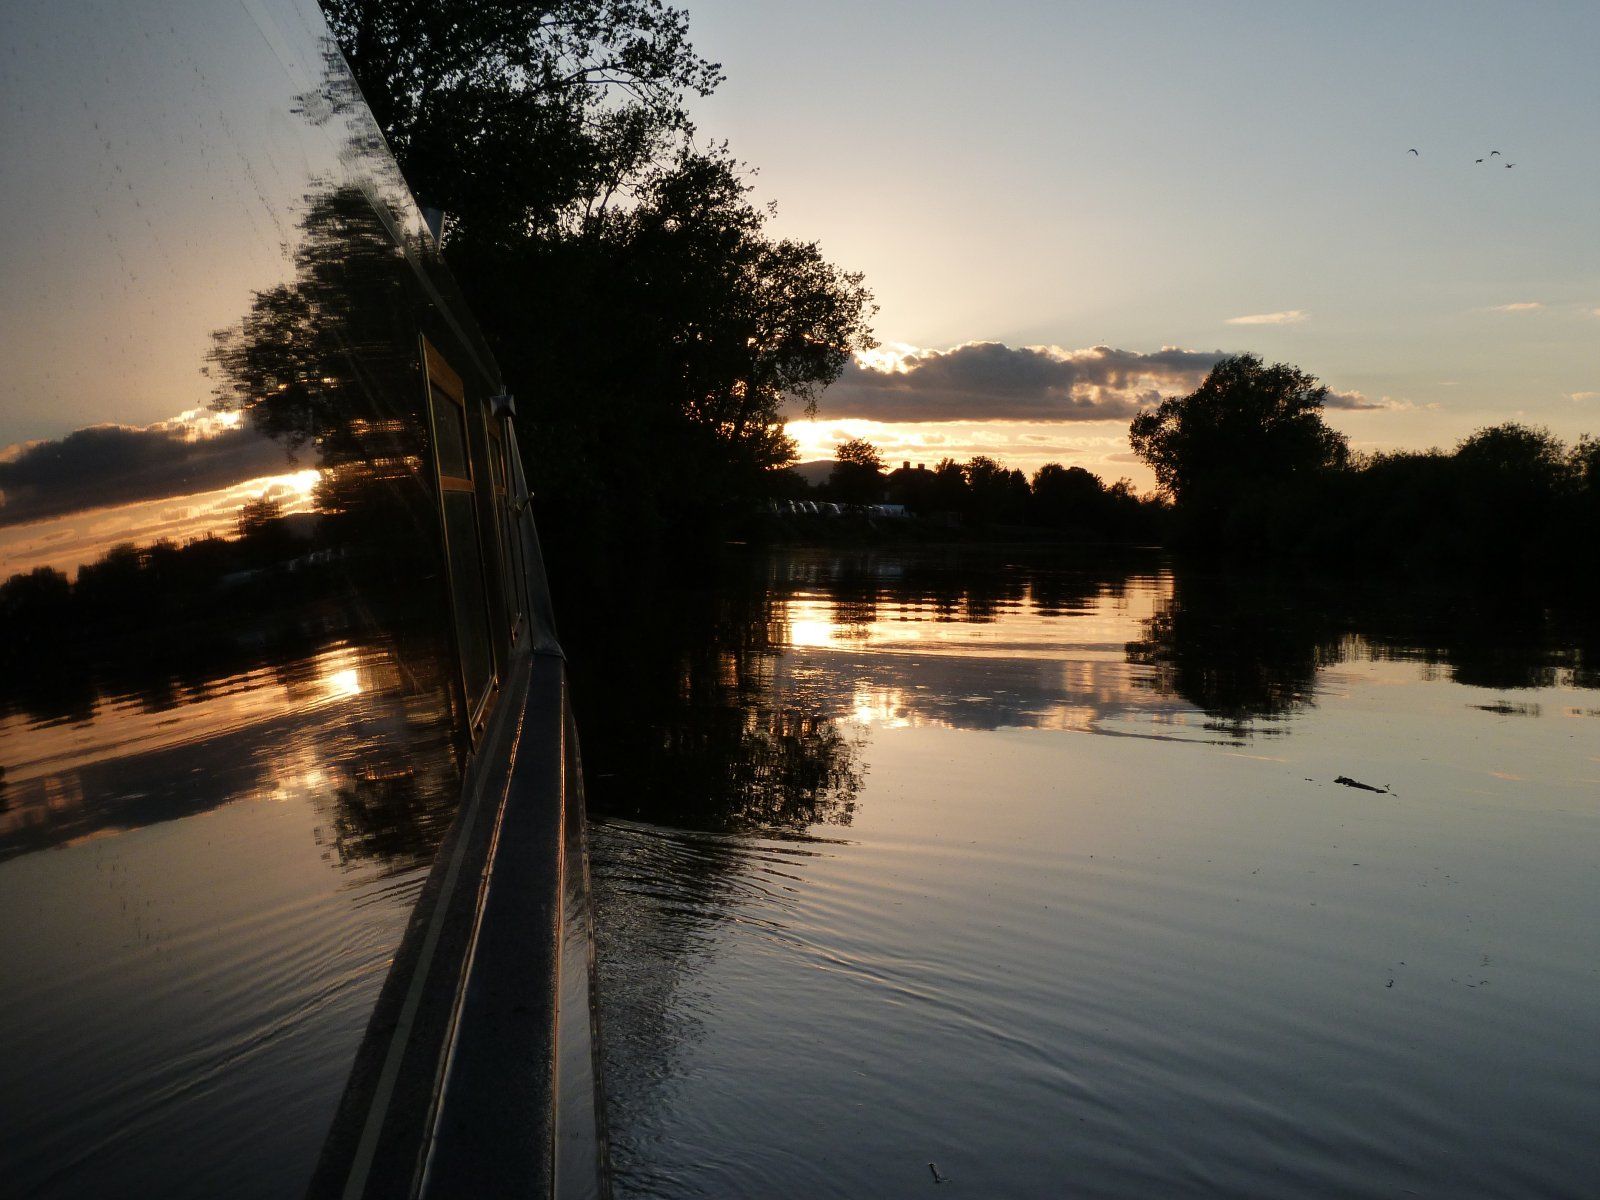
Tonic required. Send in your photos of what is nice on the waterways now.
dor replied to DandV's topic in General Boating
Reflections, reflections, reflections ... River Severn
-
Certainly had someone else with him when he went past my mooring on the way to Nantwich.
-
This post cannot be displayed because it is in a forum which requires at least 10 posts to view.
-
Watched a couple on iPlayer yesterday. The production seems to be improved from previous series. So, so much better than the "celebrity" barging about programmes. Good mix of boating and the areas he visited. Probably one of the best programme/vblogs available at the moment.
-
This post cannot be displayed because it is in a forum which requires at least 10 posts to view.
-
This post cannot be displayed because it is in a forum which requires at least 10 posts to view.
-
A broom is useful for the Beeston Iron footbridge, having watched a BW man deal with it. Swing the rope under the footbridge and catch it with the broom.
-
I'm pretty good at proof reading, so find simple mistakes annoying. I find it remarkable that mistakes like this can pass so many people and still go through. A few years ago signs were put up on the culvert access gates on the Llangollen canal saying "No public rightaway". I wondered just how many people this had passed through without it being spotted or, more likely, couldn't be bothered to correct it. It is an appalling reflection of the standard of people employed by the Trust.
-
Good result!
-
This post cannot be displayed because it is in a forum which requires at least 10 posts to view.
-
This post cannot be displayed because it is in a forum which requires at least 10 posts to view.
-
Ad is thirty months old so ... maybe try a pm.
-
This post cannot be displayed because it is in a forum which requires at least 10 posts to view.
-
My wife has a small IKEA ‘anglepoise-like’ light with brick and 230v halogen 20w lamp. As suggested I cut off the brick and fitted a 12v led lamp, several years ago now. Works fine; used when stitching or reading in the evening so not likely to be subject to more than 12.7v.
-
Interesting. This "forest waste": I've not come across this as a diesel additive, so is it something that gets extracted from waste wood? In my working days I was involved with animal feed supplements and we used a material that was a by-product in the paper and wood chip industries as a binder in mineral blocks. We referred to it as a "vegetable gum" (I even got it accepted as an organic ingredient). It was also used as a binder in the brick industry. If this material is similar it is not surprising it is gumming up the injectors.
-
This post cannot be displayed because it is in a forum which requires at least 10 posts to view.
-
What have you fettled for the boat today?
dor replied to Captain Fizz's topic in Boat Building & Maintenance
It could be worse! It takes me about an hour to change the bricks. You need to remove the bricks before removing the baffle plate. Make sure the grate is very clean with no dust before trying to remove/refit the bricks. The important thing with the baffle plate is to make sure you can move it right forward, which it is sometimes reluctant to do if there is a lot of clinker built up. Some vigorous jiggling about while pulling the front up and forward usually works - make sure it does come as far forward as it will go. If it doesn't move easily, I can poke down the flue with a bit of pipe to break up the clinker, then drop a wet/dry vac hose down to pick up the clinker. I don't burn wood any more so the clinker is usually hard and dry; it was more difficult with wood as well due to the tar. I've attached the notes from my maintenance guide about changing the bricks. You can get a set for £25 off ebay from "stovecareandrepair". They are vermiculite and seem as good as any other vermiculite ones I have come across. Good luck! Solid Fuel Stove No specific regular maintenance as such, but note the following. Fire bricks. These should be replaced if broken. The rear brick is the most likely to break, but requires the side bricks to be removed to be able to change it. The side fire bricks are not easy! If removing the fire bricks, completely remove the baffle plate and sweep flue pipe. Firstly remove all ash and dust from the fire grate. Now lift the baffle plate slightly and slide forwards. If the baffle plate won’t slide forwards, it might have a load of congealed ash on top. Jiggle it with some force should break up the ash enough to move or remove it. It should now be possible to remove the fire bricks by pulling out from the bottom; a knife of screwdriver under the bottom edge might help to get this started. Baffle plate must be fully forward to release top back corners. The rear fire brick can now be removed. It should now be possible to remove the baffle plate by jiggling it – note the cutouts in the supports on the side which help to remove the plate (note which way round the plate fits!). Although you can replace the fire bricks without removing the baffle plate, it makes sense to clean the flue at this point. Clean all ash and soot from the grate. Lift and slide baffle plate forwards and replace rear fire brick. If using new side fire bricks, chamfer (use little Surform) the top outer edge and the bottom inner edge to make it easier to rotate the bricks into position. Also chamfer off a mm or two from the inside back corner (about 50x50 triangle) of the side fire brick and a little off the bottom to help to get it up behind the baffle plate. Check also that the rear brick fits back ok, it might need a bit taking off the ends. Make sure baffle plate is as far forward as possible so that back top corner of the side fire bricks can go up alongside it. After replacing side bricks slide baffle plate back into position so it sits on the side supports and also sits on top of the rear fire brick. Fire bricks can be bought or ordered from chandlers but will be cheaper online (although allegedly not as long lasting). Make sure the replacements are for a Stovax Brunel 1A. Flue. Smoke coming out of the top vent often indicates the flue needs cleaning (although it will smoke a bit when first lighting, especially if it is calm). The flue has a tendency to tar up quite quickly if using wood. To clear flue, remove baffle plate as detailed above. Now use a metal tube or similar (there is one in the ‘shed’ or else use the aerial pole) to scrape down inside the flue. Make sure you go right to the bottom. This is needed to remove tar as the brush is not hard enough. After scraping, use the flue brush to clear any other material. Clean out grate and reassemble the stove . Glass replacement. Lift off door and lay flat. Slacken four screws holding retaining clips. These tend to be tight to remove, so carefully use mole grips to turn screws which have a cheese head (vertical sides to head). Cord in groove under glass should be ok, but if torn replace with same diameter. Glass should be sitting on cord when clips tightened, not on metal of door. Replace glass, noting it is not square so fit right way round. Size is 223x217mm. Tighten clips using a screwdriver only and not too tight. If you have some high temperature (e.g. “Copperslip”) grease put a bit of that on the threads.
-
Thanks for coming back with a conclusion. Let's hope it all ends well.
-
Insurance - required to have an Experienced Person on board
dor replied to Ewan123's topic in New to Boating?
Worrying fofr those people who lend their boat to family or friends for a few days., not an uncommon occurance. Time to check your insurance policy. -
What have you fettled for the boat today?
dor replied to Captain Fizz's topic in Boat Building & Maintenance
Just replaced the fire bricks in my Stovax Brunel 1A. God I hate this job. Despite only burning Excel, I find I need to remove the clinker that builds up on the top of the baffle plate every few months. The fire bricks only need doing every two or three years, but require the baffle plate to be removed. The rear one suffers most; the side ones would last a lot longer but I normally change them as a set while I’m at it. Firstly need to remove all trace of ash, then jiggle the baffle plate about to try and get it to slide forward. The side bricks can then be removed, but usually very tight. Then the rear one comes out, followed by jiggling the plate to drop down. This it is usually reluctant to do - I’m sure it could be designed better if the designer was made to do the job first. Then a good poke down the flue with a piece of metal pipe to clear any clinker. After cleaning out, try and jiggle the plate back in and replace the rear brick. Now with plate forward slide the side bricks into place. These are usually too tight and very unhappy about going back in ( but after years of doing it, I’ve got a couple of tricks...). Hopefully the baffle plate will drop back into place and the job’s done. All done while lying in a contorted position on the floor. It used to be a lot worse when I burnt wood as well, but I still get quite a bit of clinker built up. -
This post cannot be displayed because it is in a forum which requires at least 10 posts to view.