


Tony Brooks
Patron-
Posts
26,093 -
Joined
-
Last visited
-
Days Won
114
Content Type
Profiles
Forums
Events
Gallery
Blogs
Store
Posts posted by Tony Brooks
-
-
I am not convinced they are all in parallel. I THINK the right-hand pair are, but looking at the left-hand battery positive, the lead with the yellow label does not seem to connect to the other batteries, so this one might have originally been an engine start battery.
If it is or was one start battery and two domestic batteries in parallel then the start battery negative is typically connected to the domestic bank negatives, but unless the positive is connected in the same way they are all not in parallel.
If this boat is subject to the Boat Safety Scheme inspections, then how many battery master/isolating switches do you have?
I fear that you really need to follow the cables and draw a diagram showing what they connect to, then you stand a chance of understanding the system.
As long as you have adequate charging and charging regime, there is no reason not to replace the batteries with similar for those that are only used for starting. If they are used for powering the domestic systems, then you really need to do a power/energy audit and charging calculations to ensure you have enough batery capacity.
I am not sure that you don't have a charging problem, that might be simply not enough, so the batteries are ruined.
-
A run-of-the-mill wet 100Ah battery will have a Cold Cranking Amperage of around 700A or a marine cranking Amperage of around 800 amps. You must check that the case size fits your boat and that the terminals are in the same position as your existing setup.
A starting battery has a very easy life, so you don't really need anything fancy and expect 8 to 10 years out f a basic starting battery - unless you have poor charging.
1 minute ago, BEngo said:I suspect the OP's 3 batteries in parallel are/were the entire outfit of his ex lifeboat so also keep the lights on and work any radio until the motor is running.
So do I, which is why I think we need it clarified. If it is, so I suspect the lack of proper charging was the base cause.
-
1 hour ago, jacko264 said:
This is correct a example of this is a cab window on a double decker bus
next to the driver
Assuming it is not a sliding window.
If the OP can get a length of suitable rubber glazing section, do you think he could cut slots in the inner face to provide drainage. I so do you think that he could use the waste in the bottom of the channel to hold the glass up a little and provide drainage to that slot.
-
Three in parallel sounds much more like domestic/service batteries rather than starting batteries, unless you use the same batteries for both. I think we need you to confirm they are three stat batteries, there are other domestic batteries, and, ideally, a photo.
A single start battery of around 90 to 100 Ah should be more than enough to start that engine. (Note: Ah is not how start batteries are now designated).
-
4 minutes ago, jacko264 said:
This is how a window frame etc looks like if this helps .
there is no other drip on this type of frame
Graham
Thanks, that is exactly the info the OP needs to understand his window construction. This is more or less as I suspected would be the case. I would also not be surprised if the glass has not dropped to the bottom of the frame rather than sit in the rubber section.
-
 1
1
-
-
29 minutes ago, truckcab79 said:
I have no need to. I’ll leave the d1ck-swinging desire to answer every post to others on here. I was just answering the original question in so far as there isn’t a missing part and that slot is just a simple frame drain. If I don’t know something, I’d rather not continually post a load of ‘what-ifs’. As I’ve said before I find it best to answer if I know something and to read, learn and say nothing if I don’t.
As you’ve asked though, anything is possible, but the work involved in being able to adapt that slot into some sort of useful drain channel unless you have the ability to fabricate and the skill and equipment to TIG weld ali aren’t worth the time involved. I’d either use it as it was intended and accept it doesn’t do much and find another way to deal with condensation, or stump up thousands for modern double glazed units.
Or a few hundred for a modern single glazed window that has a drain.
Or fit secondary double glazing, as described many times on here.
Interesting that you have swerved the OP's original question and told him much the same as I have, there was no drain channel on that window, and it is not practical for to DIY fit one. The difference is that I have tried to explain why, that you seem to have singularly failed to do
I have tried to explain this to the OP and answer his question. You dismiss my efforts of explanation as what-iffery, yet fail to give any explanation as to why the OP's supposition was incorrect and why his solution is not really practical. You just make a blank statement like "it is a simple drain" and walk away. That is not helpful to OPs who want to learn.
-
1
-
-
8 hours ago, truckcab79 said:
Don’t over-complicate this. As I’ve said. It’s just a drain hole. Nothing more. Not a particularly efficient design but it is what it is. Very common design that’s been around forever.I have never said it was not a drain, but I read what the OP says and claims.
As you seem so sure that I have overcomplicated the OP's wish to fit another drain channel to replace the one he thinks was glued onto the frame, perhaps you would be good enough to explain to him how he can do this and how it will work to drain condensation through the existing drain. Of, and answer his original question and tell him what it is called and where to source it.
As you seem so sure about how this window works, perhaps you can explain how the glass was fitted and secured into such a wide frame channel, so the OP can have a go at recreating it if they want to.
In my view the OP is trying to modify hos frame to do something it was never designed to do.
-
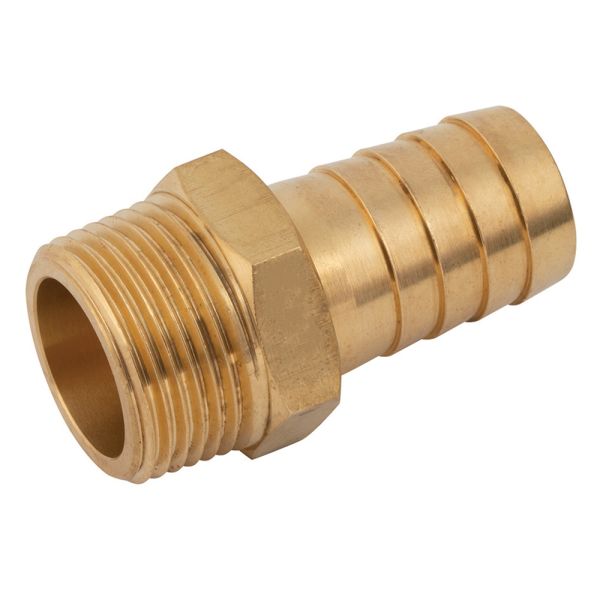
Hose TAIL, or hose barb

-
The vent looks to me as if it is on the base of the glazing channel, if this were not so you should be able to see the cabin side through it. That suggest it is a drain for the glazing channel, but how it worked is beyond me. Maybe there was once a large rubber glazing seal instead of mastic, but how that worked with the vent I have no idea.
If there was a drip channel as you keep on about, then there would have t be holes in the existing frame vertical, so water could escape from the channel into the glazing channel, under the glass, and out of the vent. There are no such holes, so a drip channel would just fill up and overflow - as the drip channel on other windows do when the glass drops or moss/dirt blocks the holes.
I think that the blue glue once secured a wooden trim piece and has nothing to do with a drip channel. It runs up the vertical side of the frame, where there is no need for a drip channel.
-
1
-
-
The photo is not clear enough to be sure.
-
Many thanks for this full report back. It all makes sense, especially the blocked pipe down to the low level expansion tank. I think it will now prove to be OK.
-
 1
1
-
-
4 minutes ago, MtB said:
I was thinking they might marginally further restrict the flow of water into the prop, making cavitation slightly worse.
That is certainly a possibility, but if it restricted much I think it would ventilate because that means water would have been drawing down from the surface.
-
No signs of drain holes through the inside aluminium face, and I doubt there ever was a drip channel. Plenty of signs of the use of orrible black mastic to hold the glass into the frame. I am now sure this is a DIY bodge. I would try digging out some of the black mastic to see exactly why you have there. The mastic looks wide enough to be hiding a drip channel.
-
1
-
-
18 minutes ago, MtB said:
I'd imagine with a cavitation problem, welding on anti-ventilation plates would make no difference or could make it worse, if anything.
I agree, but not sure how it could make things worse because cavitation air/gas bubbles are caused by the prop itself making low pressure areas, not drawing air down from the surface.
-
Tests to confirm the suggested diagnosis before you go pulling things apart and assuming the engine will turn by hand (spanner)
You can extend the voltmeter leads with almost any length of cable if needed.
To test for problems with the positive circuit.
Voltmeter between start battery positive and the large terminal on the starter solenoid that runs from the solenoid into the starter body. Expect battery voltage, but ignore it. Operate starter. The meter should read less than 1 volt. The higher the reading, the bigger the resistance in the circuit.
If you get more than 1 volt, transfer the connection to the other large solenoid connection and repeat. If you then get less than 1volt, the solenoid contacts are burned.
To test for problems with the negative circuit.
Voltmeter between start battery negative and the starter negative terminal, or a clean area on the starter body. Expect zero volts but ignore it. Operate the starter. The meter should read less than 1 volt. The higher the reading, the bigger the resistance in the circuit.
-
1 minute ago, RaggedyVan said:
Thanks Tony, exactly as you say.
I will get a photo of the window in question when we get back. Appreciate the help
If I may observe that the photo shows a very poor quality of fit out, even though it is elderly, so I suspect it may well have been a DIY job using second hand windows. If so they could have originated in all sorts of applications. I think some GRP cruisers had aluminium window frames with no drip channel and the stick on "fabric" cabin lining was overlapped and stuck to the frame - hence the glue. However, I am having difficulty in recalling a cruiser that had narrowboat style windows, so suspect a vehicle of some sort is a more likely doner.
-
10 minutes ago, magnetman said:
I meant anti ventilation plates.
Of course you did. The trouble is that those who know the difference between cavitation and ventilation on props are not as numerous who think both are the same thing.
-
1
-
-
1 hour ago, jacko264 said:
That looks like a bus window to me
But the photo shows the required drain channel. I think this is another window, so we need a photo of the offending window.
-
Many thanks for the update, and sorry it is not sorted.
I seem to recall someone said that you had a Barrus Shire engine, so have been looking at manuals and images. If it is something different, ignore this and let us know exactly what it is.
It seems the starter motor has a top mounted solenoid well above the engine bed so that won't smoke from under the engine.
The Non Canal boat engine manual suggests that there may be a start relay, but there seems to be no mention of this on the canal boat range. Such a relay should be mounted higher on or beside the engine, so even if you have one it should not be under the engine.
If there is something under the engine, it seems unusual.
There is likely to be something low down on an engine bed or on a starer mounting bolt, the starter negative terminal (if there is one) or probably a gearbox or flywheel housing mounting stud/bolt and that would be a main negative "earth" connection. This could look as if it may be under the engine and if the smoke is coming from there then Arthur got it right. If that connection is loose, dirty, or the cable strands are loose in the terminal, it would smoke and give you symptoms.
I await the next instalment with interest.
-
29 minutes ago, blackrose said:
Corrected that for you.
The porosity of car body filler is exactly why it's not suitable for marine use. If you want to do it properly you need a marine grade filler. I've used International Watertite before and it's completely different from Plastic Padding, P38, etc, and is not porous. It's also more expensive of course, but you get what you pay for.
I tried one of the so-called marine fillers once and it was extremely difficult to sand down - as one would expect from a product with more resin and less powder in it. Therefore, I doubt it would suit the OP's job. It was also far more difficult to apply. I think it was the Plastic Padding one. I never had any problems with automotive fillers on vertical or near vertical surfaces on the boat, but if the area suffered any paint damage I touched it up at once.
-
1 hour ago, Mark R said:
In terms of making a key for the lock I'd not even know which blank to start with?
Now you know why I suggested a locksmith. Your lock may well not be the Aquafax one so you can't go by the look of the lock.
-
1
-
-
29 minutes ago, Blue37 said:
its at odiham hampshire - needs some woodwork for the doors to cabin - needs a new window seal - removal of old name etc
Ask at the Basingstoke Canal Centre at Mychett. That is the office of the Basingstoke Canal Authority.
-
Talk to Eagle Boat Windows https://www.eagleboatwindows.co.uk/
and describe what you want or send them photos. As they refurbish all sorts of windows, they may know what you need.
If you can shape it at the ends, all the big DIY sheds seem to sell aluminium square section U channel, but trying to make a mechanical fixing to the existing frame in my view stands a good chance of ending up with shattered glass when a drill hits it behind the existing aluminium upstand..
-
I think that they are part of the section the frame is made from. so not a separate item. If you don't have them, then maybe the windows are from a bus or other vehicle
Draining Rads with a Webasto Top Evo system.
in Boat Equipment
Posted
Have you followed the pipes to the calorifier in case there is a valve? If not, I would suspect an airlock in the calorifier Webasto coil or its pipe work.