Giant
-
Posts
667 -
Joined
-
Last visited
Content Type
Profiles
Forums
Events
Gallery
Blogs
Store
Everything posted by Giant
-
Since the OP has his location listed as Cricklade, it would seem he is upstream of the head of navigation. So a license may not be needed, but I would expect planning permission might be needed. I think the EA would probably be consulted in the planning process, but in their general environmental role, rather than as a navigation authority.
-
True, the battery needs to have been connected initially to have some current flowing - it's when it becomes disconnected whilst running that's the risk. But as you note, that's exactly what can happen with an intermittent switch, especially under engine vibration.
-
Intermittent isolator switches might just need to be stripped down and the contacts cleaned. If the alternator has been run without a battery connected then that could certainly cause damage; without anywhere for the current to go, the voltage can rise out of control and blow things.
-
The cabin wall will presumably be something like 3-5mm steel, then whatever insulation you have, then wood lining. I would drill a hole through the steel and put in either watertight cable gland, or a waterproof panel mount connector if you want to be able to remove the mast & wiring completely. Either way you will need to get some access to the inside, behind the lining. A saw fitting on a vibrating multifunction tool is very useful for cutting neat access panels from inside.
-
I went with an LMO7270 MIMO antenna, mounted on the crosstrees to be clear of the mast itself. Price was similar to the Solwise one. On the left here - router is the rectangular box in the middle.

-

painting Re-painting over new shiny gloss paint
Giant replied to Cpickle's topic in Boat Building & Maintenance
Don't worry, by the time you get to it the current paint will be years old and it will be time to take it back & repaint from scratch. Seriously, do the rest of the boat first. It will take so much longer than you think and you will be glad you didn't mess with the paint. -
In general, the dB gain of an antenna is mostly just proportional to how directional it is. The highest gains will be from antennas that need to be aimed at the cell tower to work well, which isn't that practical on a boat. But you can get medium-gain antennas with good reception in all directions, but only near the horizontal plane. That makes pretty good sense for cellular network reception and is what most will be, around 2-4dBi. As others have noted, you'll lose more from long crappy cable than by choosing between two similar antennas. I went for a router in a waterproof enclosure up on the mast, with only ~50cm cable to the antenna.
-
Our local council tip will take waste oil, but don't let you through the gate without proof of address in that borough.
-
The best procedure I've found for asking a question on here is as follows: Write down the question. Think through as many ways as possible that the question itself could be misinterpreted. Go back and rewrite the question to avoid as many as possible of these. Think through all the answers you've already ruled out. Go back and mention all these with reasons. Take a deep breath. Post the question. Stay glued to the forum for the next couple of hours fending off the people who, despite steps 2-4, have ignored most what you've written. Spend the next day or so answering different variants of "but why would you want to do that?". After the initial flurry of responses, two total tangents and a personal flamewar between two members, attempt to steer the thread back onto the original topic. Give up and announce that you've come up with the answer yourself anyway. Spend another week defending your decision to new posters who haven't read the rest of the thread.
-
What have you fettled for the boat today?
Giant replied to Captain Fizz's topic in Boat Building & Maintenance
Yes, and in various sizes: http://www.ebay.co.uk/itm/252934918585 -
Yes, that's exactly what most battery monitors other than the Smartgauge do. They use a shunt to count amp hours going into and out of the battery. They're not very good for telling you what % charge you're at, because that relies on them knowing the true capacity of the batteries, which is hard to measure and changes over time. But for just counting amp hours used over some period, they're perfect.
-
What have you fettled for the boat today?
Giant replied to Captain Fizz's topic in Boat Building & Maintenance
Oh I know! Was thinking to stick some of that long brushy draught excluder stuff around the inside of the cutout, so it can have the opening screw still run through it OK but still keep the little buggers out. -
What have you fettled for the boat today?
Giant replied to Captain Fizz's topic in Boat Building & Maintenance
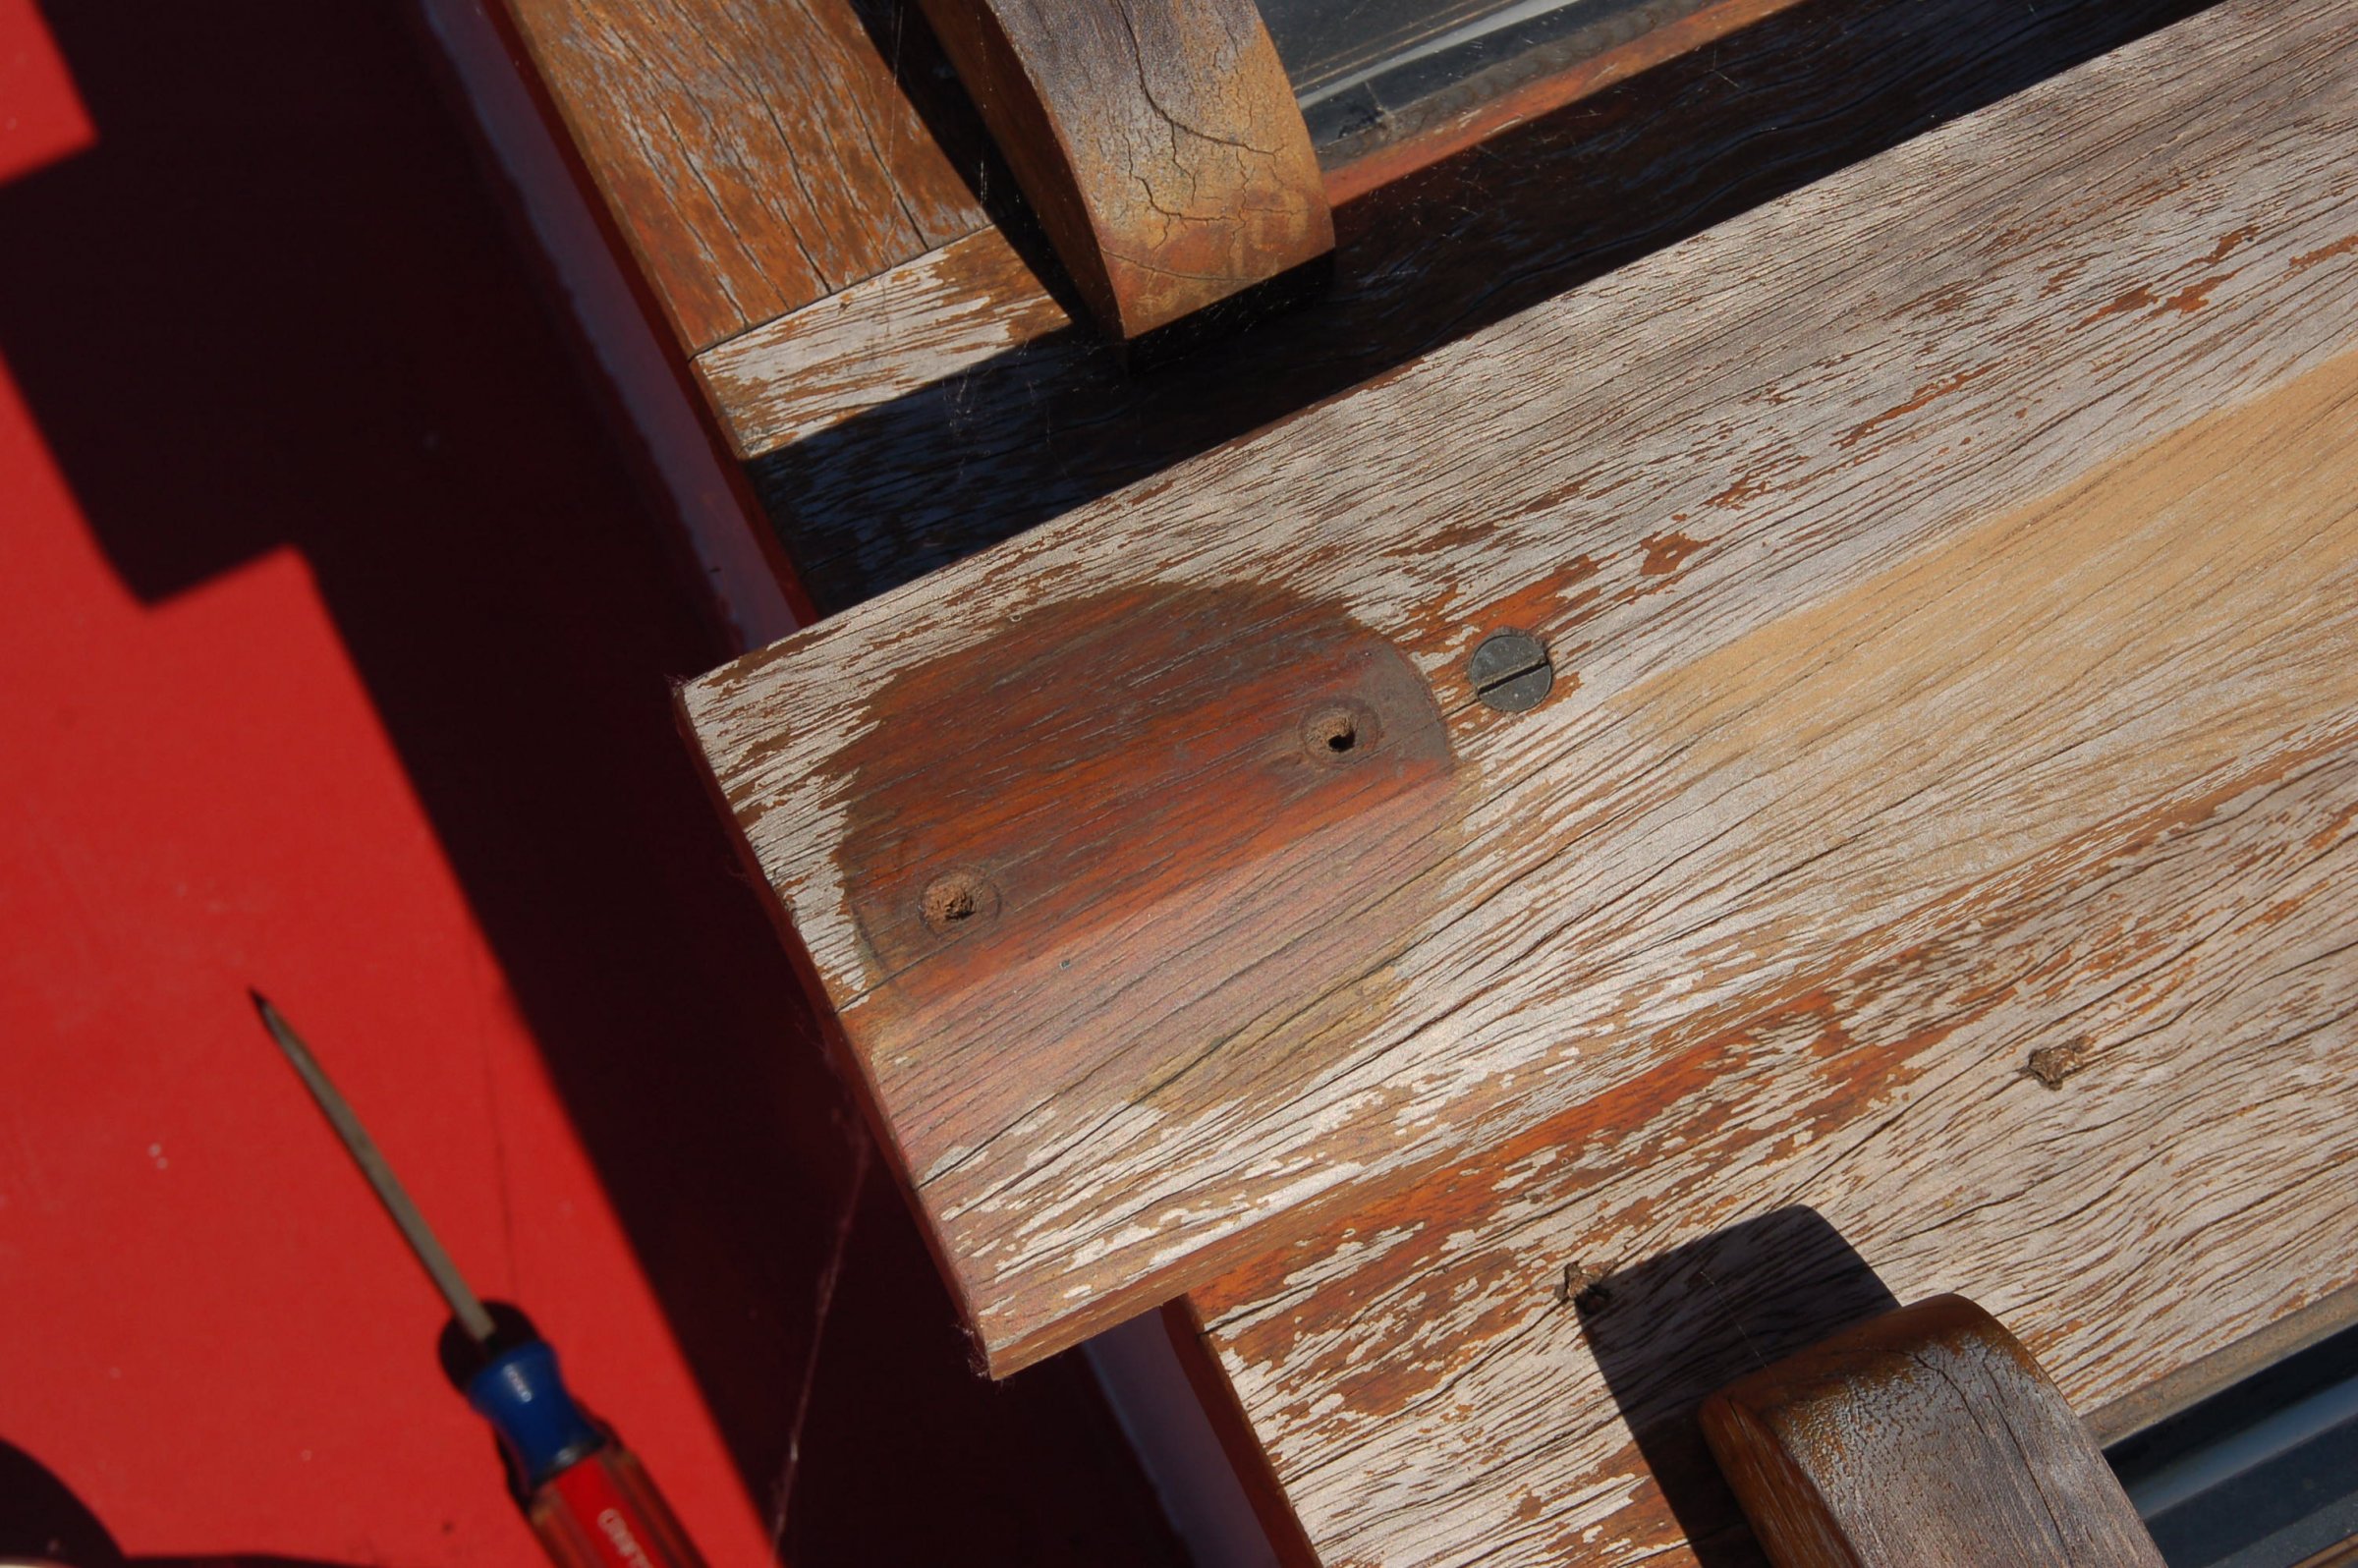
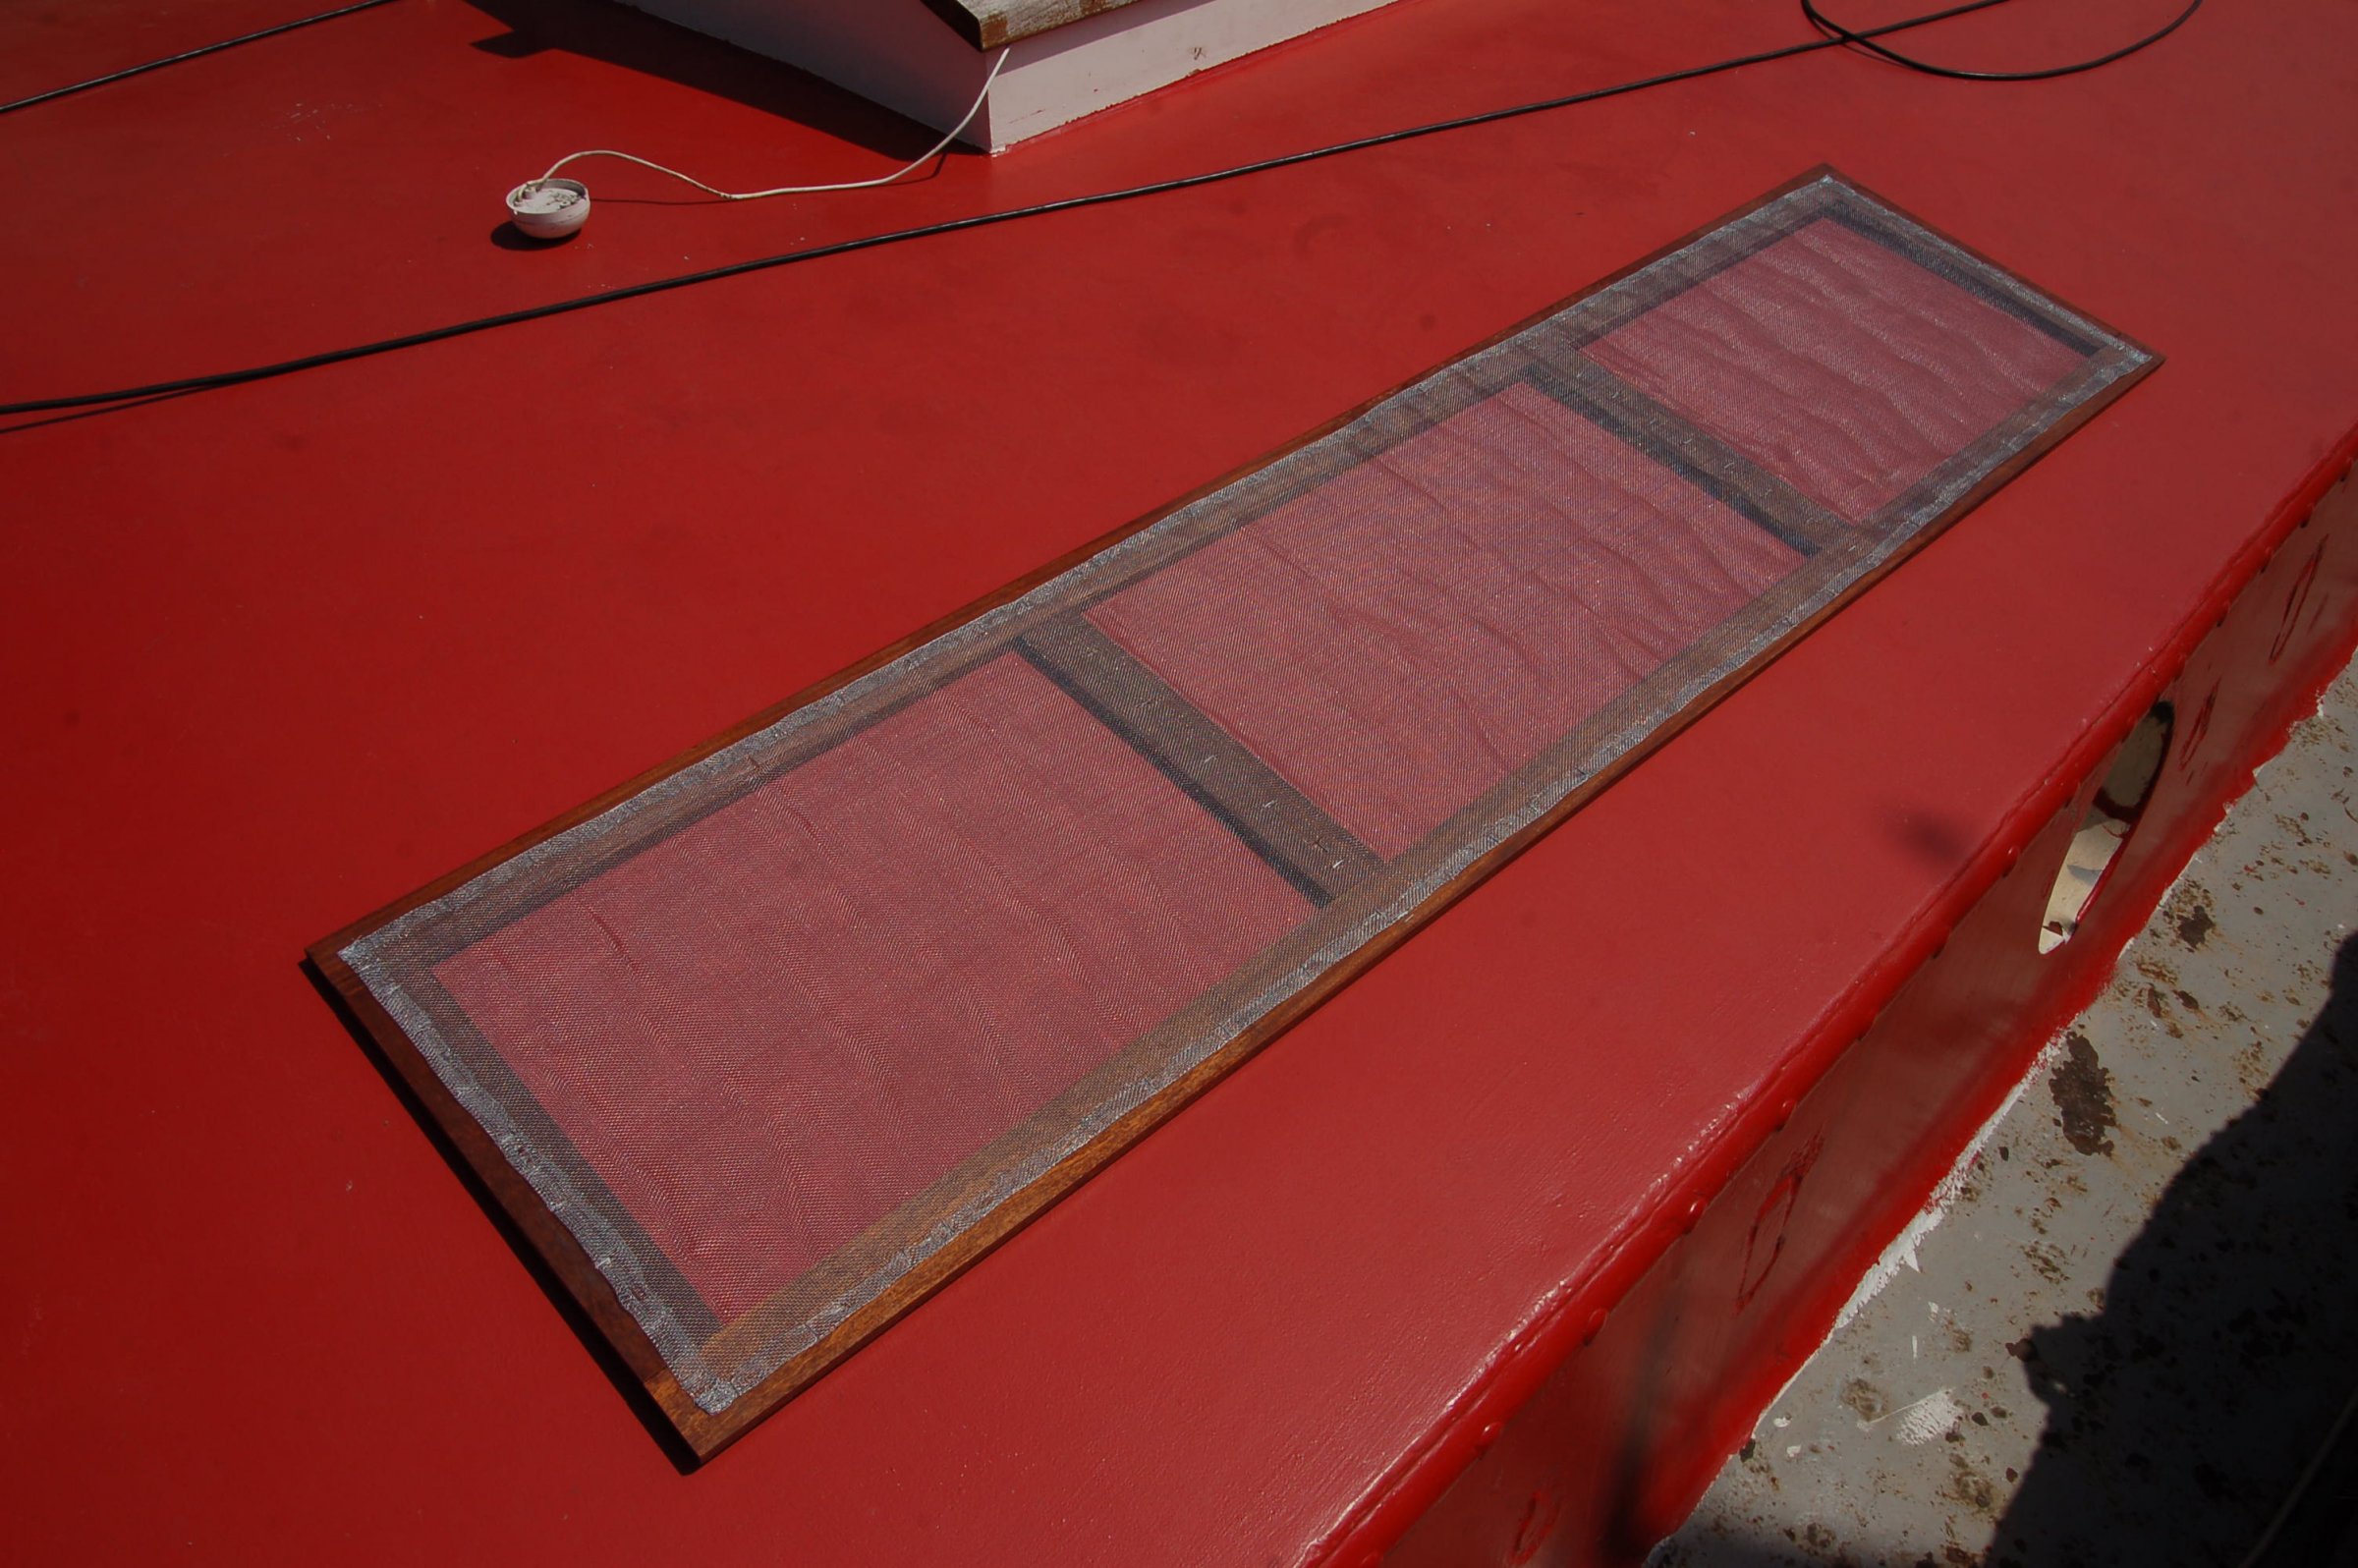
Have been giving our pigeon roof some love. This is what it looked like on Friday: Under the GPS the original colour of the varnish is revealed - this is about 4 years' difference: Sanded the top beam back to the bare iroko: We will be redoing this box and the wheelhouse this summer with Sikkens Cetol HLS Plus and Filter 7 Plus. This beam is the test piece and looking good: Lots more sanding and varnishing to be done - but it's been scorchingly hot and we daren't leave the roof open because of the dreaded mosquitoes. So this was the other project - 12x55mm hardwood strip, put together with 6mm dowels and jig to drill the holes: Varnished and then covered on the back in 1.5mm aluminium insect mesh, stretched out and staple gunned in place: A quick notch in the side and up it goes! Now we can leave the roof open... on one side at least until I make up the other one!
-
Well there's already a Leicester Trader, Gainsborough Trader, Nottingham Trader, Humber Trader and there used to be a Freight Trader.
-
I would guess that it's because there is a higher risk of a fault in a shower environment with water everywhere - and if a fault occurs in the shower unit, having all the lights go out in the bathroom when the master RCD trips is not that helpful or safe! I speak from experience...
-
Hmm. I've found a source for both 0.600" and 0.710" AF hex brass bar, so could do both the 3/8 and 5/16 Whitworth sizes. But would need to buy a metre of each! Might be cheaper to just mill off a bigger bit unless lots wanted or I can find a supplier for shorter lengths. Will need to measure up an original of each to get the right length and dome radius
-
Hmm. We are also short of a bunch of these. If nobody else has any sources for them, I could make up a batch. Anyone else interested?
-
The trick we have found with vactan is to take back to almost-clean metal with just surface rust, apply the vactan, wait a couple of weeks and a handful of spots will rust through where the rust was too thick. Clean these spots up a bit further and repeat. Once nothing further comes through, prime and paint.
-
Just to update the list floating around this thread, Valiant's owners made an impressive voyage up to Scotland last month, going non stop from Scarborough to the Moray Firth and are now based on the Caledonian Canal. I took this of her out on Loch Ness as I was coming through the other way. Well impressed.
-
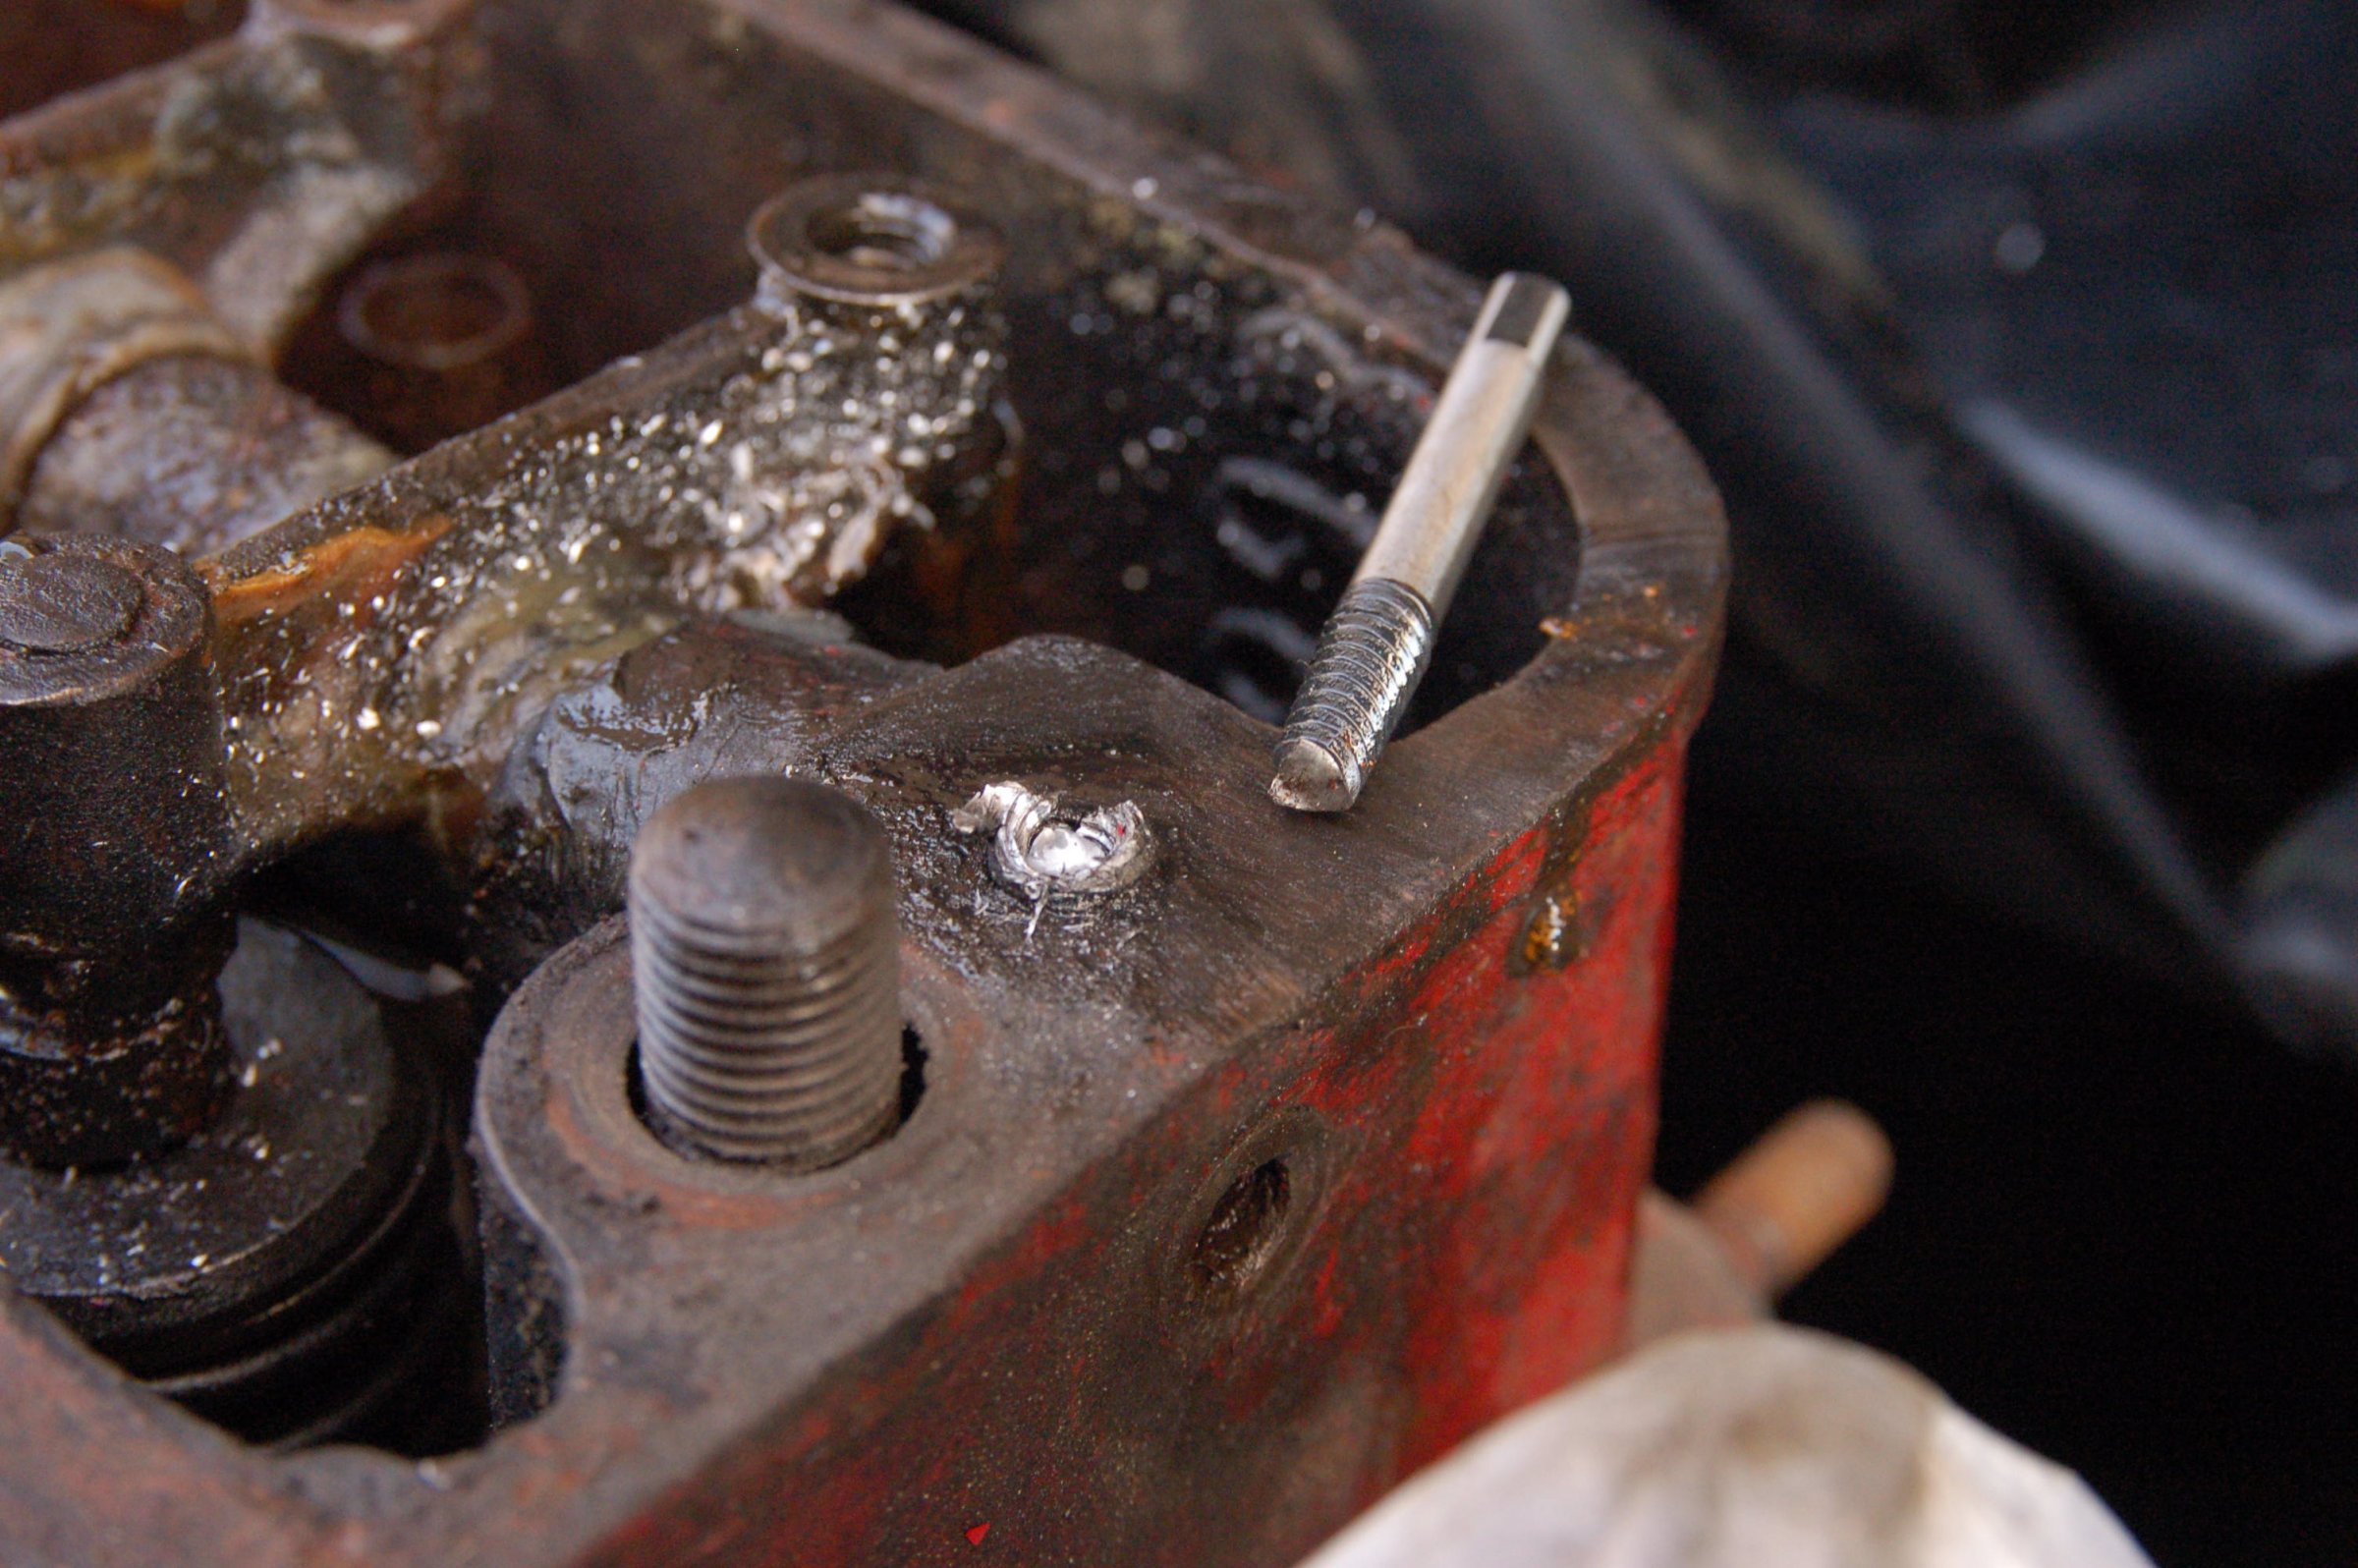
Once we've got that head off I will put it in the big drill press and drill out the remains. If I can do a neat job then all the better, but as BWM notes, only one retaining bolt is really needed, so if I mess up the thread it's not the end of the world - and could always tap to the next size up. The need to remove the rocker shafts to get the heads off really does seem like a bit of a design flaw on the JP. It's easy to get the shafts out once the heads are off! I actually wonder if it would be possible to create a tool that could get the hollow stud nuts off without removing the rockers. Anyway, we have plenty to do for now in cleaning up the bits we've already taken off and brought home.
-
Well that was a bit of a flop. Is there such a thing as a "screw extractor extractor?" Despite not getting that out I did manage to tap that shaft enough to get it moving towards the next cylinder head, but coming back the other way I haven't been able to get it more than a couple of millimetres out of the head. Also tried to use it to push the one in the next head, but that's still thoroughly stuck too. No further with the gudgeon pin either - I will make up a puller.
-
Right - any good tips on getting that gudgeon pin out, and the remaining valve rocker shafts too? I'll be going back tomorrow or Weds for another bash at it. I sprayed in a load of penetrating oil at the weekend so maybe that'll help. One of the rocker shafts still has a retaining screw in place which the head has come off, so I'm going to have to drill out and extract that, but I don't know if that's actually what's stopping it. The other one has both screws out but still won't budge. I've taken the tappet screws out and turned the crank such that there's no force on the rockers. Just to further complicate things both shafts still have right-angle fittings screwed into the forward ends for the greasers, which can't be unscrewed because they hit a raised area on the sides of the heads. I don't want to abuse these and end up trashing the internal threads.
-
It's funny, to me that's starting to look like a proper boat... just raise the decks/gunwales a bit! Sooner or later someone's going to just build a new keel.
-
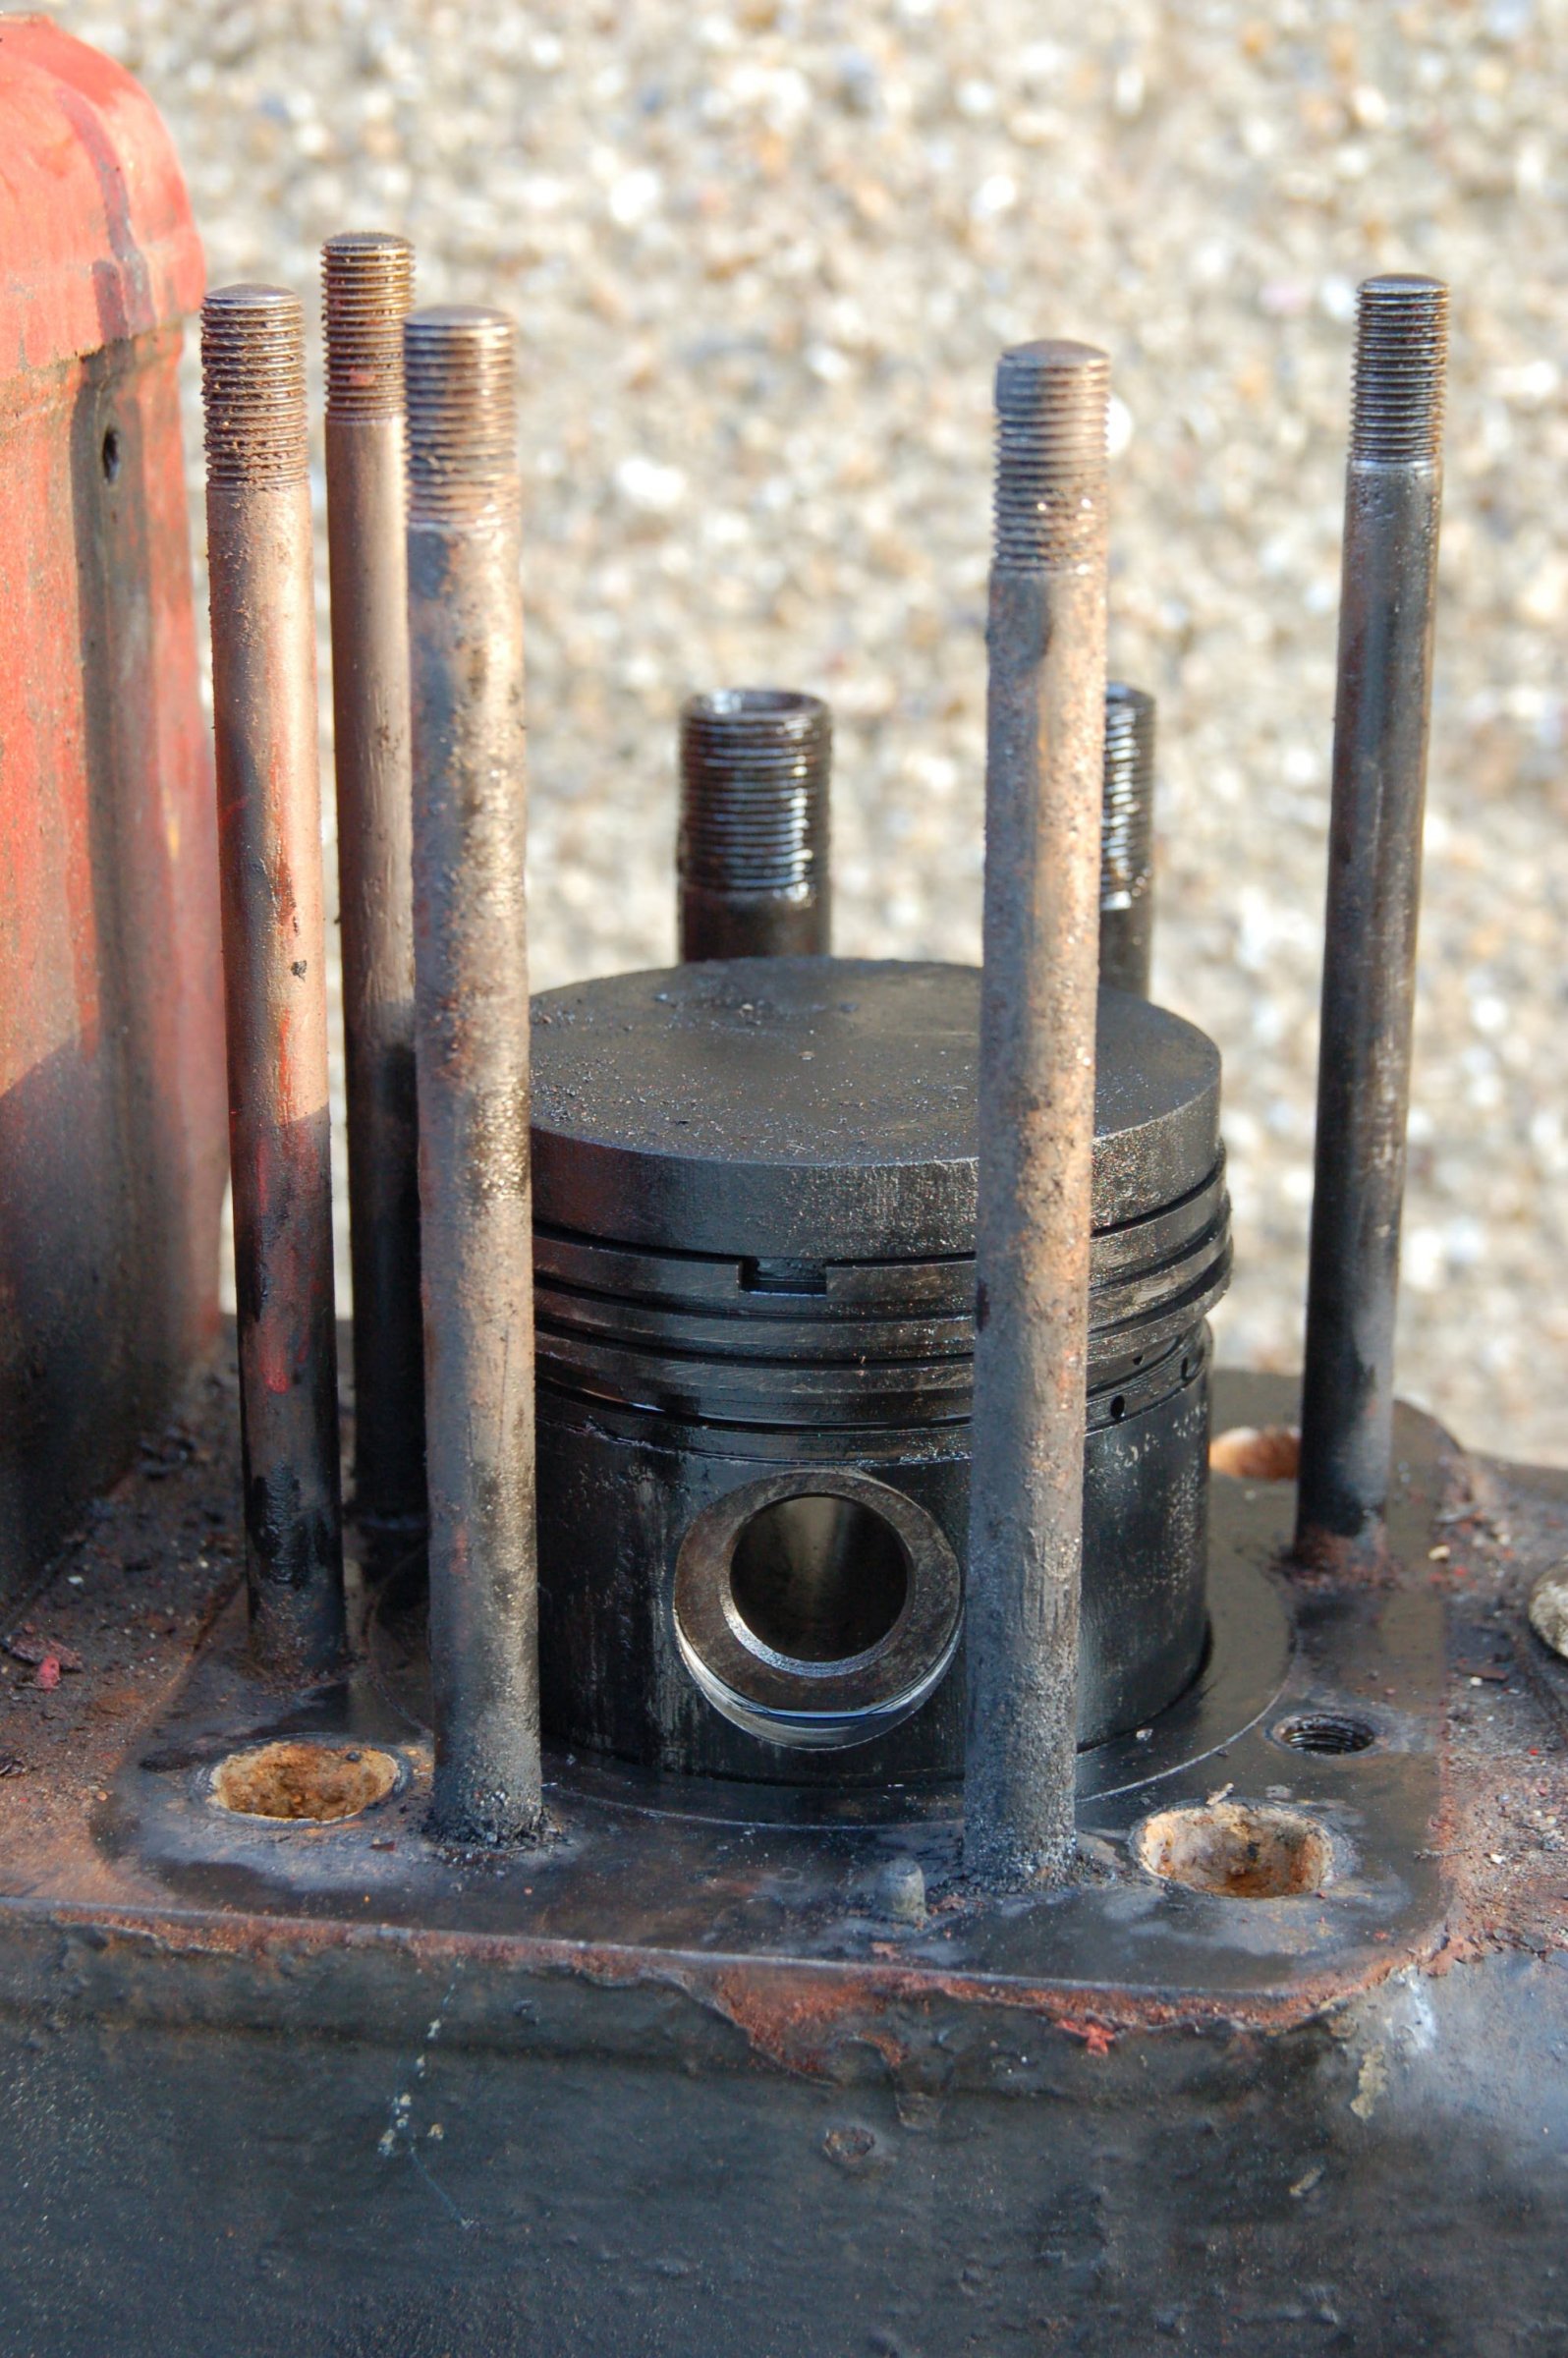
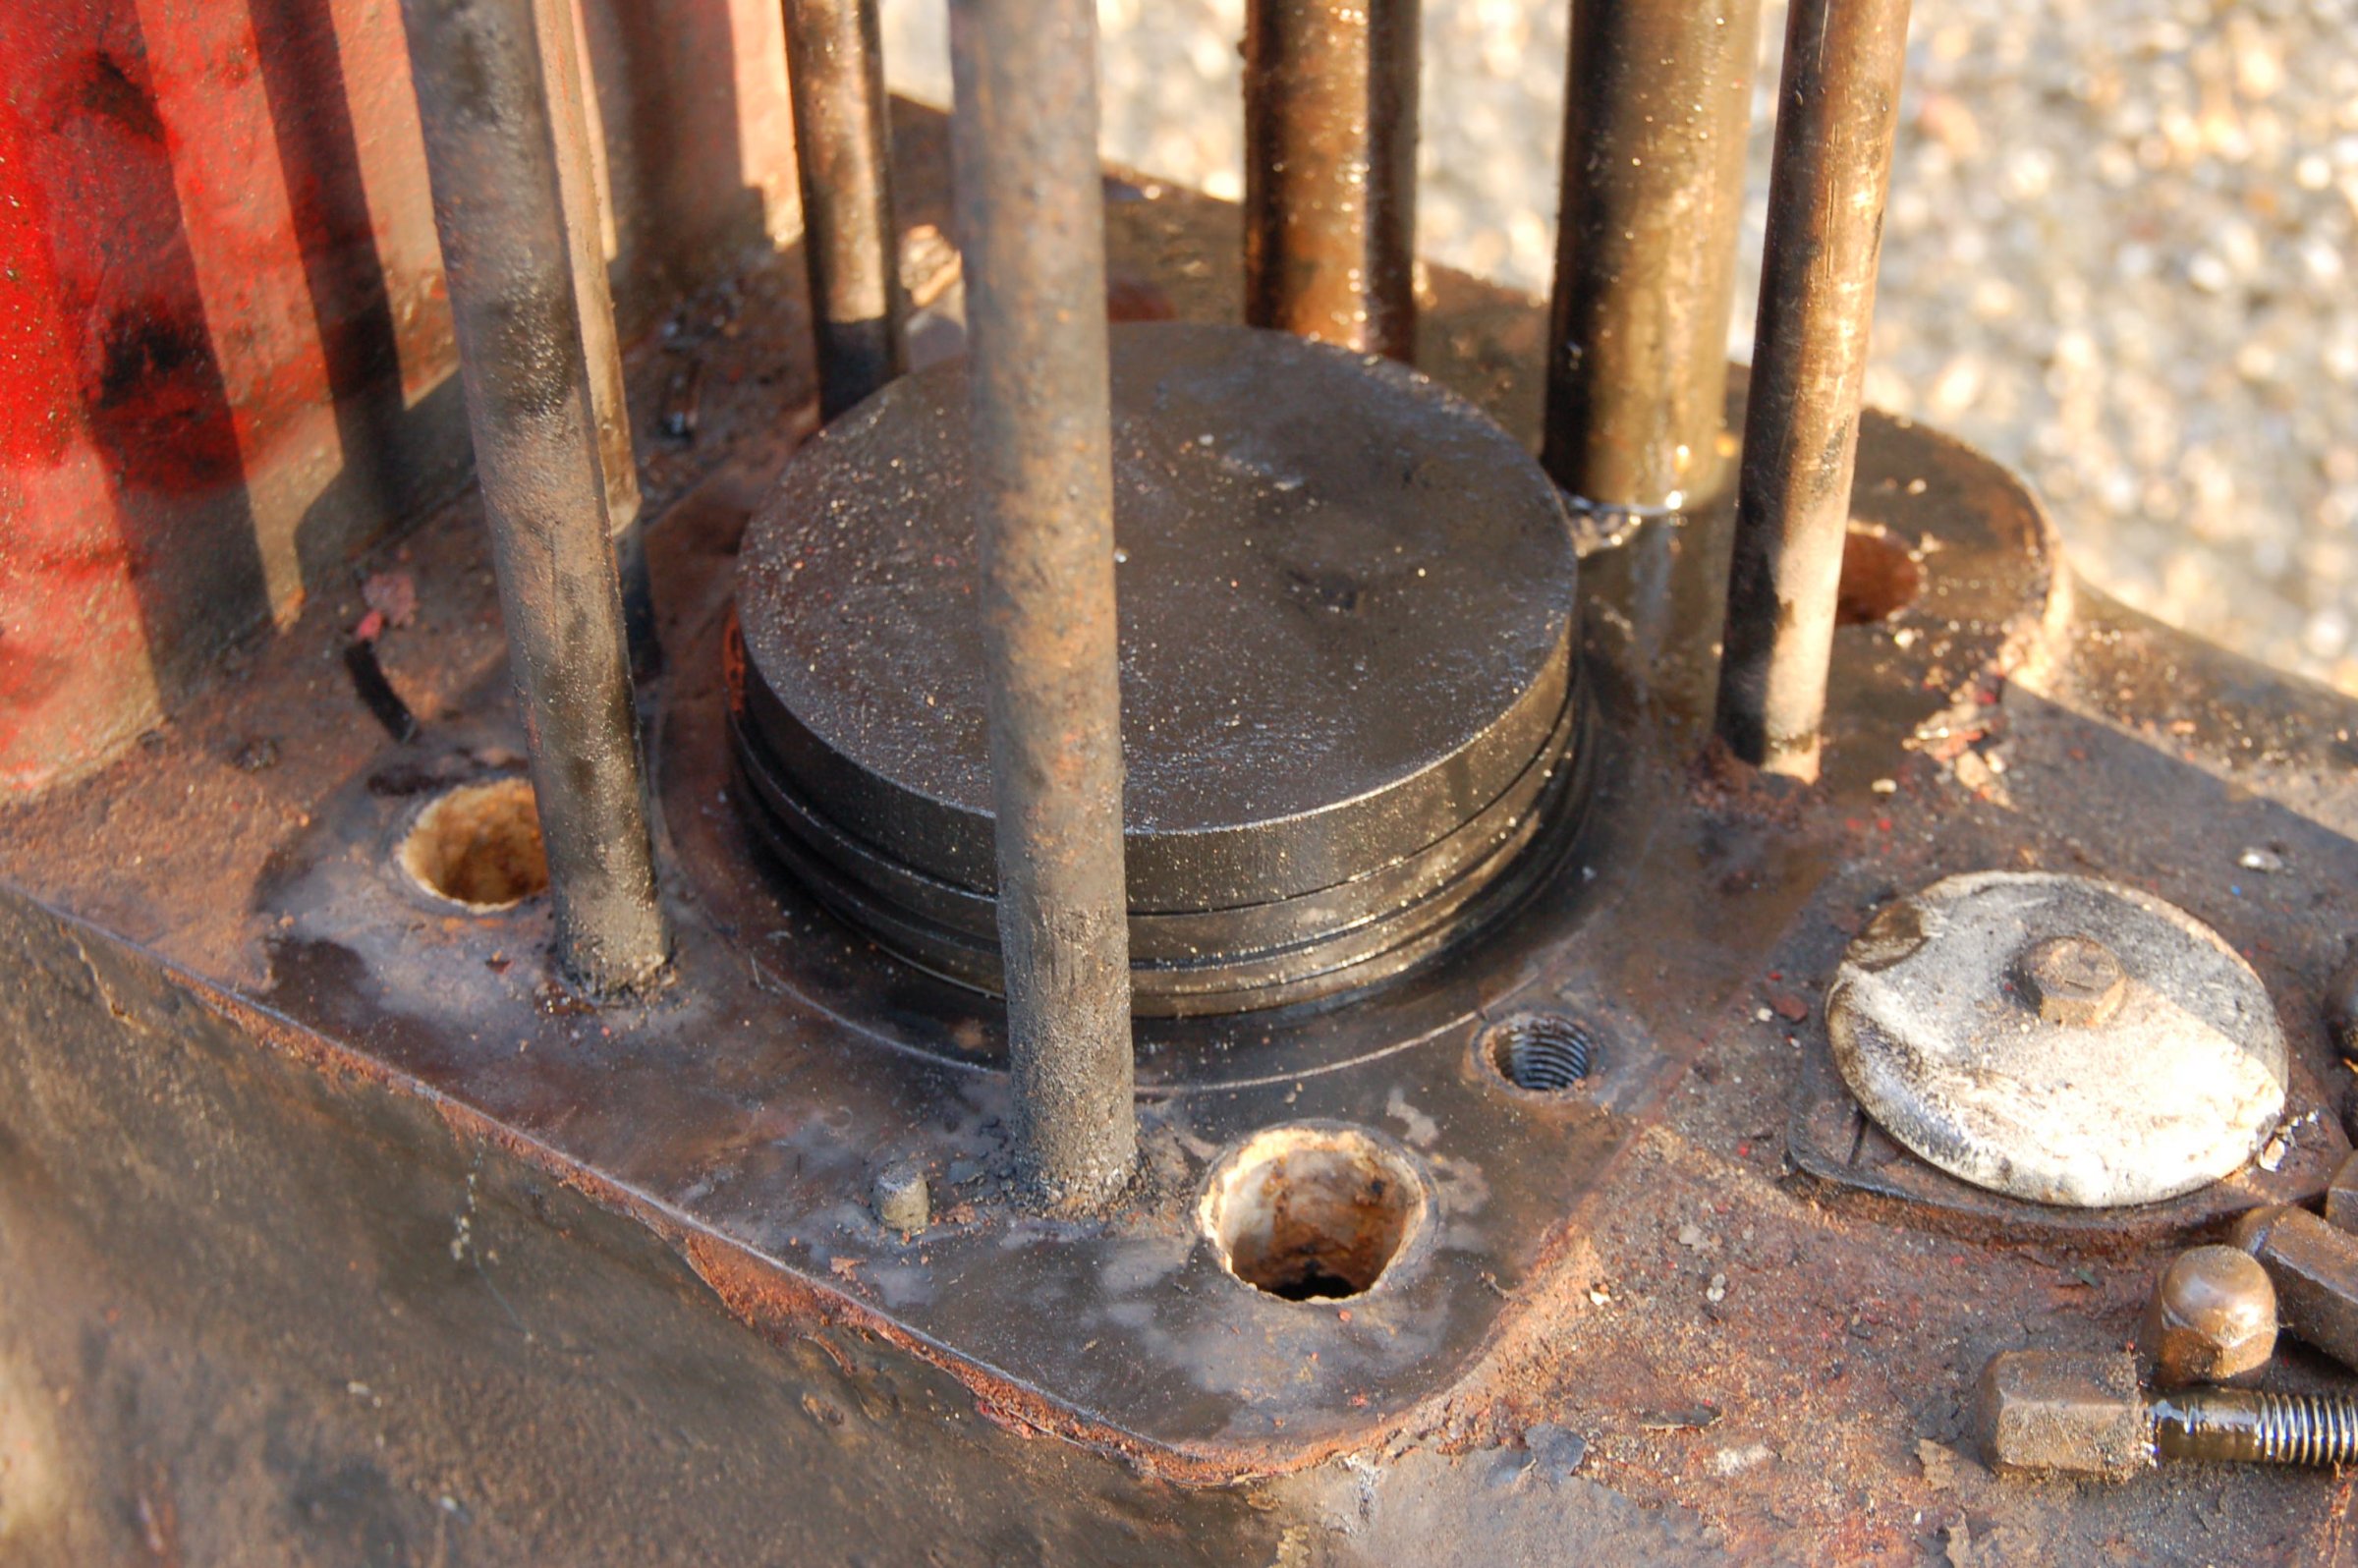
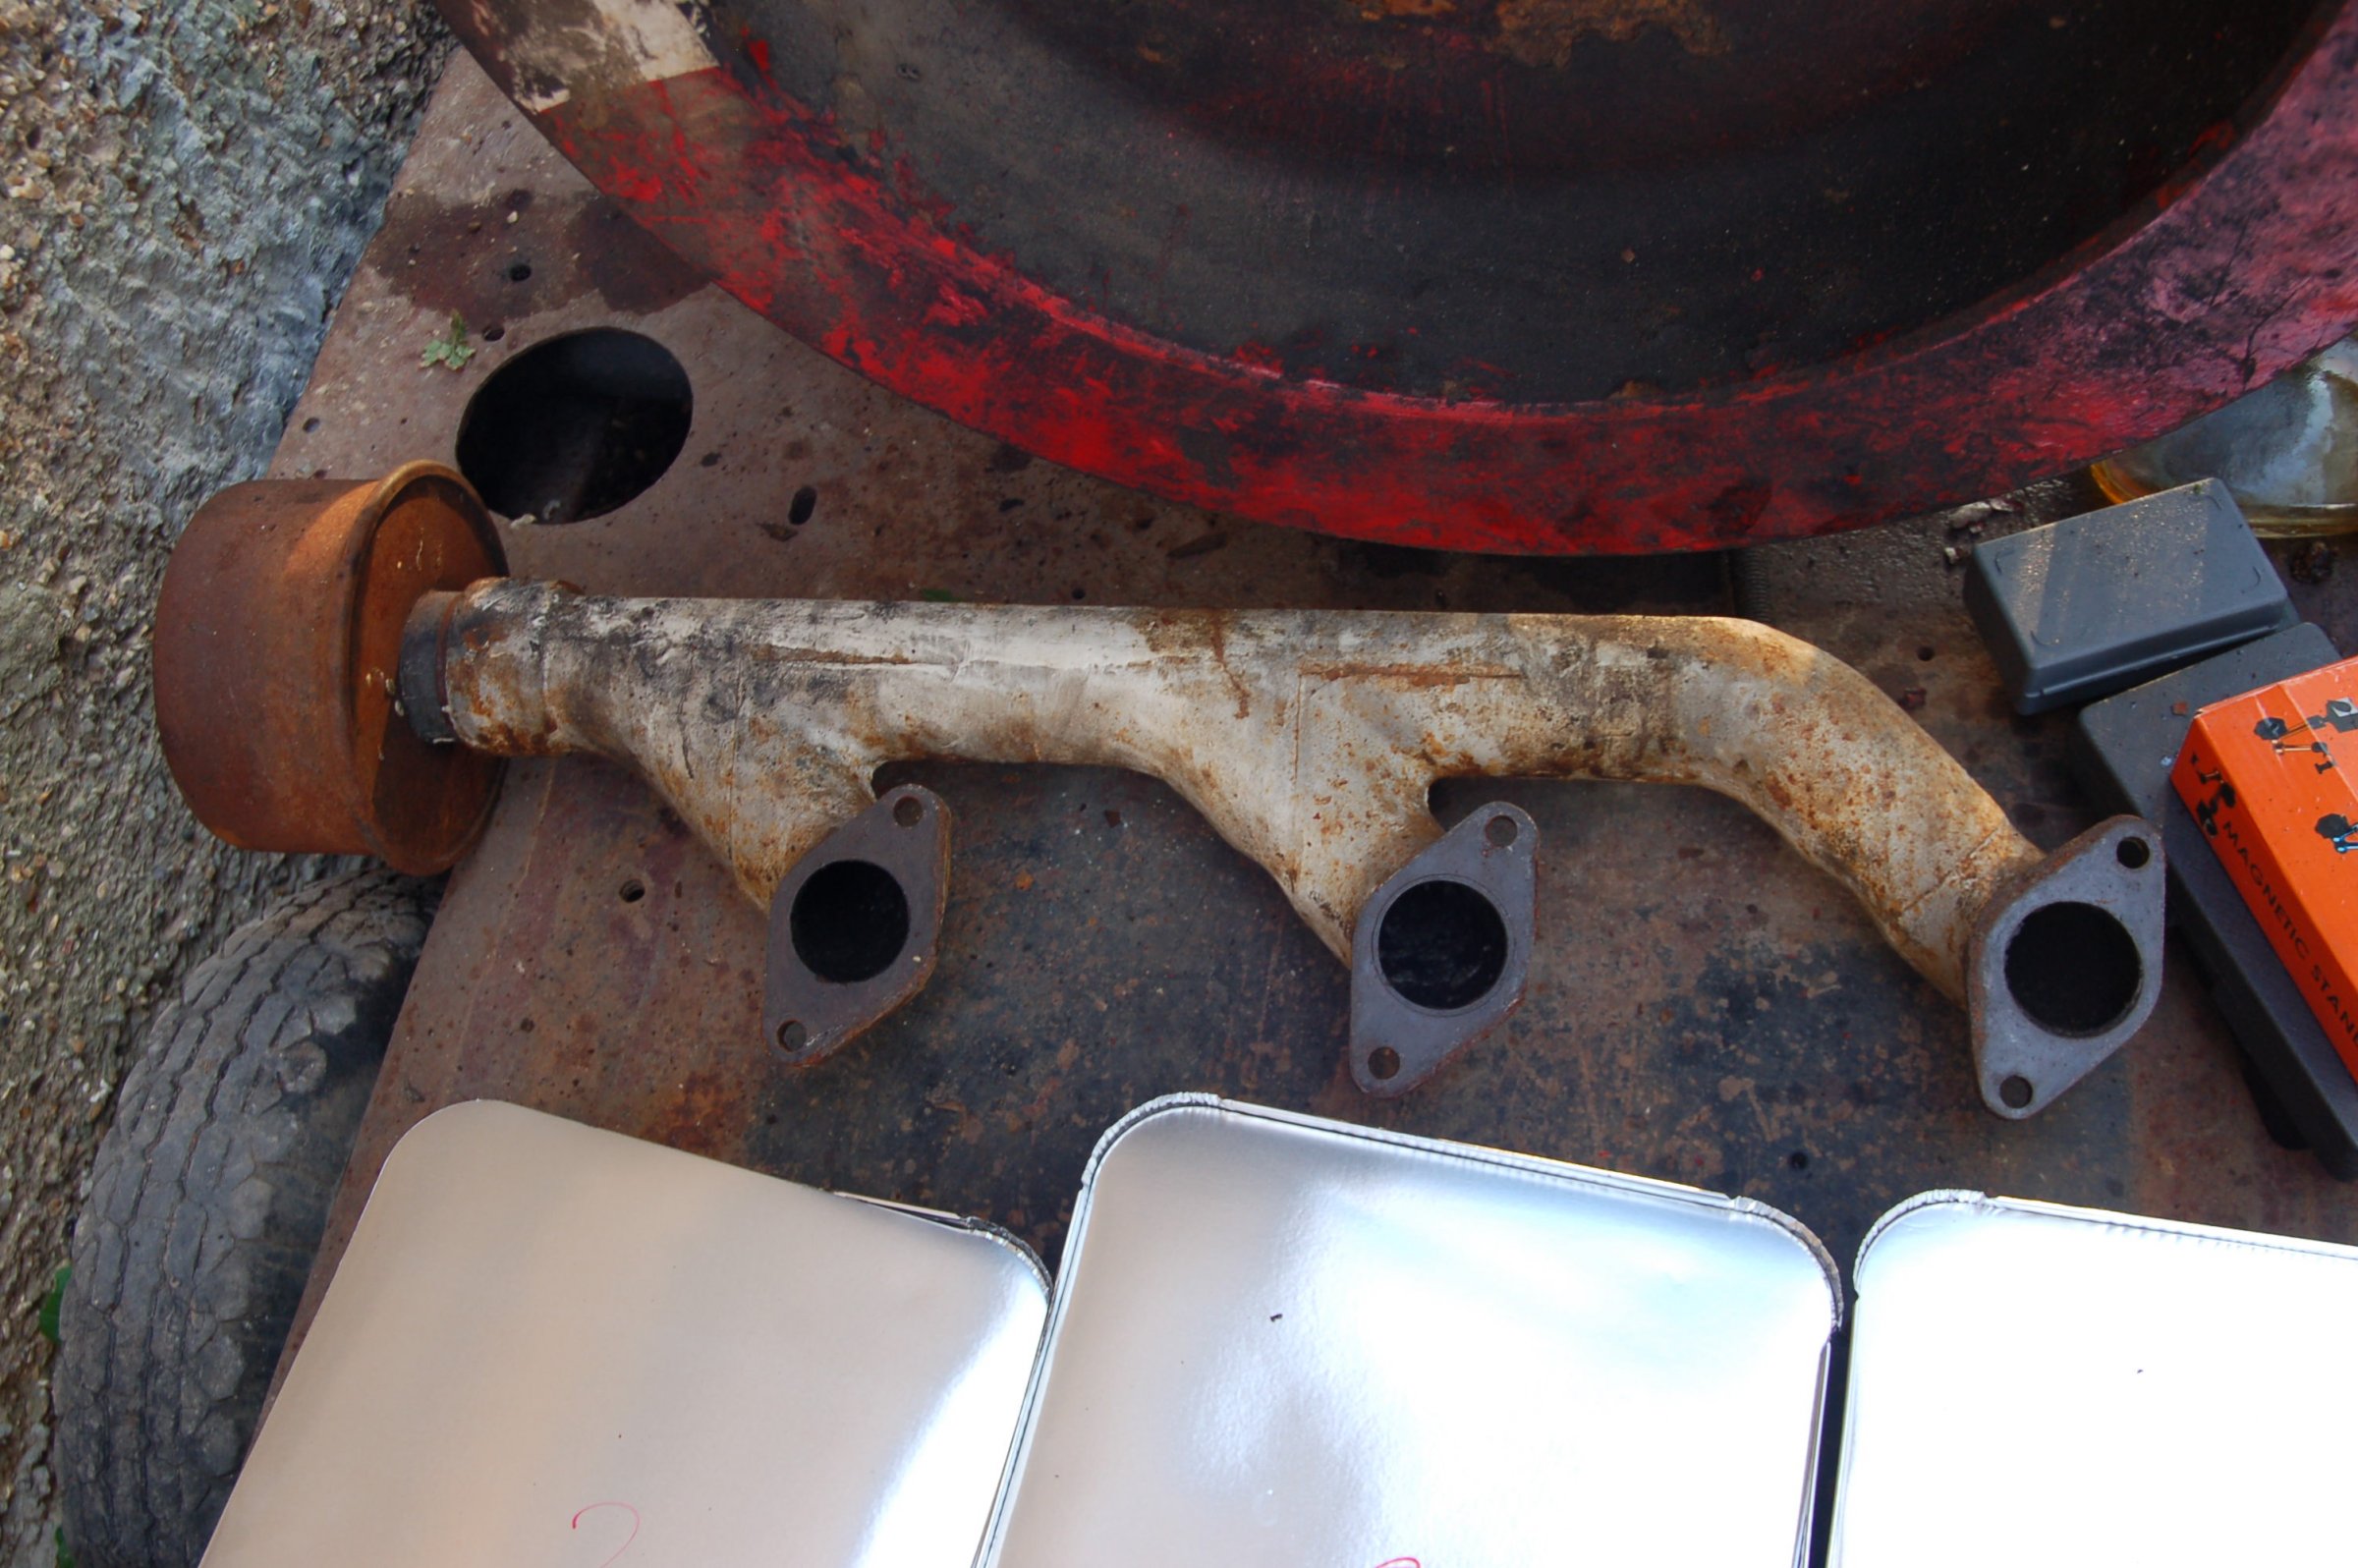
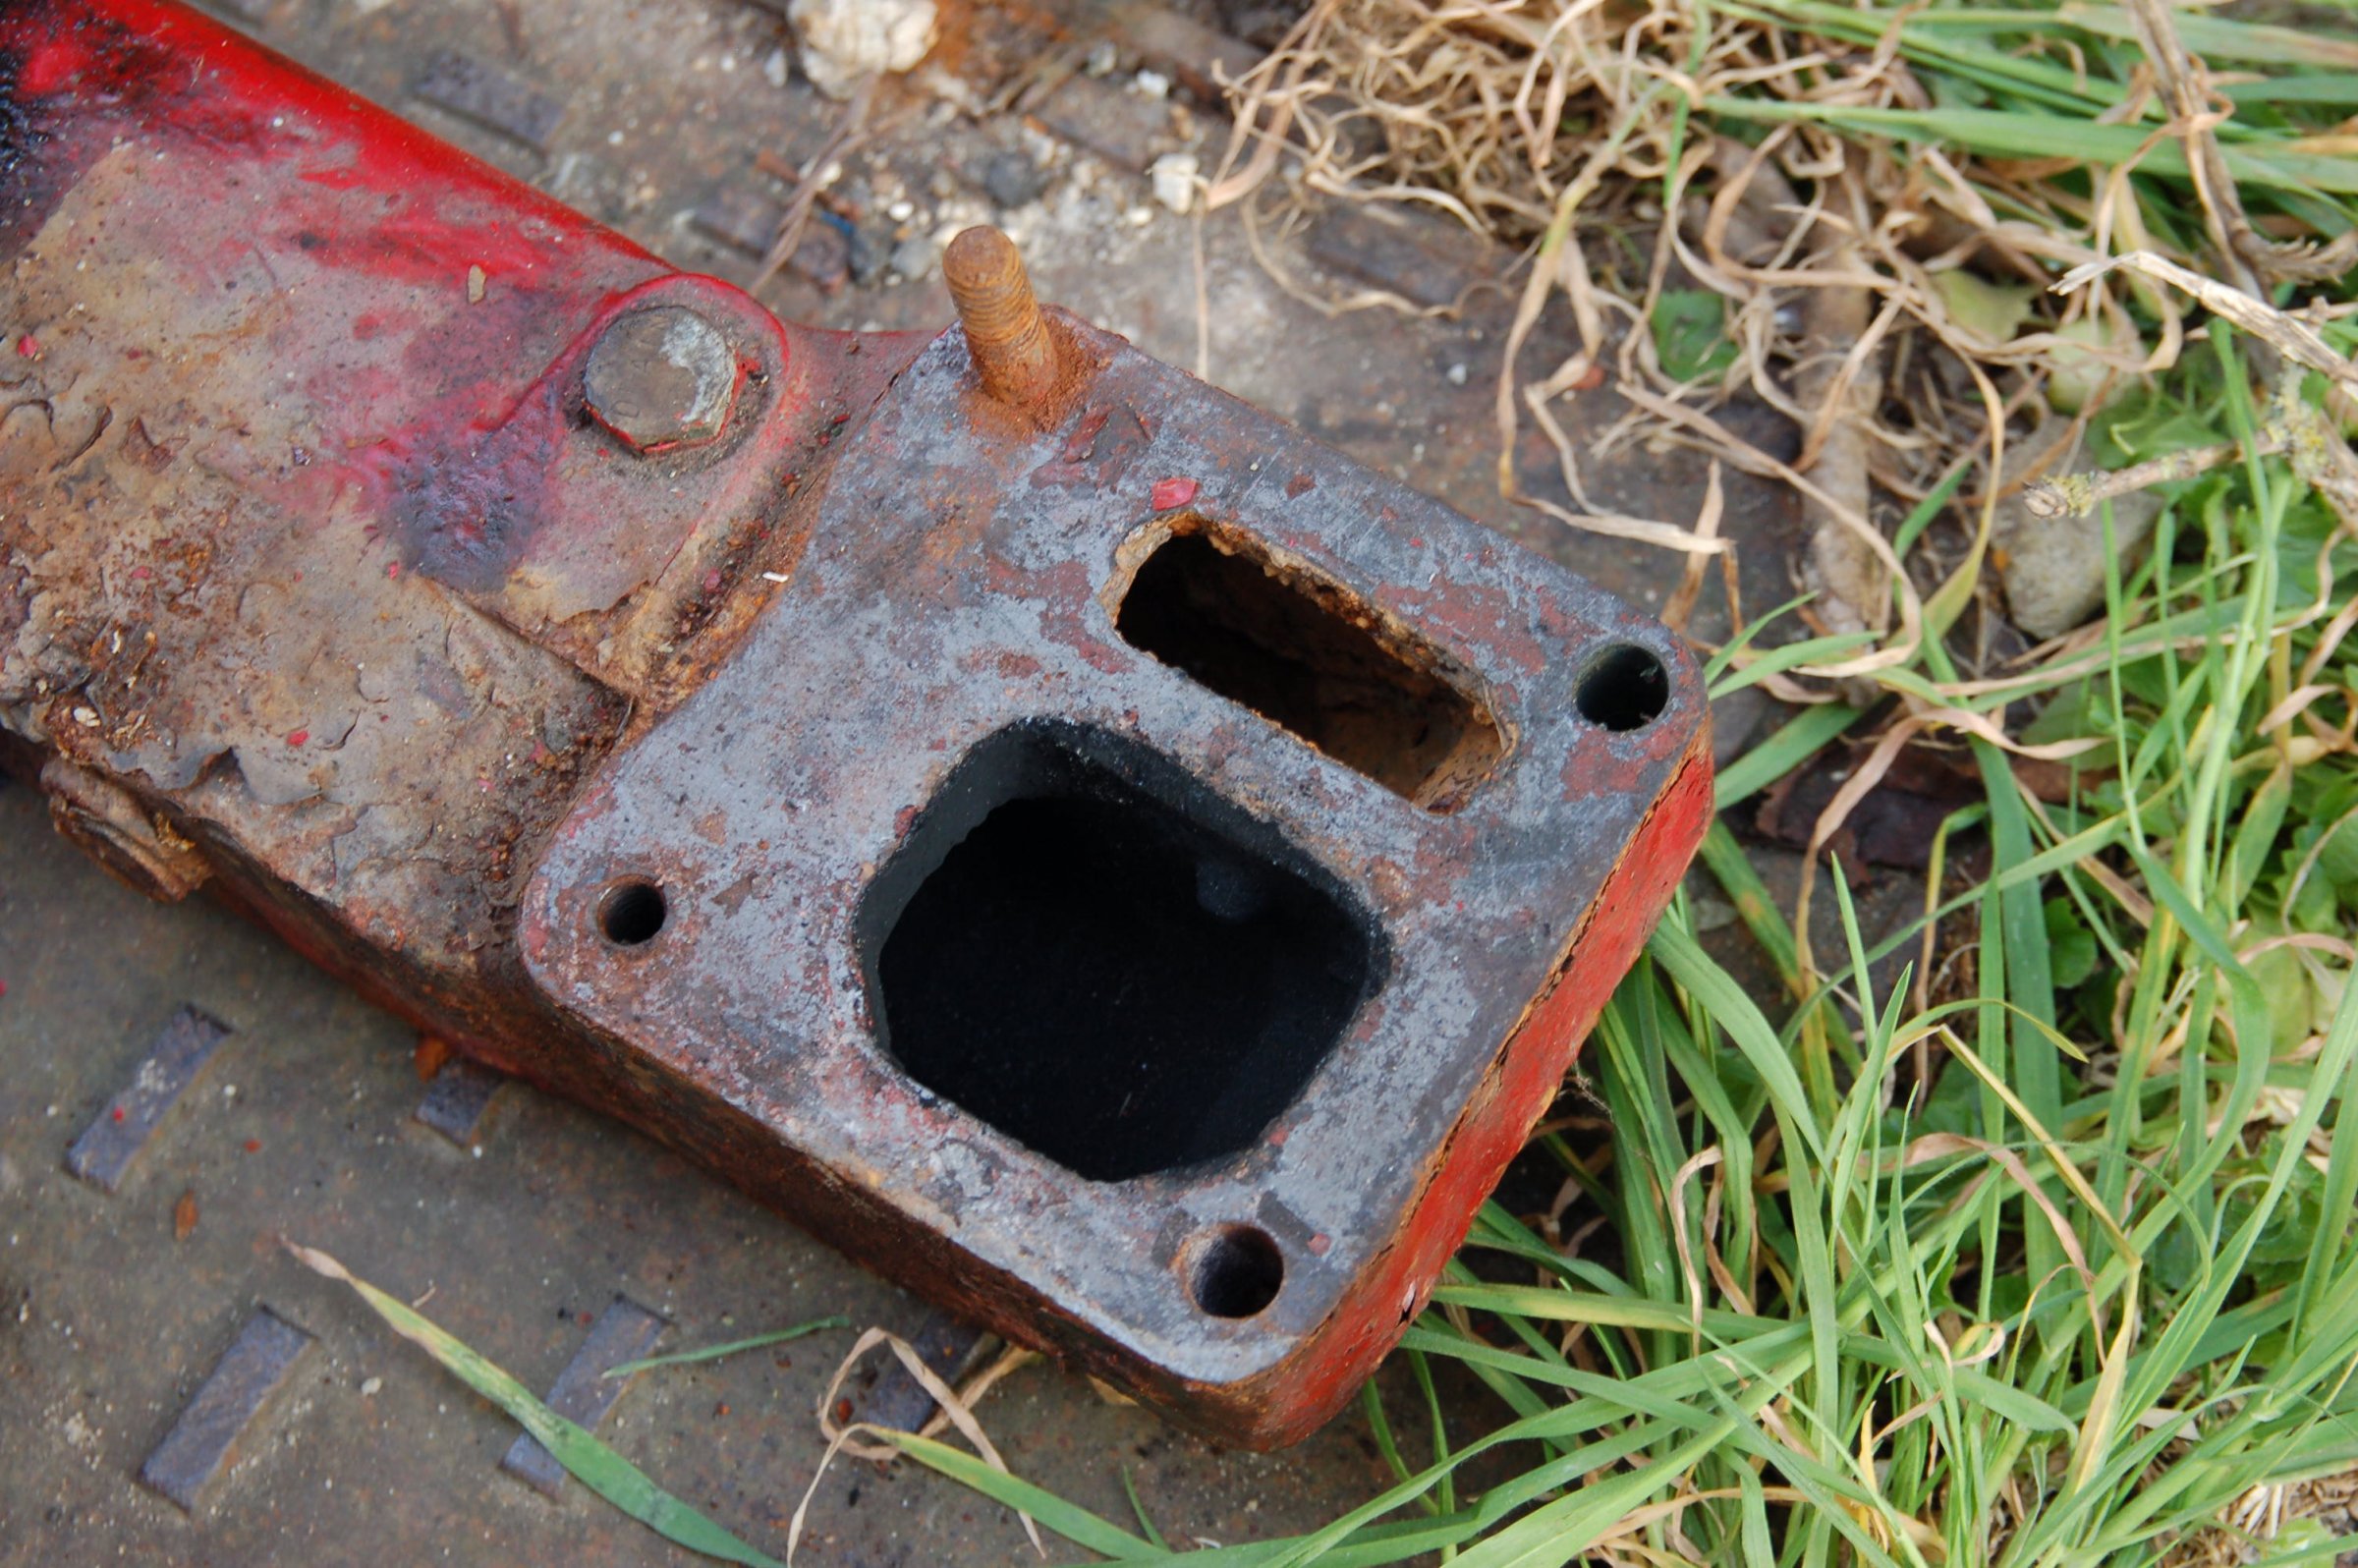
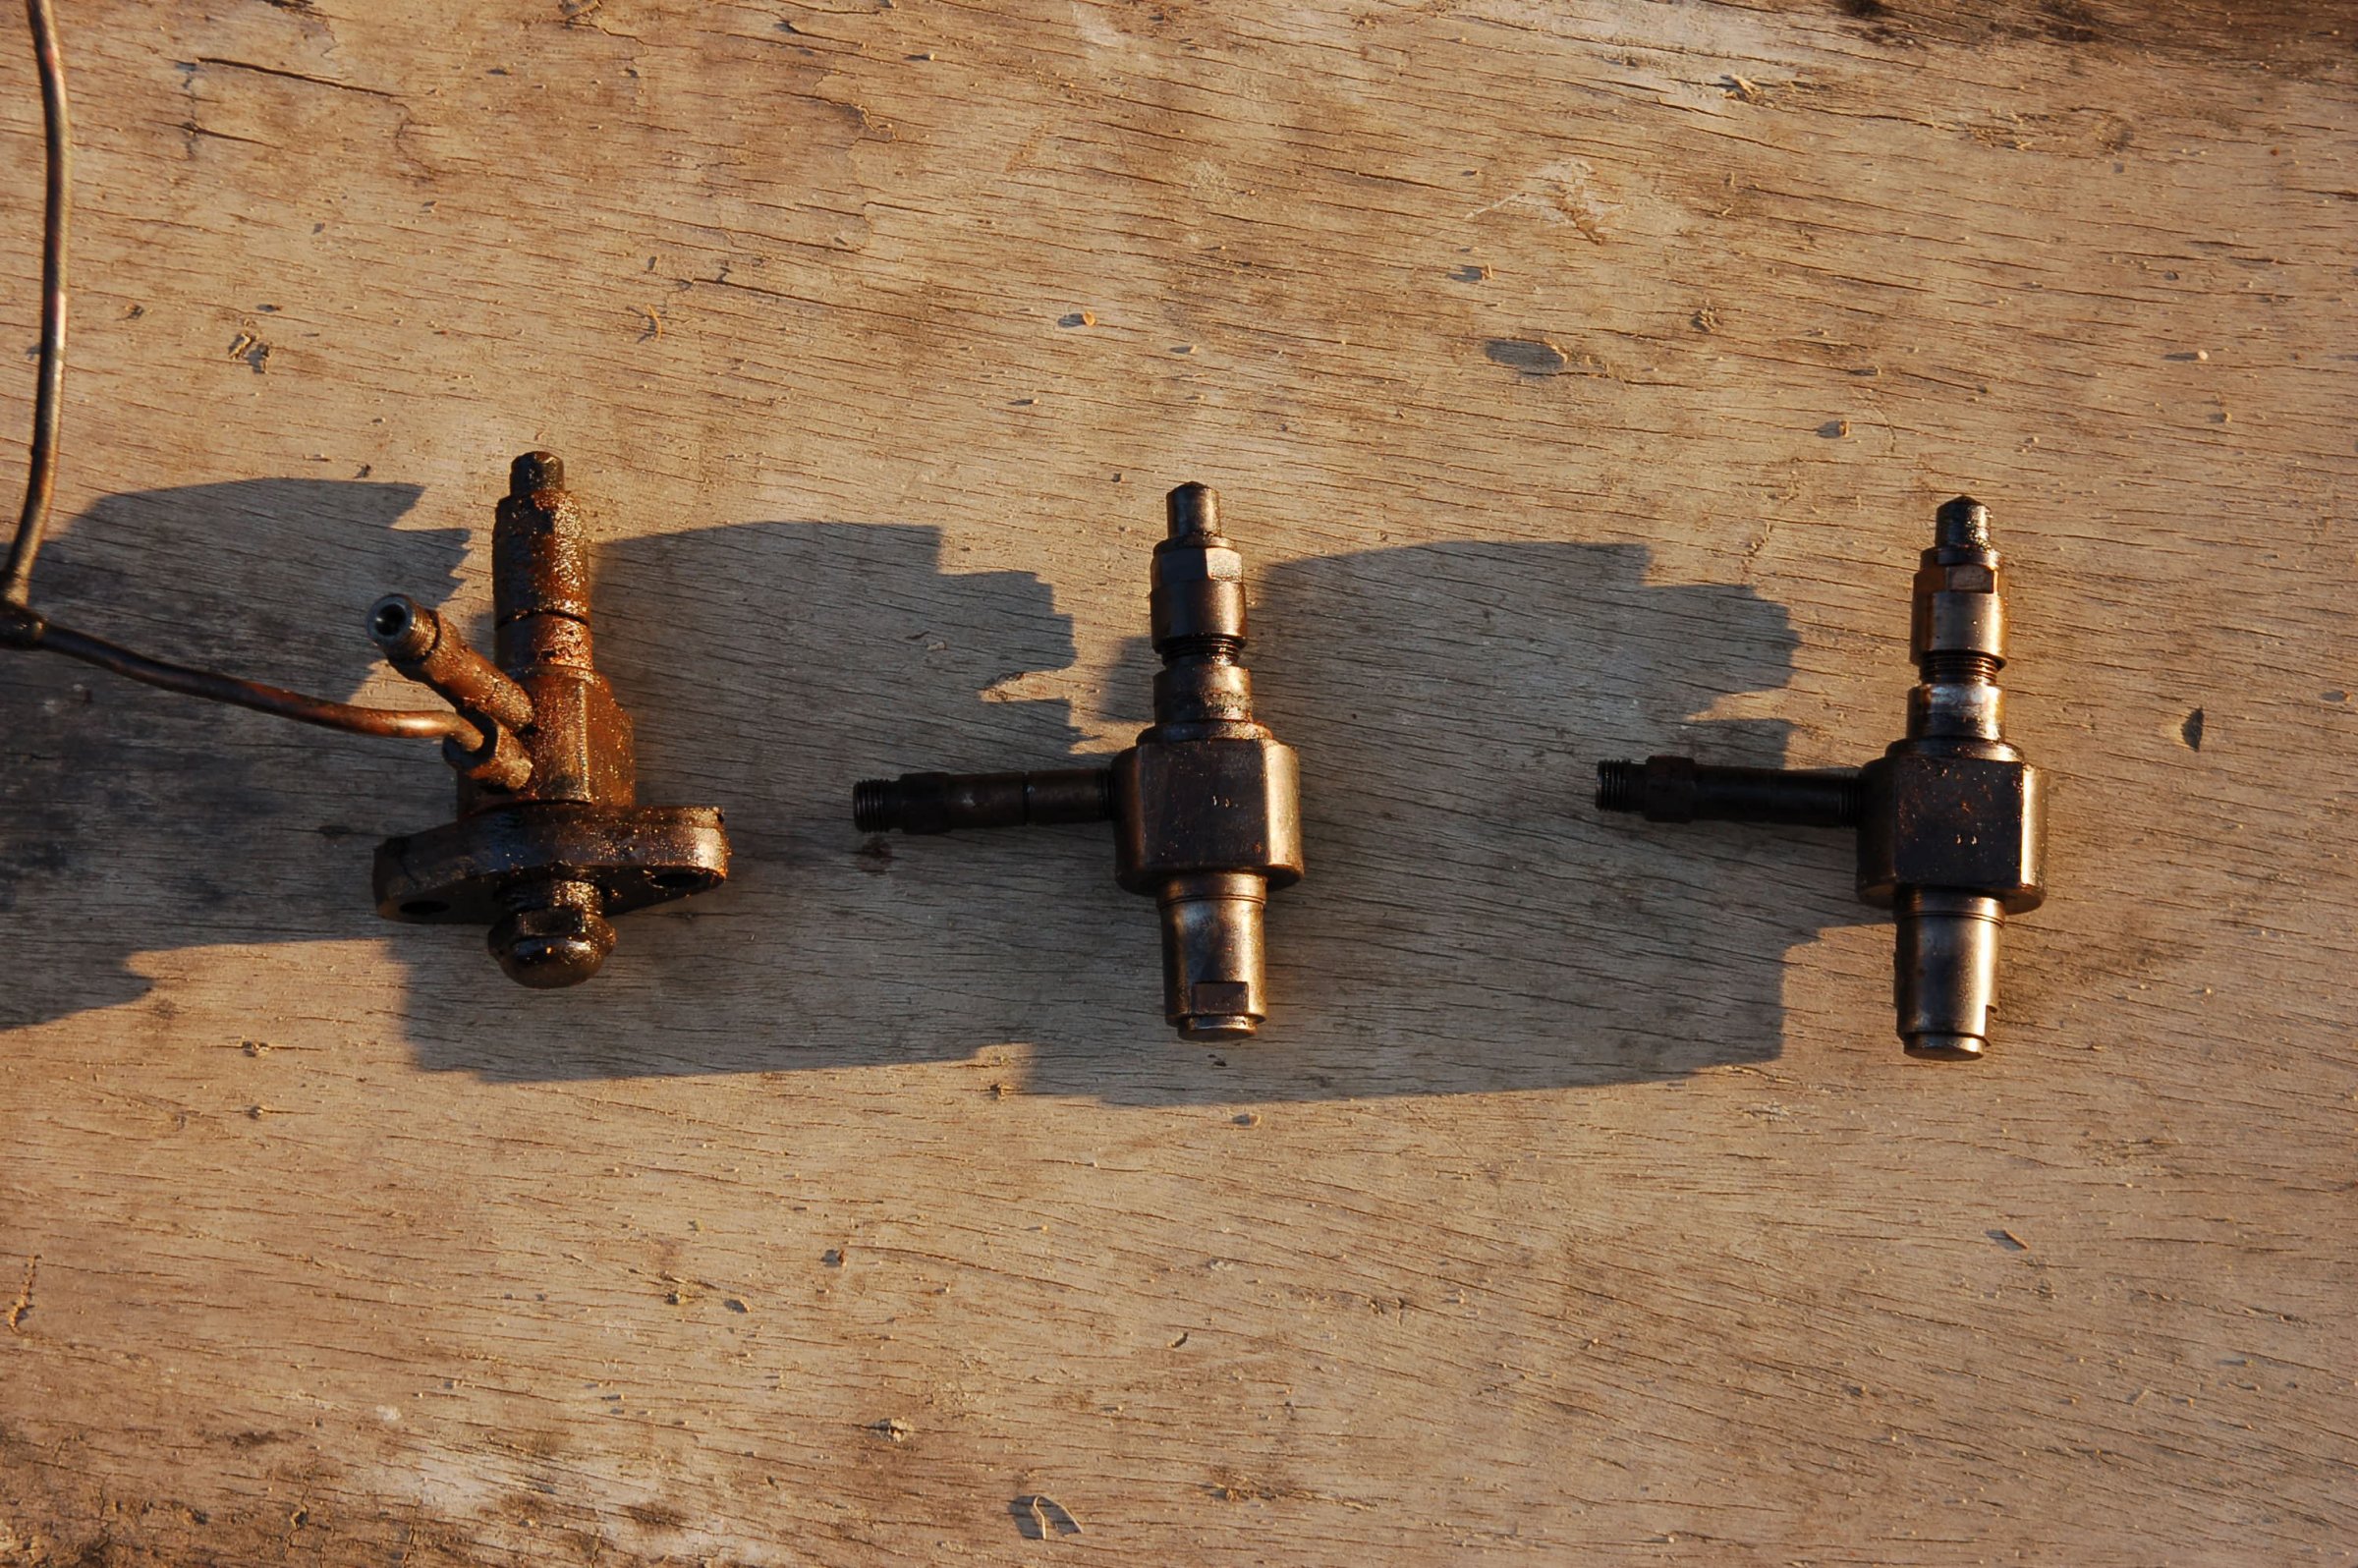
Okay, time for an update on this. We started stripping down engine #2 in earnest yesterday; have got the injectors out and fuel pump off which we will probably just send over to Peter Slater, manifolds etc off, one head off, and one big end opened up. We haven't been able to shift the rocker shafts on the other two heads yet, nor the gudgeon pin on the accessible piston. We will need to come back with superior force - suggestions welcome. This is the state of the bearing surfaces: The crank journal measures up at exactly 0.020" undersize. Same measurement horizontally, vertically and diagonally. I'm guessing it has been ground down to that, fitted with an 0.020" undersize shell and then seen negligible wear since. Again, it looks like we may have got very lucky with this bottom end. What I really don't understand is: if the bearing work was done not many hours ago, why did someone go to all that effort and not give the block a good general cleanup at the same time? There is thick layer of what looks like limescale around the port connecting over to the silencer, and dense mud and rust piled so deep in the block that water doesn't flow out with the drain tap opened, even with substantial poking. Feeling around with a screwdriver it seems inches deep in there. Few more photos of other removed bits - intake manifold: Silencer and exhaust manifold: We were pleased to find this troublesome bit in far better condition than our existing one on engine #1: Injectors - the one on the left is different to the other two, it has a sort of domed nut on the top that prevents the clamp plate being removed. Is this an earlier / later type? State of the nozzles: The removed head: Fuel pump: Piston (the bottom ring broke when it slipped back and hit the cylinder rim):
-
Interesting - ours looks exactly like that so I guess it was made from these plans. We can confirm it's a good design!