Doodlebug
-
Posts
1,320 -
Joined
-
Last visited
Content Type
Profiles
Forums
Events
Gallery
Blogs
Store
Everything posted by Doodlebug
-

Does my thermostat engine circuit need a restrictor?
Doodlebug replied to Doodlebug's topic in Boat Equipment
I didn’t specifically ask because I couldn’t remember the exact setup. The calorifier is 15mm tube which I don’t think is enough for it to be included in the bypass circuit. Although again a restrictor pipe would help ensure that the calorifier is the favoured route. The thermostat does not shut off the bypass - it simply opens an additional 1” bsp pipe. However if this is going straight down to a 15mm pipe that doesn’t seem ideal? -
Sorry for the weird title. Thanks to some helpful pointers earlier for my old engine I am now the owner of a thermostatic housing to direct hot water away from my engine and towards the calorifier. However I am not sure whether I need something to restrict the flow back into the engine. Let me try and explain When cold - the engine thermostat will be closed and water will exit the engine and run directly through the pump intake and straight back into the engine with no restriction on the flow. When hot the thermostat will open and allow water towards the calorifier and skin tank. HOWEVER there is nothing stopping water flowing through the original circuit and back into the engine. I estimate most of the water will flow back into the engine. After all - it can either flow direct back into the engine unrestricted or push through the thermostat and round the calorifier coil and through a skin tank and back to the pump. Surely I need just a bit of resistance in the original engine bypass circuit? Some sort of fitting that increases the pressure build up behind so that when the thermostat opens it will prefer the longer route. Does any of that make sense? Or am I over complicating something very simple? Many thanks in advance
-
Just been to redshaws and they have sorted me out with a thermostat to fit 😊 thanks for all the help.
-
C goes directly back into the engine. So at the moment the bypass valve is either on or off. As soon as the engine is up to temperature and I close the valve the smoke from the exhaust turns white showing that it is not fully heated. I am getting better at not fully closing the valve to try and get a balance but that is obviously dodgy if I make a mistake and the water boils. The pump is never prevented from pumping - it either pumps back into itself or into the calorifier and then the skin tank. many thanks.
-
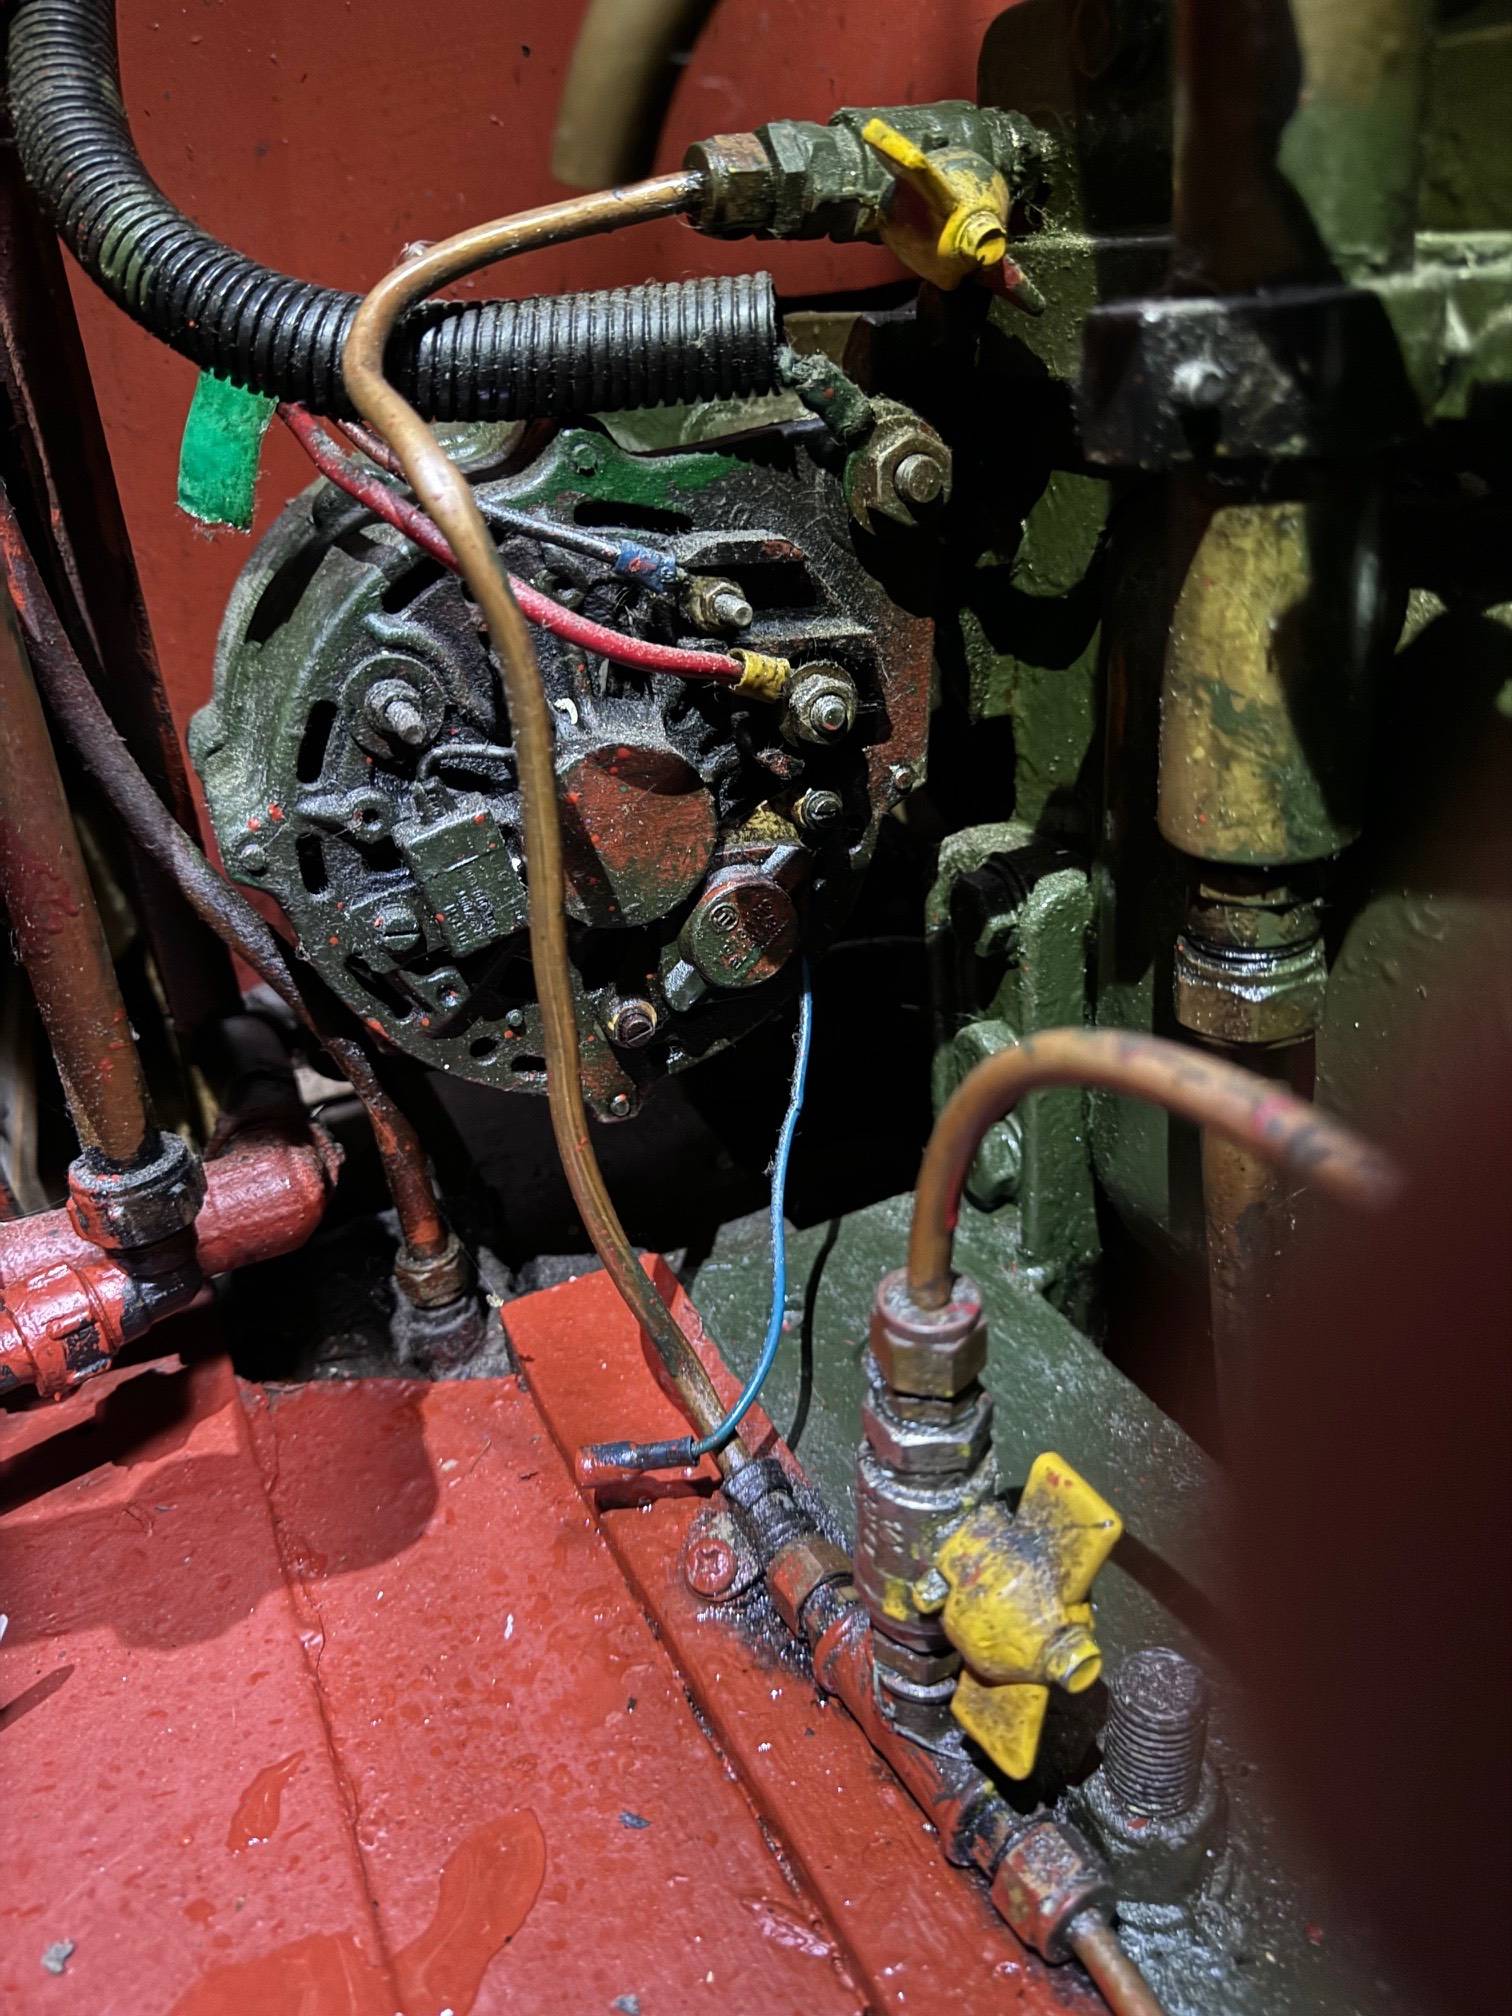
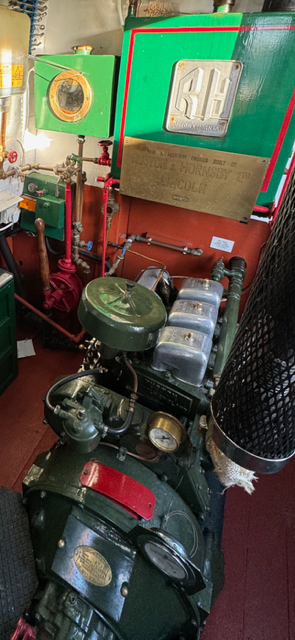
Hi, I have a Ruston Hornsby 3 cylinder engine and the thermostat does not exist and so when starting there is a bypass valve that has to be opened to get it up to temp. Once up to temp (normally whilst cruising along) I have to run inside and close the bypass where the engine then runs cold until the calorifier is up to temperature. None of that seems ideal. I have been trying to find a thermostat that I can plumb in to the 22mm pipe or a BSP fitting. Does anyone know of anything suitable? On the attached picture A is the outlet from the engine. B goes towards the calorifier and C goes straight back into the engine. Many thanks.

-
What are they called? They look like giant wood pellets
-
True - but I didn’t want to risk having too much heat and not enough for the oven. Also it would have been 1200 pound for a new one!
-
Interesting. So what do you think the impact on price is for this? I know the cost per Kg or coal but not so much with logs.
-
I’ve been searching and am surprised not to find anything on this topic. Has anyone done a proper cost analysis of coal vs wood? It strikes me that coal is significantly cheaper but that seems to be counter intuitive. For instance if I burn 5kg of coal a day and let’s say £20 a bag to make the numbers nice. That’s £4 a day. Meanwhile a bag of logs seems to be around £8 and probably won’t last more than a day and a half if that’s the only fuel source. Does anyone have any thoughts better than my rough calculations in my head? I’d much prefer to only use wood but I imagine it doesn’t work cost wise. Any cheap sources of kiln dried logs? Thanks!
-
An update for everyone. It works! Although it’s not a job I will do again in a hurry. It was a nightmare to take apart - a fair few bolts snapped and the angle grinder was needed a fair bit to cut through old bolts and washers. Using a stud remover I was able to take most of them out and I have moved onto the boat and reassembled. No issues with listing - it’s only 400kg so not a crazy amount. The back boiler in the one I bought was leaking - but it is integral to the Rayburn so I have cut a hole in it and inserted a much smaller back boiler which is more suited to boat use anyway. Overall I am very pleased (and very worn out!) I replaced the old insulation with rockwool and have put new fire tiles on everything. Thanks again for the help.
-
Okay seeking thoughts again: The engine is resting in a kind of cradle that seems to sit on some wooden joists. Not the best for bolting alternators to I suspect. I have however found I could get a 10in timing belt pulley and a 1.5in timing belt pulley made up for the alternator. Does anyone know why the need for an alternator to slip? A timing belt would allow for a much tighter and smaller pulley in the alternator and thus could solve my problem. But why do you never see timing belts used in this way? many thanks.
-
Unfortunately the alternator has been painted but is only 40a and I want to avoid buying a generator for this use. The engine should be able to deliver the power and with a trad stern using a generator would be a pain. It looks like they might have discontinued these as they are all out of stock 😔
-
I agree that running an engine for hot water and trickle charging is not suited but putting a 120a load on it to charge lithiums is going to be good load on the engine - which after all was built for generating power? This could work - I will investigate how the engine is mounted because if I can bolt to the floor it would be ideal! I wonder how I would tension the pulley though.
-
I believe the red arrow but does it make a difference? it’s quite hectic behind. Here is another photo and pipe might need moving but that’s not impossible. Why what were you thinking? pulleys on a pillow block might might work?
-
I don’t have very good pictures on my phone and not with the boat right now. You can just make out the oil cooler and the water pump in the picture. It is off a generator off of a ship so would have been the industrial type I believe.
-
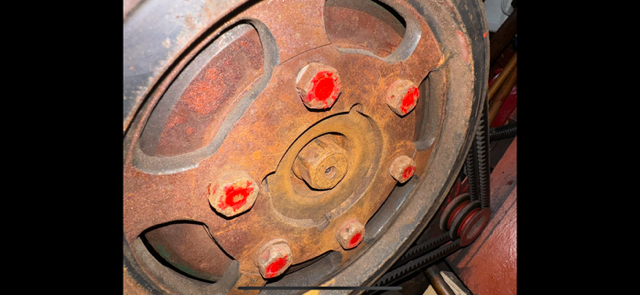
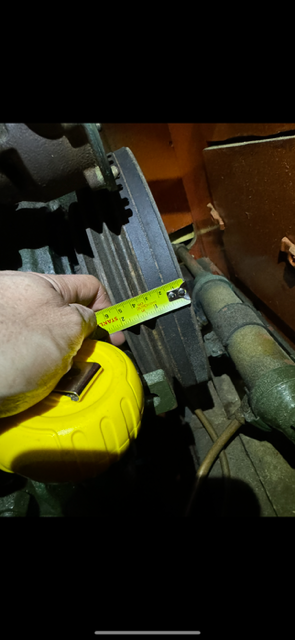
I think that the flywheel is about a 5mm gap between the case and the flywheel so not enough space for this to be fitted. I guess it could be totally taken out and cut but thats a major job. What do you all think of the gearbox (or use of a spur gear set up or chain and sprocket?) Thanks
-
Unfortunately the flywheel is totally enclosed! Please see the below picture
-
It’s a Ruston Hornsby 35hp 3ydz I measured the speeds yesterday - I know it can go faster but not with the set up I’ve got
-
Thanks for all the thoughts - I have purchased a second hand rayburn one and will report back on how i get on taking it apart and fitting it back together again!!
-
Hi all, I am hoping someone who is better at problem solving than me might have some ideas. The engine in the boat has a lowest tickover speed of 200rpm, a generally acceptable speed of 300-500rpm and then its absolute top speed is 1030rpm. The problem is that the alternator that came with it is a 10inch to 2.5inch pulley system… This means at tickover it runs at 800rpm and at full whack it runs at 4060rpm. This is clearly no good for generating usable power. The 120a alternator I would like needs at least 5000rpm to give its full output. The 10 inch pulley can not be increased in size because it hits the water pump and the oil cooler. I can change the alternator to 2in but that only marginally helps. Does anyone know of a system that could help? Ideas so far include using a secondary pulley to increase the speed (but how to mount this to the engine). I could use a planetary gearbox on the alternator (has this ever been done). I could use a marine gearbox in reverse to speed up the rpm and then use a pulley as normal. Does anyone have any other ideas that could work?! Many thanks
-
In the summer the oven would just become storage for pots and pans! I’m going to look into whether it’s possible to get someone to help me reassemble one. Does anyone know if the overall heat output will be too much for a boat? I note that some are rated well over 20kw! So is there no version of an aga that is smaller but not so small as to be one of the mini boatman cabin range style stoves? thanks!
-
Hi everyone - long time no speak. Does anyone know of a solid fuel range which is able to fit through the doors of a narrowboat - I.e one which can be taken the bits and reassembled? the doors are only 90x56 so no chance of it coming through whole without a hole cutting in the roof. I’d prefer a proper one to a mini range but I’d be interested in the discussion nonetheless. many thanks for any pointers. On a previous thread someone mentions heritage stoves but they don’t seem to be flat packed but come whole on a pallet. cheers.
-
My Grandad sadly passed away yesterday. He was the person who got me into boating and he loved nothing more than spending time on the canals. Due to ill health he had to give up boating in his final years and wanted nothing more than to get back on the canal in some form or another. I don’t think I’m going to have much luck with this but I thought it would be a fitting send off if his coffin could travel a short distance before being taken to the crematorium. He will be cremated near Stockton Locks, near Southam, Warwickshire. Does anyone know any way I might be able to organise this? My best thought was that a working boat might be able to help us out as it would need a flat area for the coffin to go on. But I don’t know their details to be able to contact those in the area. Alternatively an enthusiast might have a boat that would be suitable. I’m not sure anyone would want to get involved but thought I’ve got to try. Apologies that I don’t know much about how this could work - I just wanted to reach out to see if anyone had any ideas. Many thanks in advance.
-
Thanks for the suggestions. I’ve taken out the fridge and put it directly next to the batteries and held the bare newly stripped wire against the terminals whilst it gets 30a of solar power at 13.5v going in and it still flashes. I’ve left it off for an hour and no luck. Was working fine overnight. Many thanks.
-
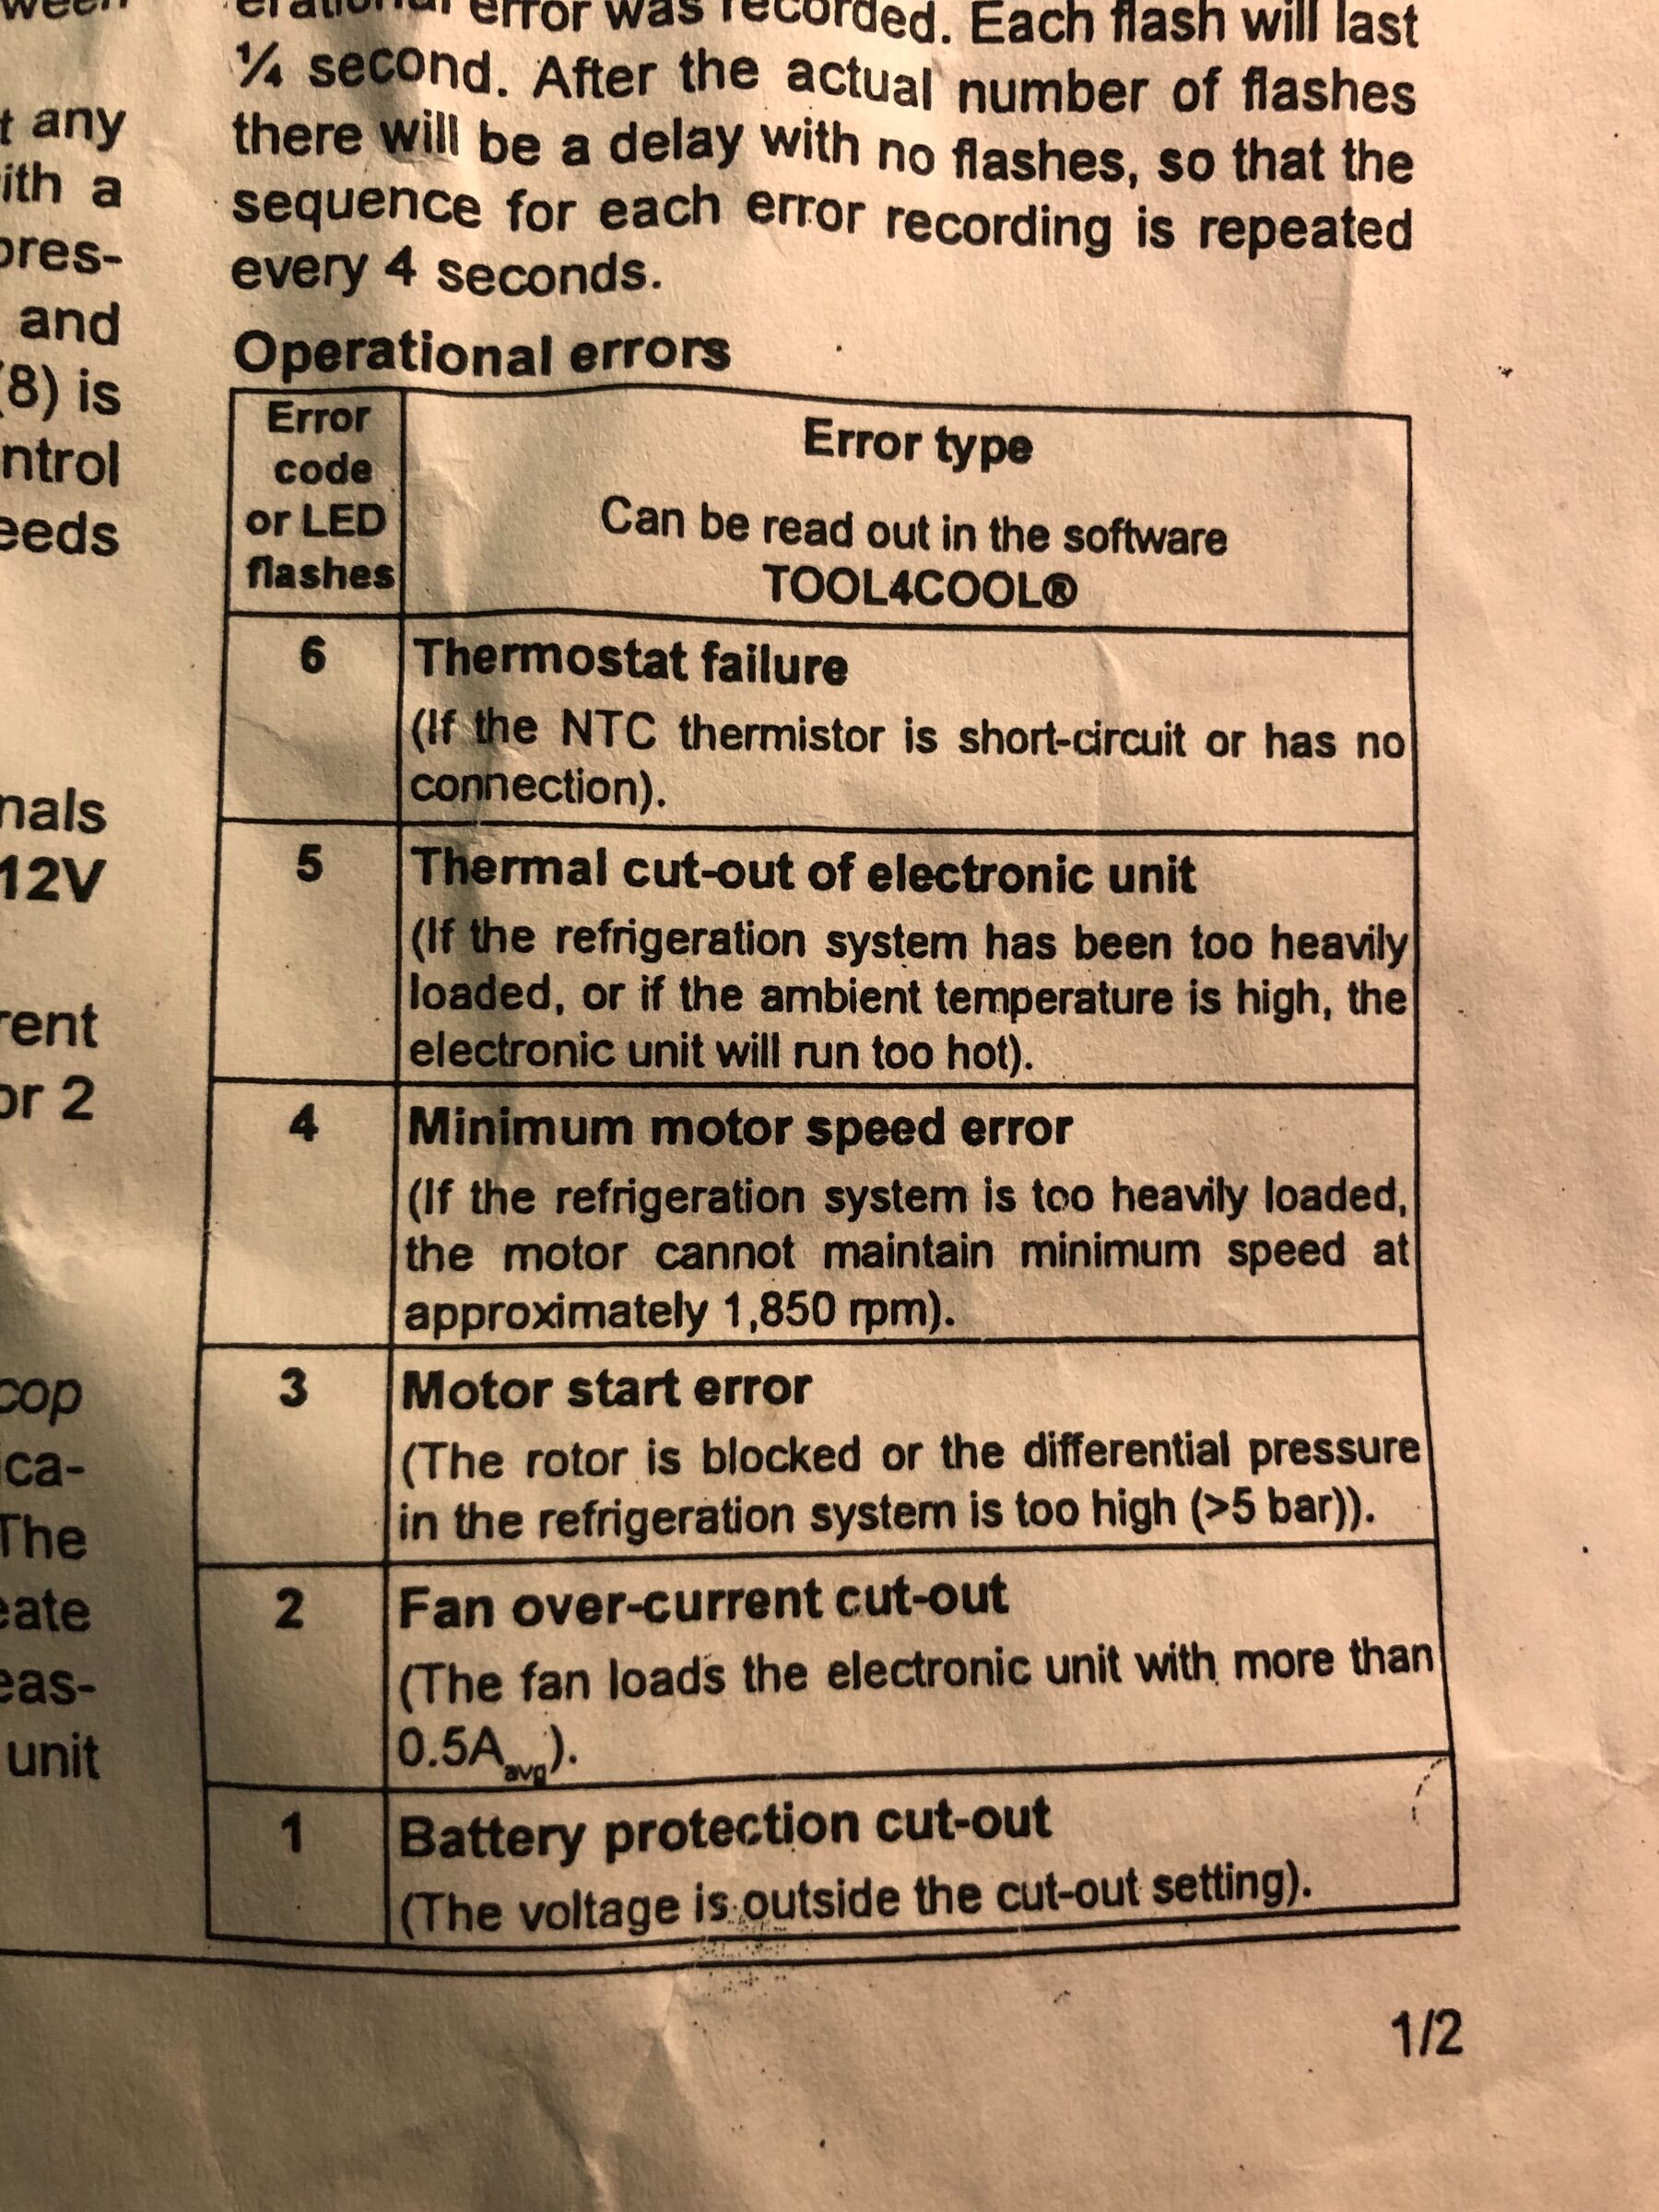
Hi all, long time no see. Been far too busy on other projects. Our 12v inlander fridge is flashing twice which according to the manual means the “fan is over current.” Yet we have no fan installed and there is nothing touching the fan terminal on the back of the fridge. No loose connections either and it’s getting a good voltage to the back. Any ideas? I’ve tried turning it off and on but no luck. many thanks.